How to Add WordPress Favicon to your Site (4 Methods)
Table of Contents
A WordPress Favicon is a tiny but powerful symbol of your site’s identity. This site icon feature helps a WordPress website get recognized in a crowded online market. Leveraging WordPress favicons lets you define your site identity and improve user experience.
But how do you add site icons?
In this guide, we’ll define a WordPress favicon and show you 4 ways to add one to your site. We’ll also give you a few pointers on creating, removing, and sizing your site icon. Read on to grasp this feature and learn its role in brand recognition.
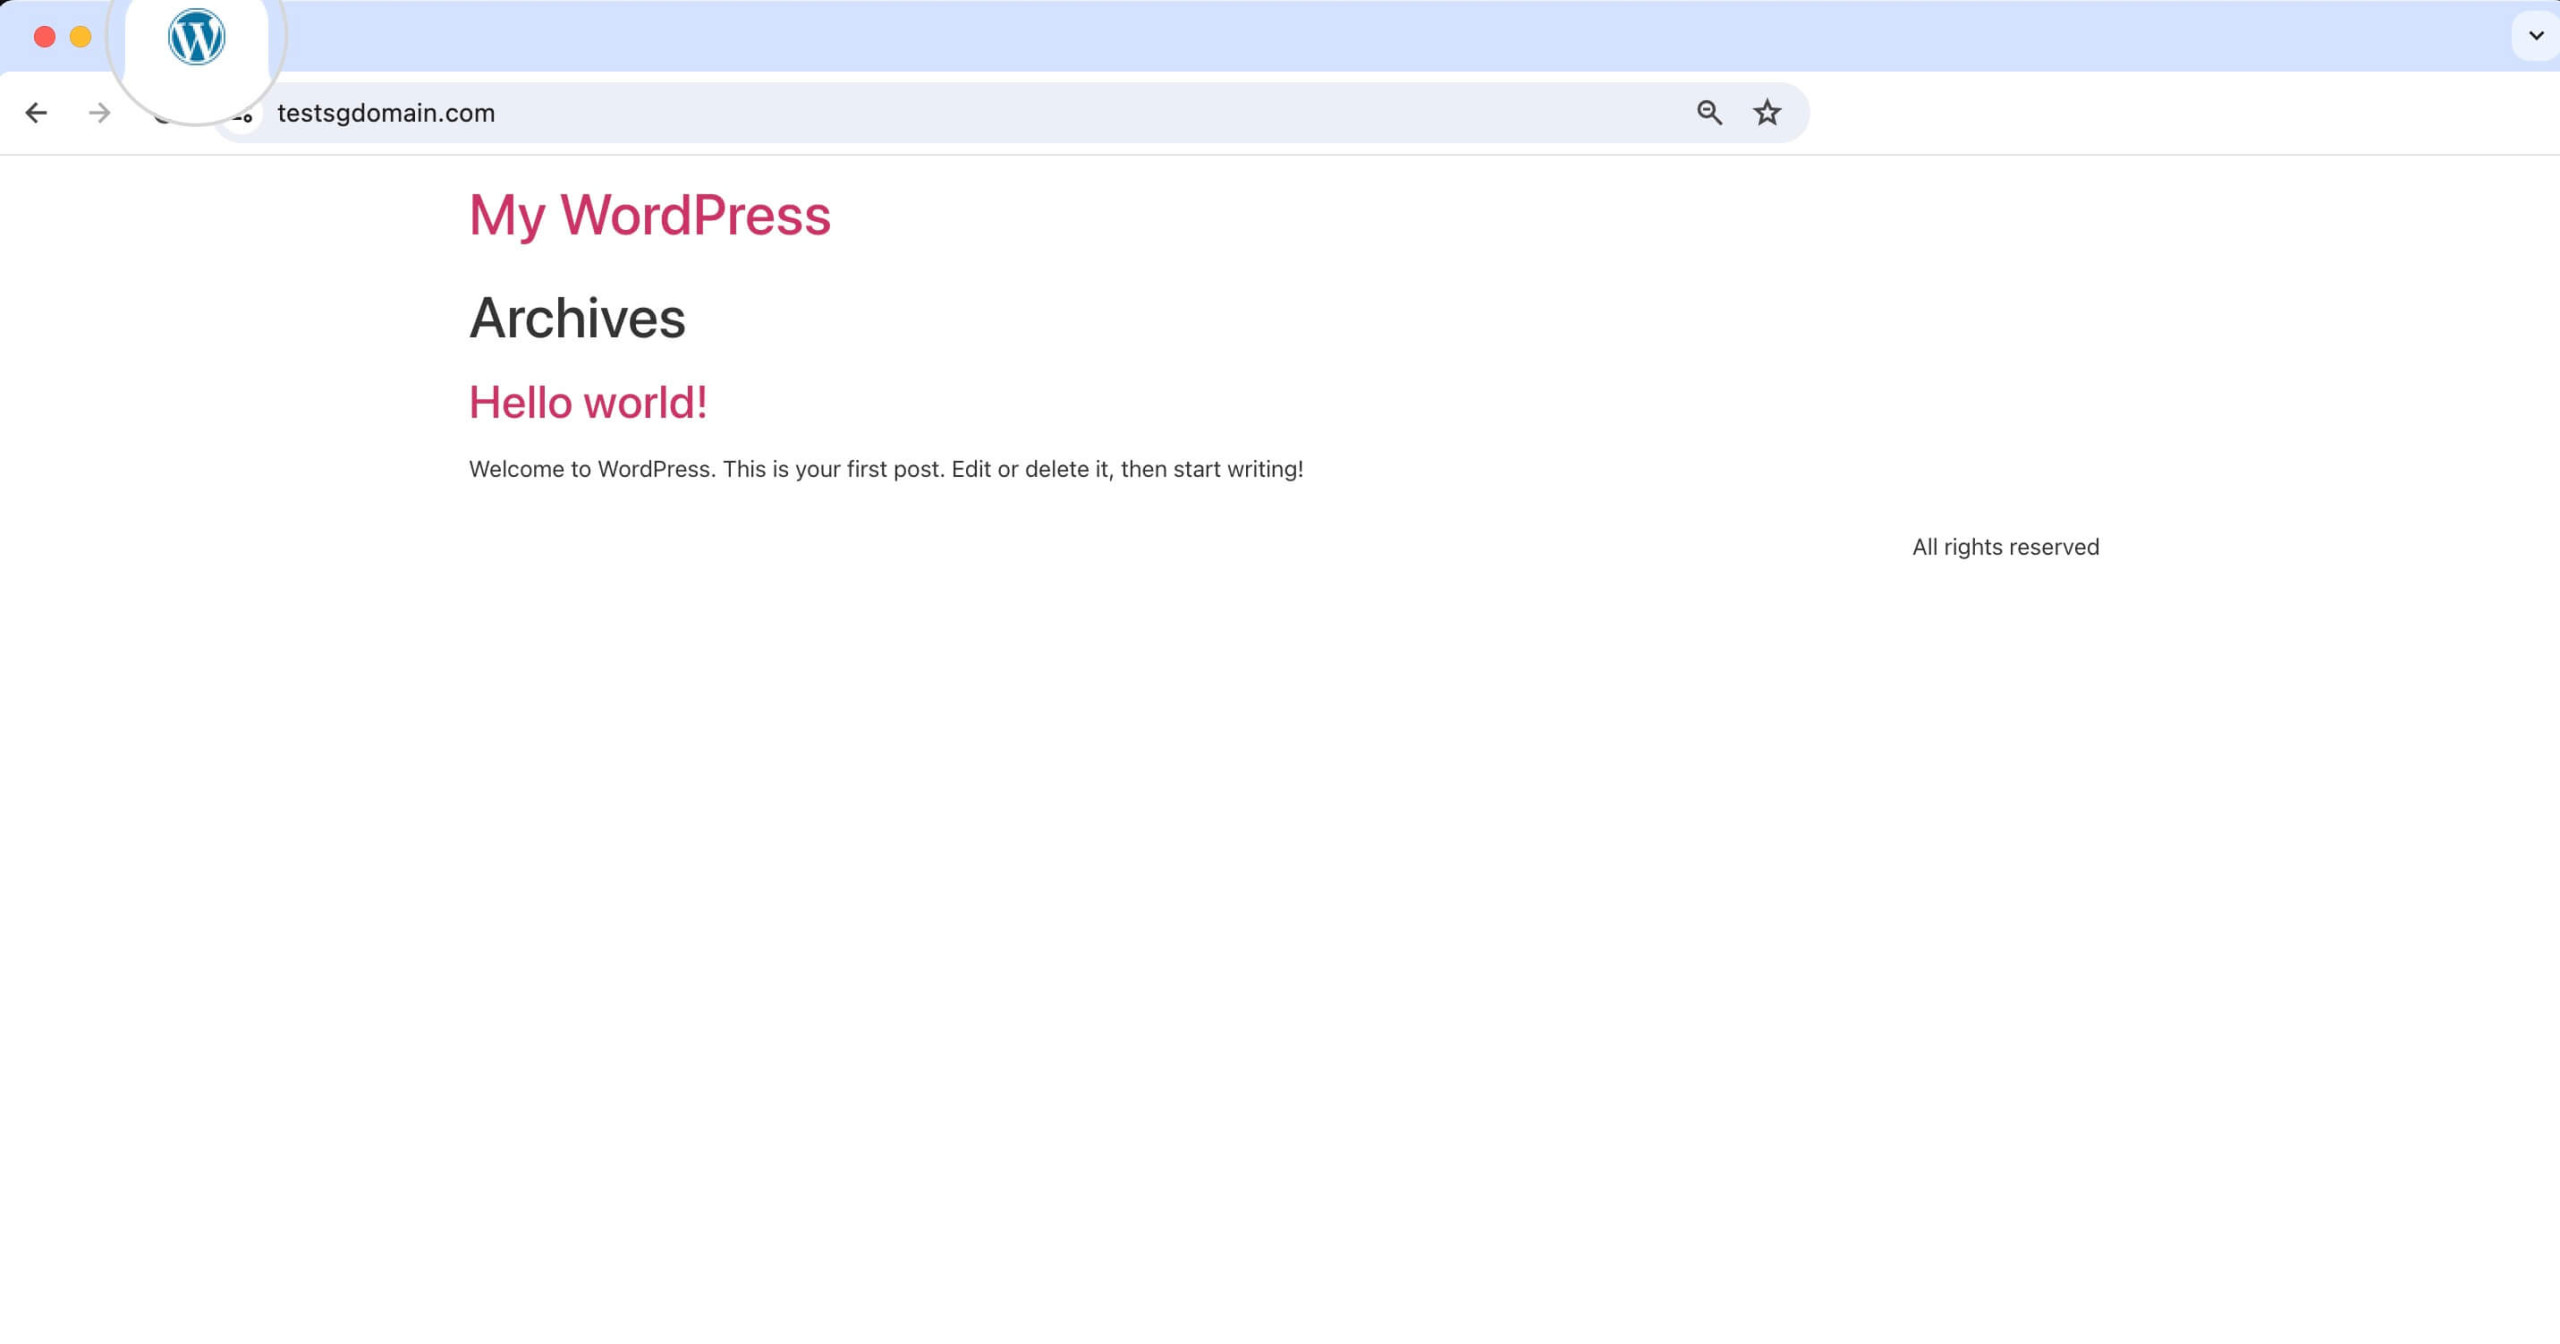
Below is an example of a favicon on a WordPress website.
How to add Favicon in WordPress? (4 ways)
In this section, we’ll show you how to add a WordPress favicon to your site in 4 different methods. You can use whichever suits you, so keep reading to learn more about each method.
1. Add a Favicon Using the WordPress Customizer
Adding a custom favicon, or “Site Icon,” to your WordPress site is simple if your theme settings include the option.
Here’s how you can do it using the WordPress Customizer:
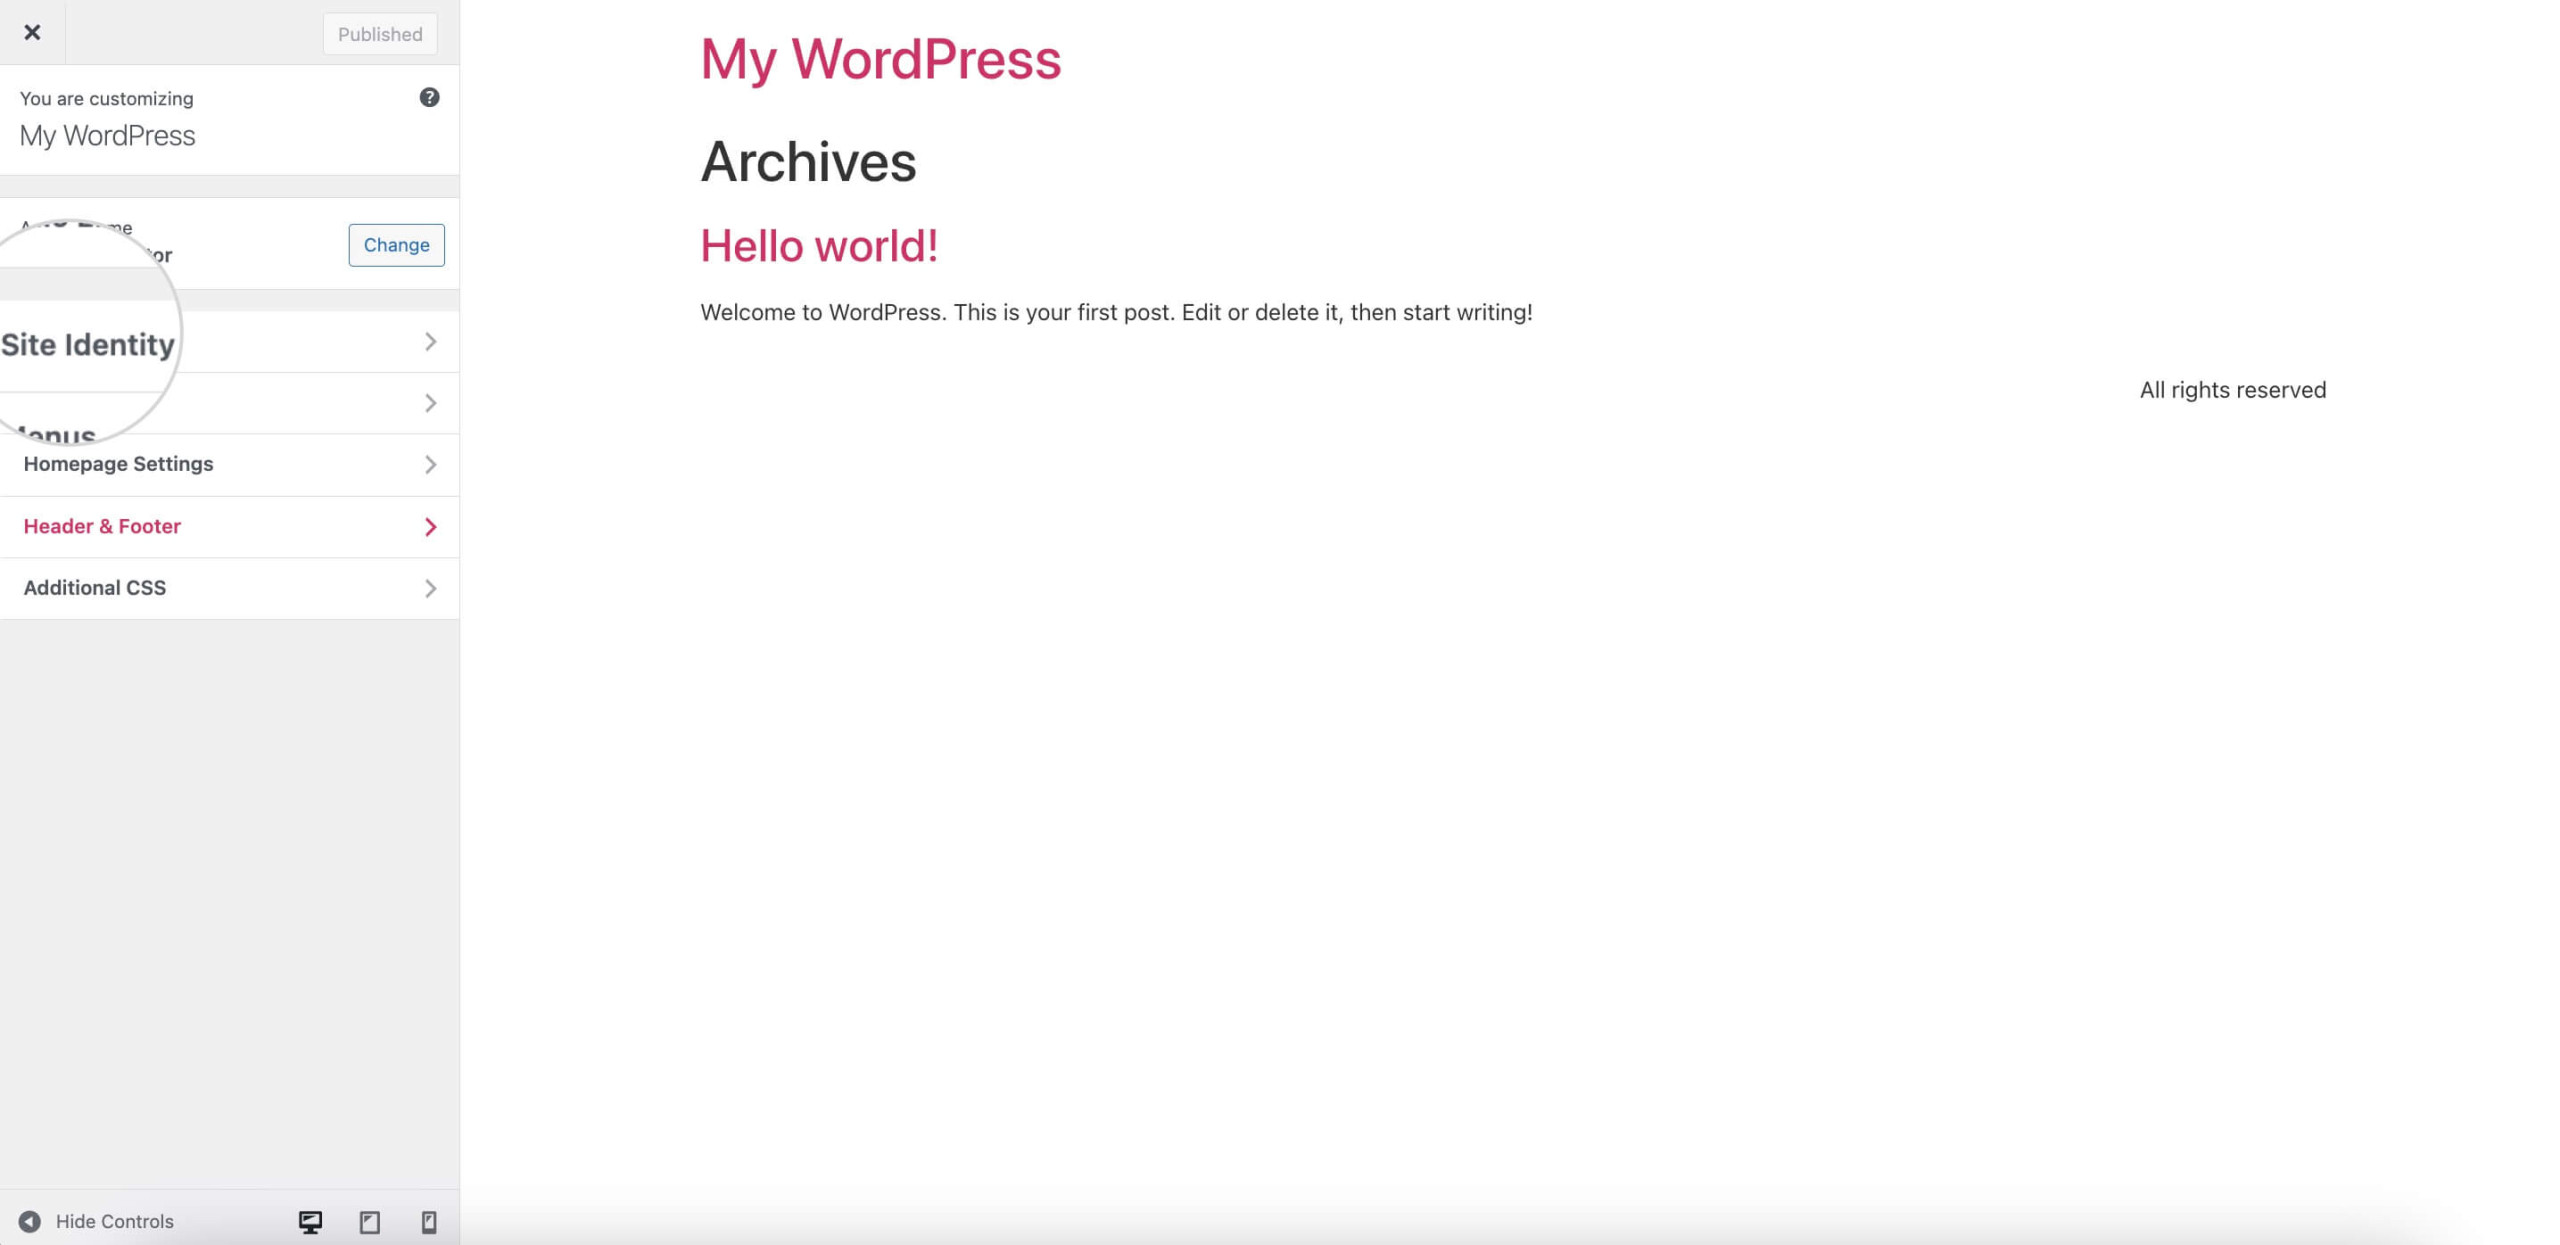
- Log in to your WordPress dashboard.
- Click on Appearance > Customize to open the WordPress Customizer.

- In the Customizer, look for the Site Identity section and click on it.
- Here, click on the Select Site Icon button. This is where you upload your favicon file.
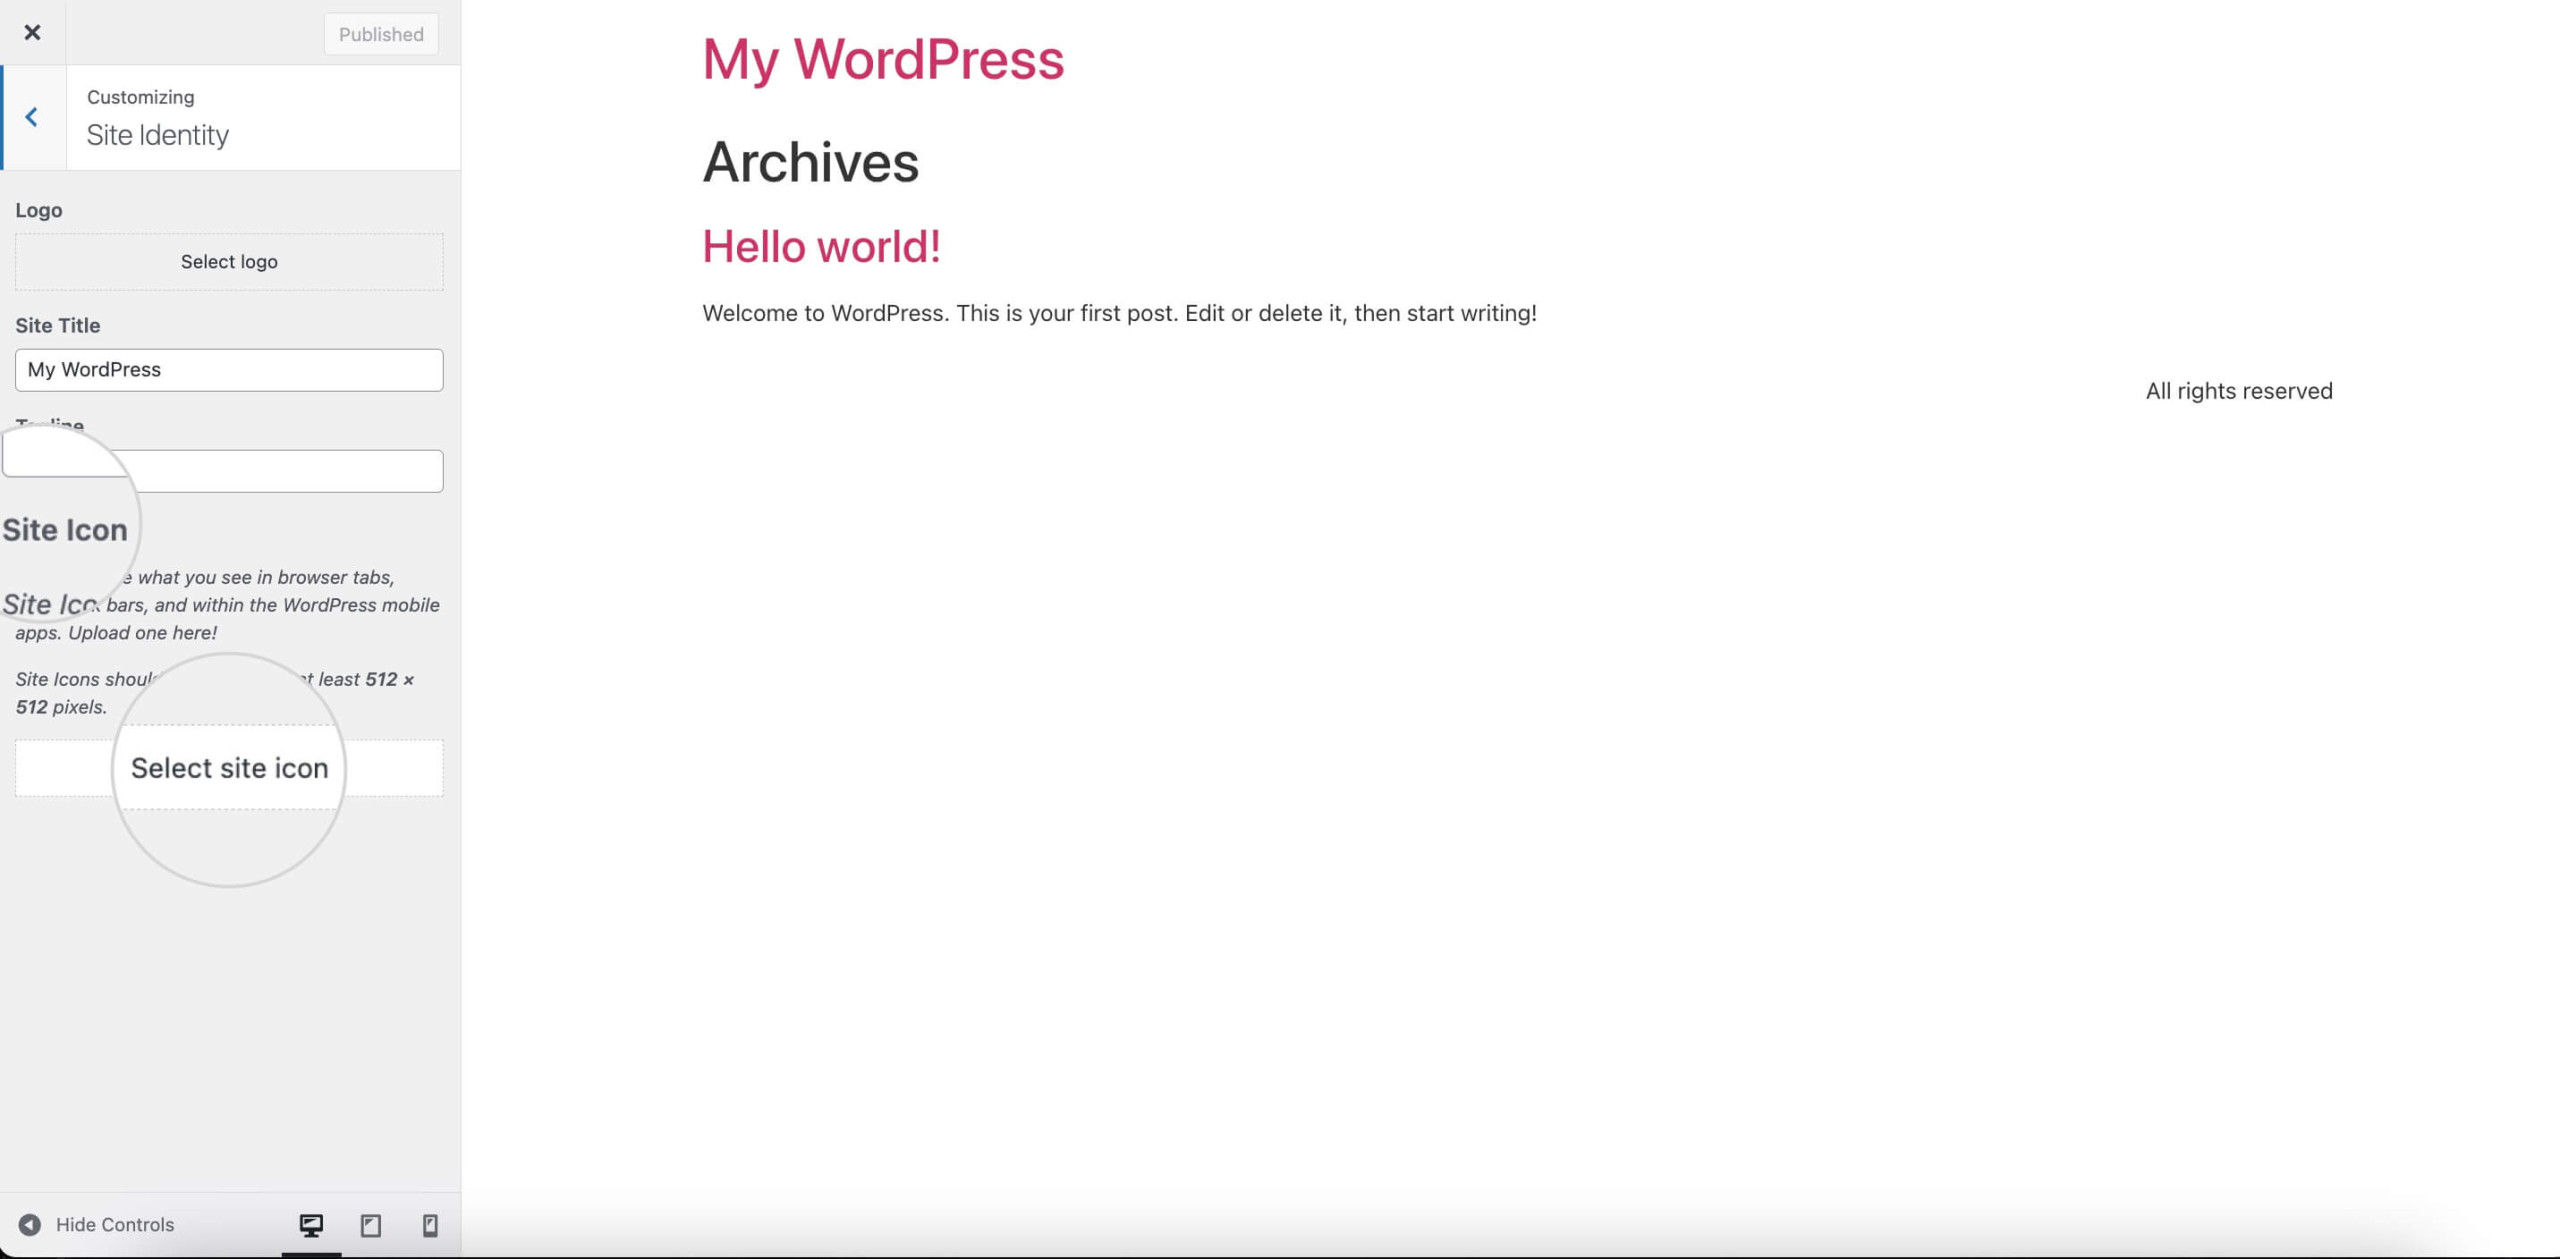
- Click the Select File button to upload your favorite image.
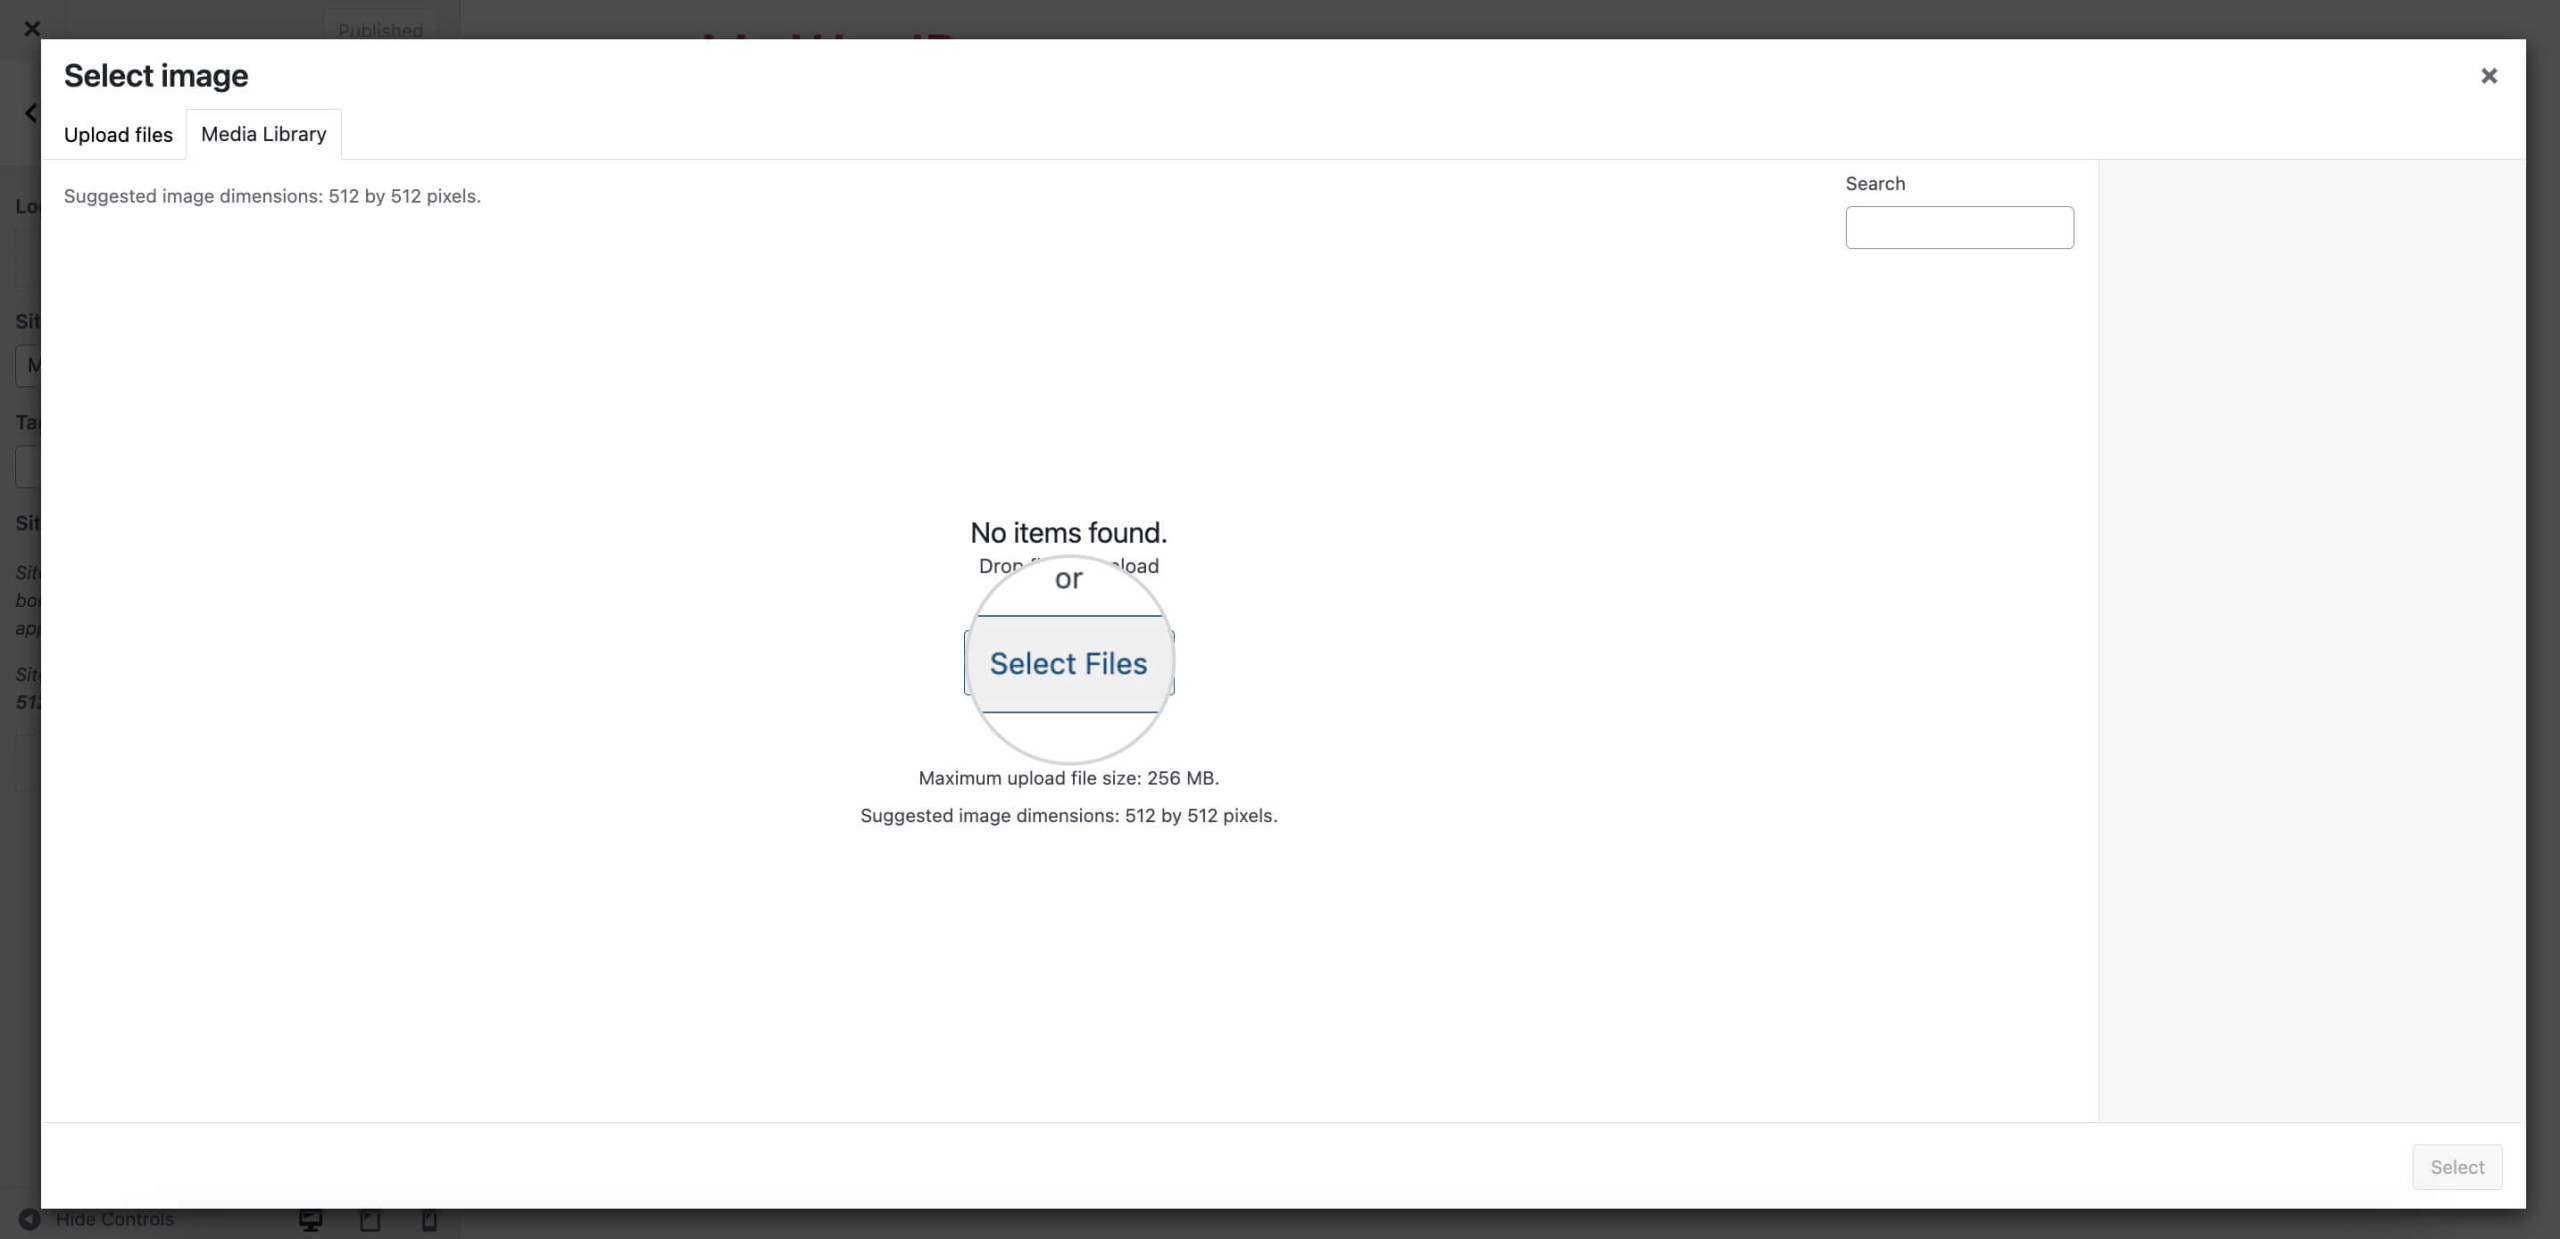
- Or select an existing icon image from the WordPress Media Library. The recommended size for a favicon is 512×512 pixels. WordPress will allow you to crop images if necessary.
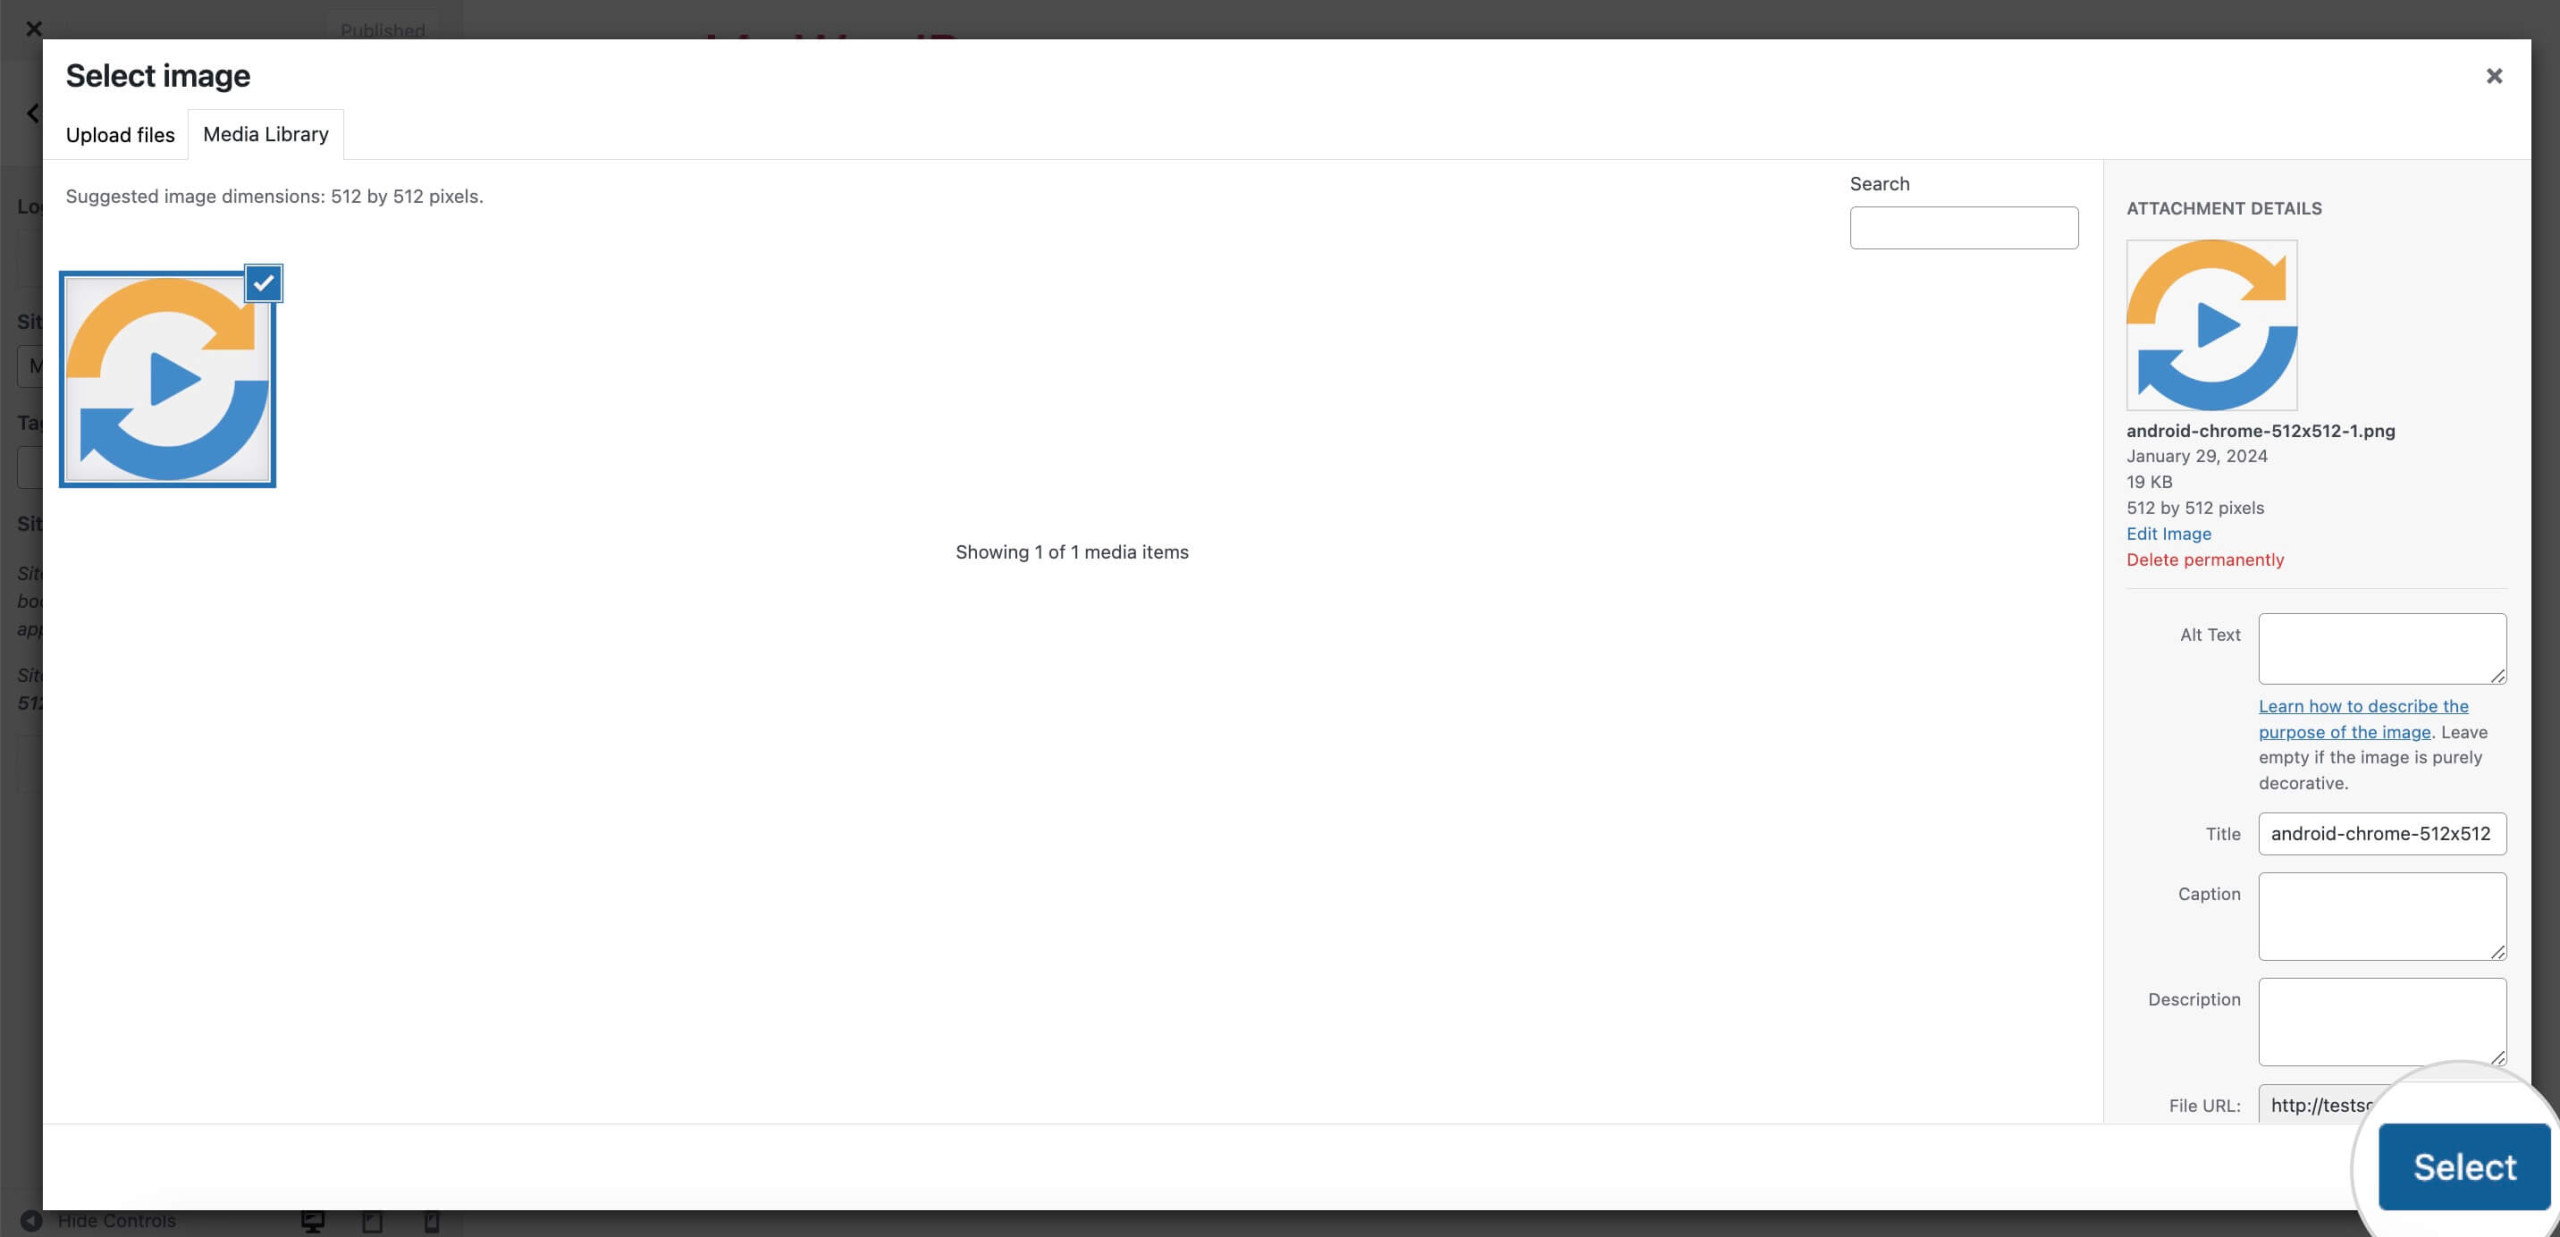
- Once ready, click Publish at the top of the Customizer to save your changes.
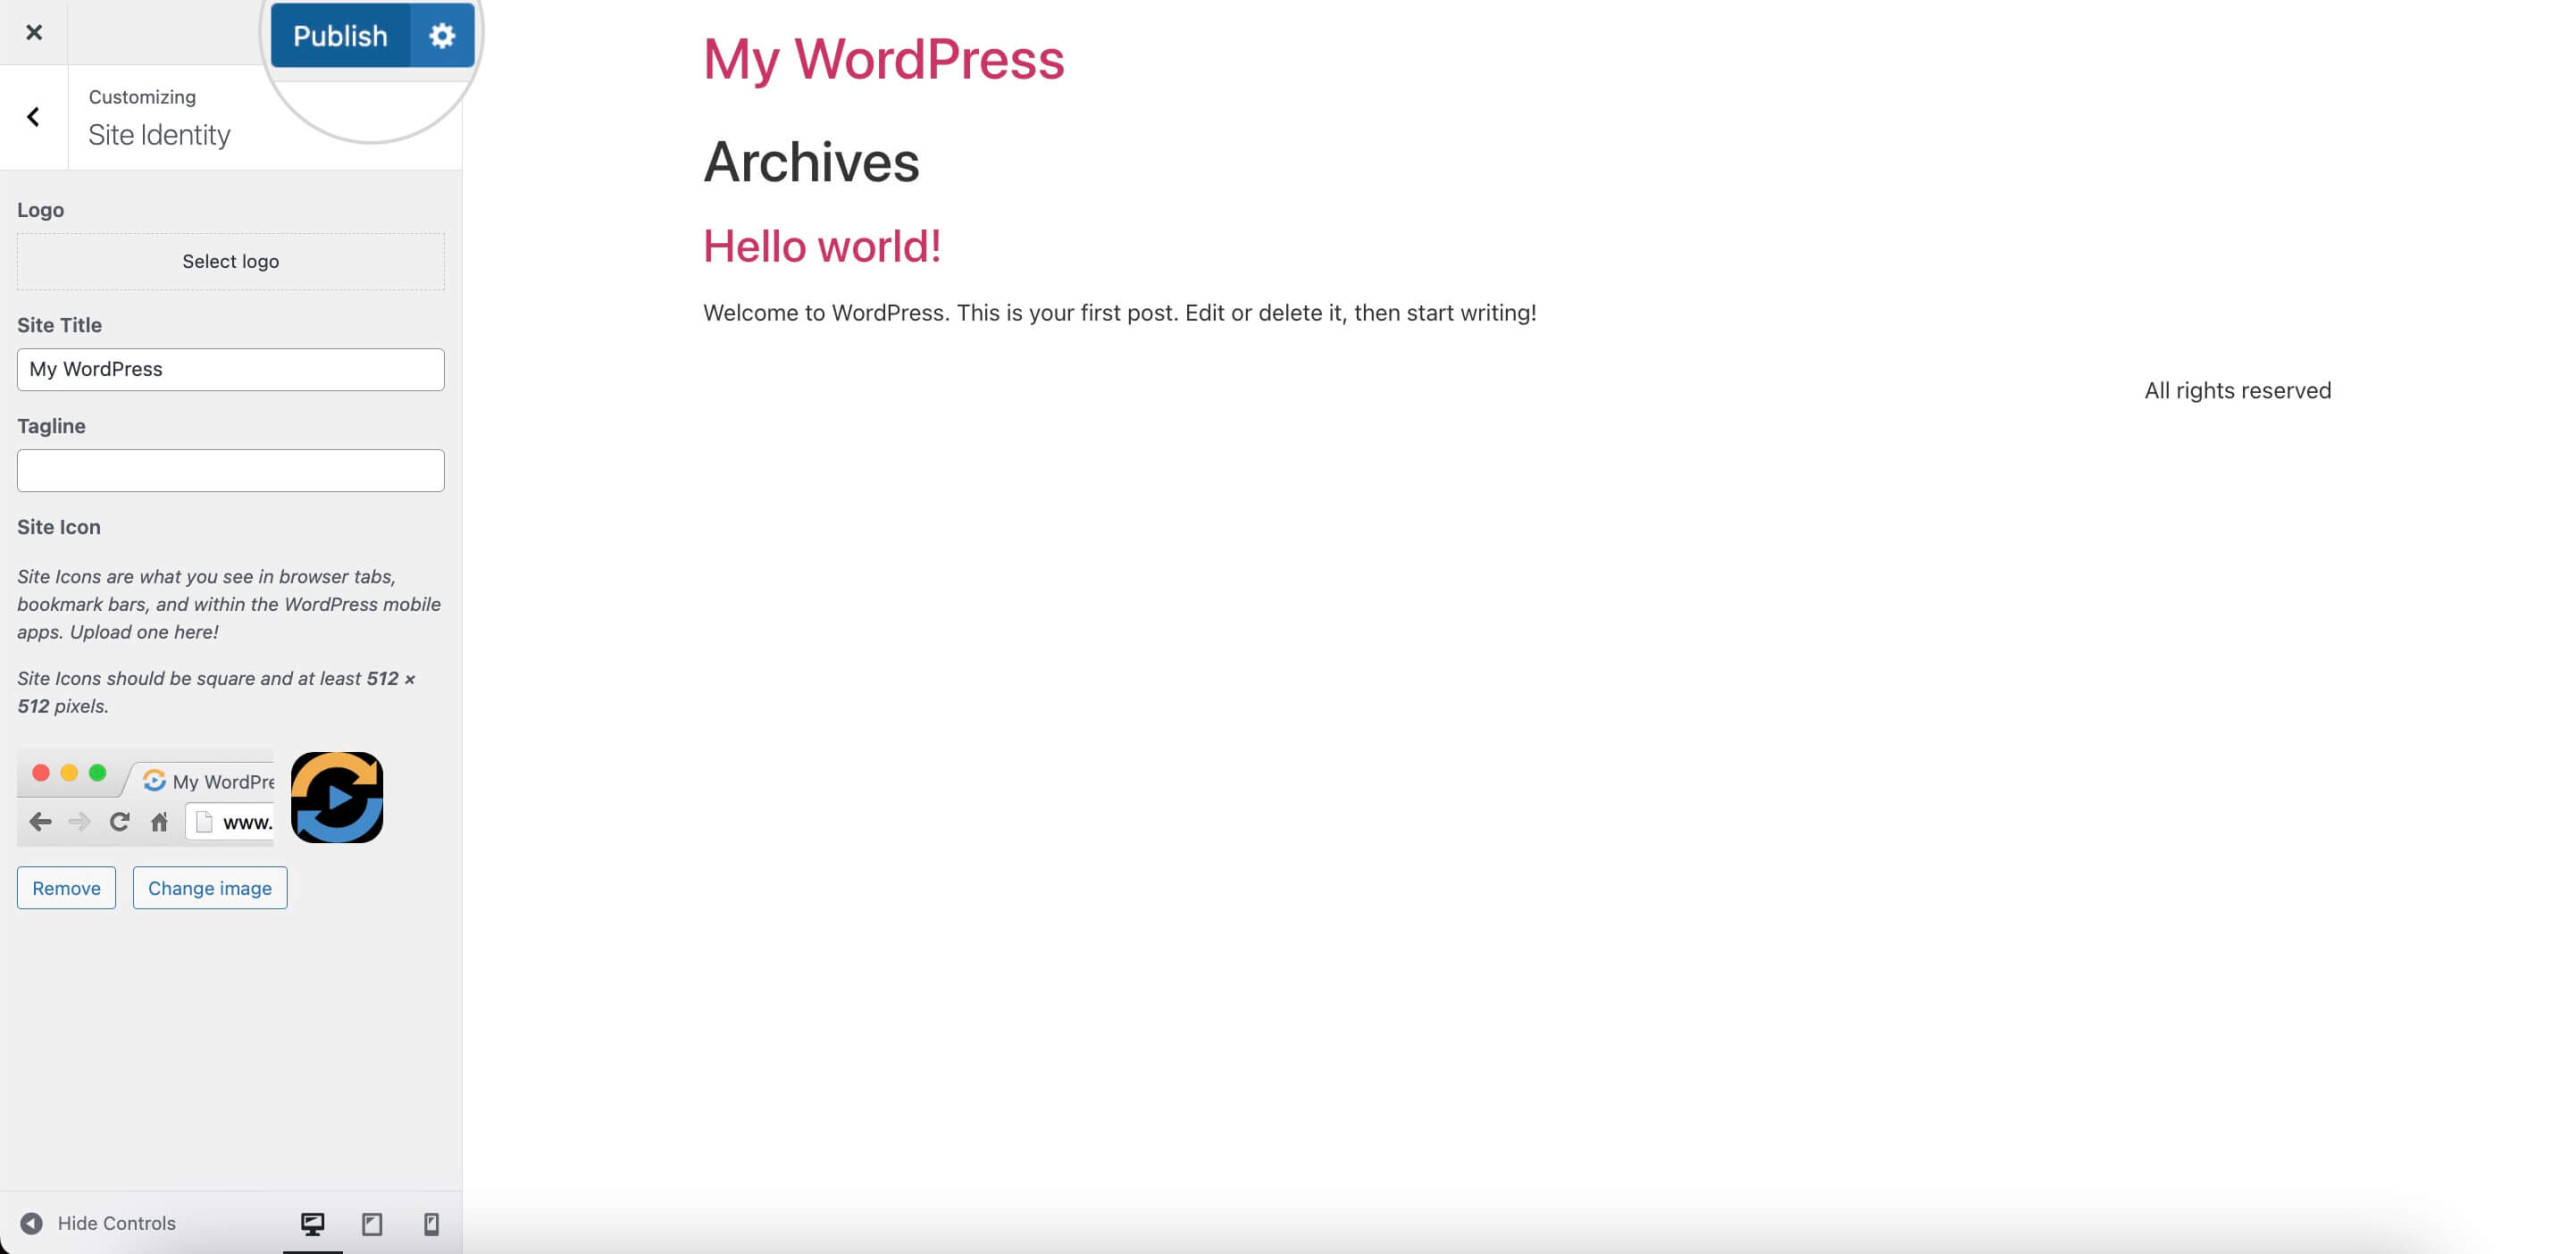
Your new favicon should now be visible in the browser tab when you visit your site. It will also show up when someone bookmarks your site or adds it to their home screen on a mobile device.
2. Change WordPress Favicon using the Site Editor
Since the release of WordPress version 5.8, you can change the favicon using the Site Editor, as long as your theme supports it. Keep reading to master the WordPress favicon change with the Full Site Editor.
Here’s how to do it:
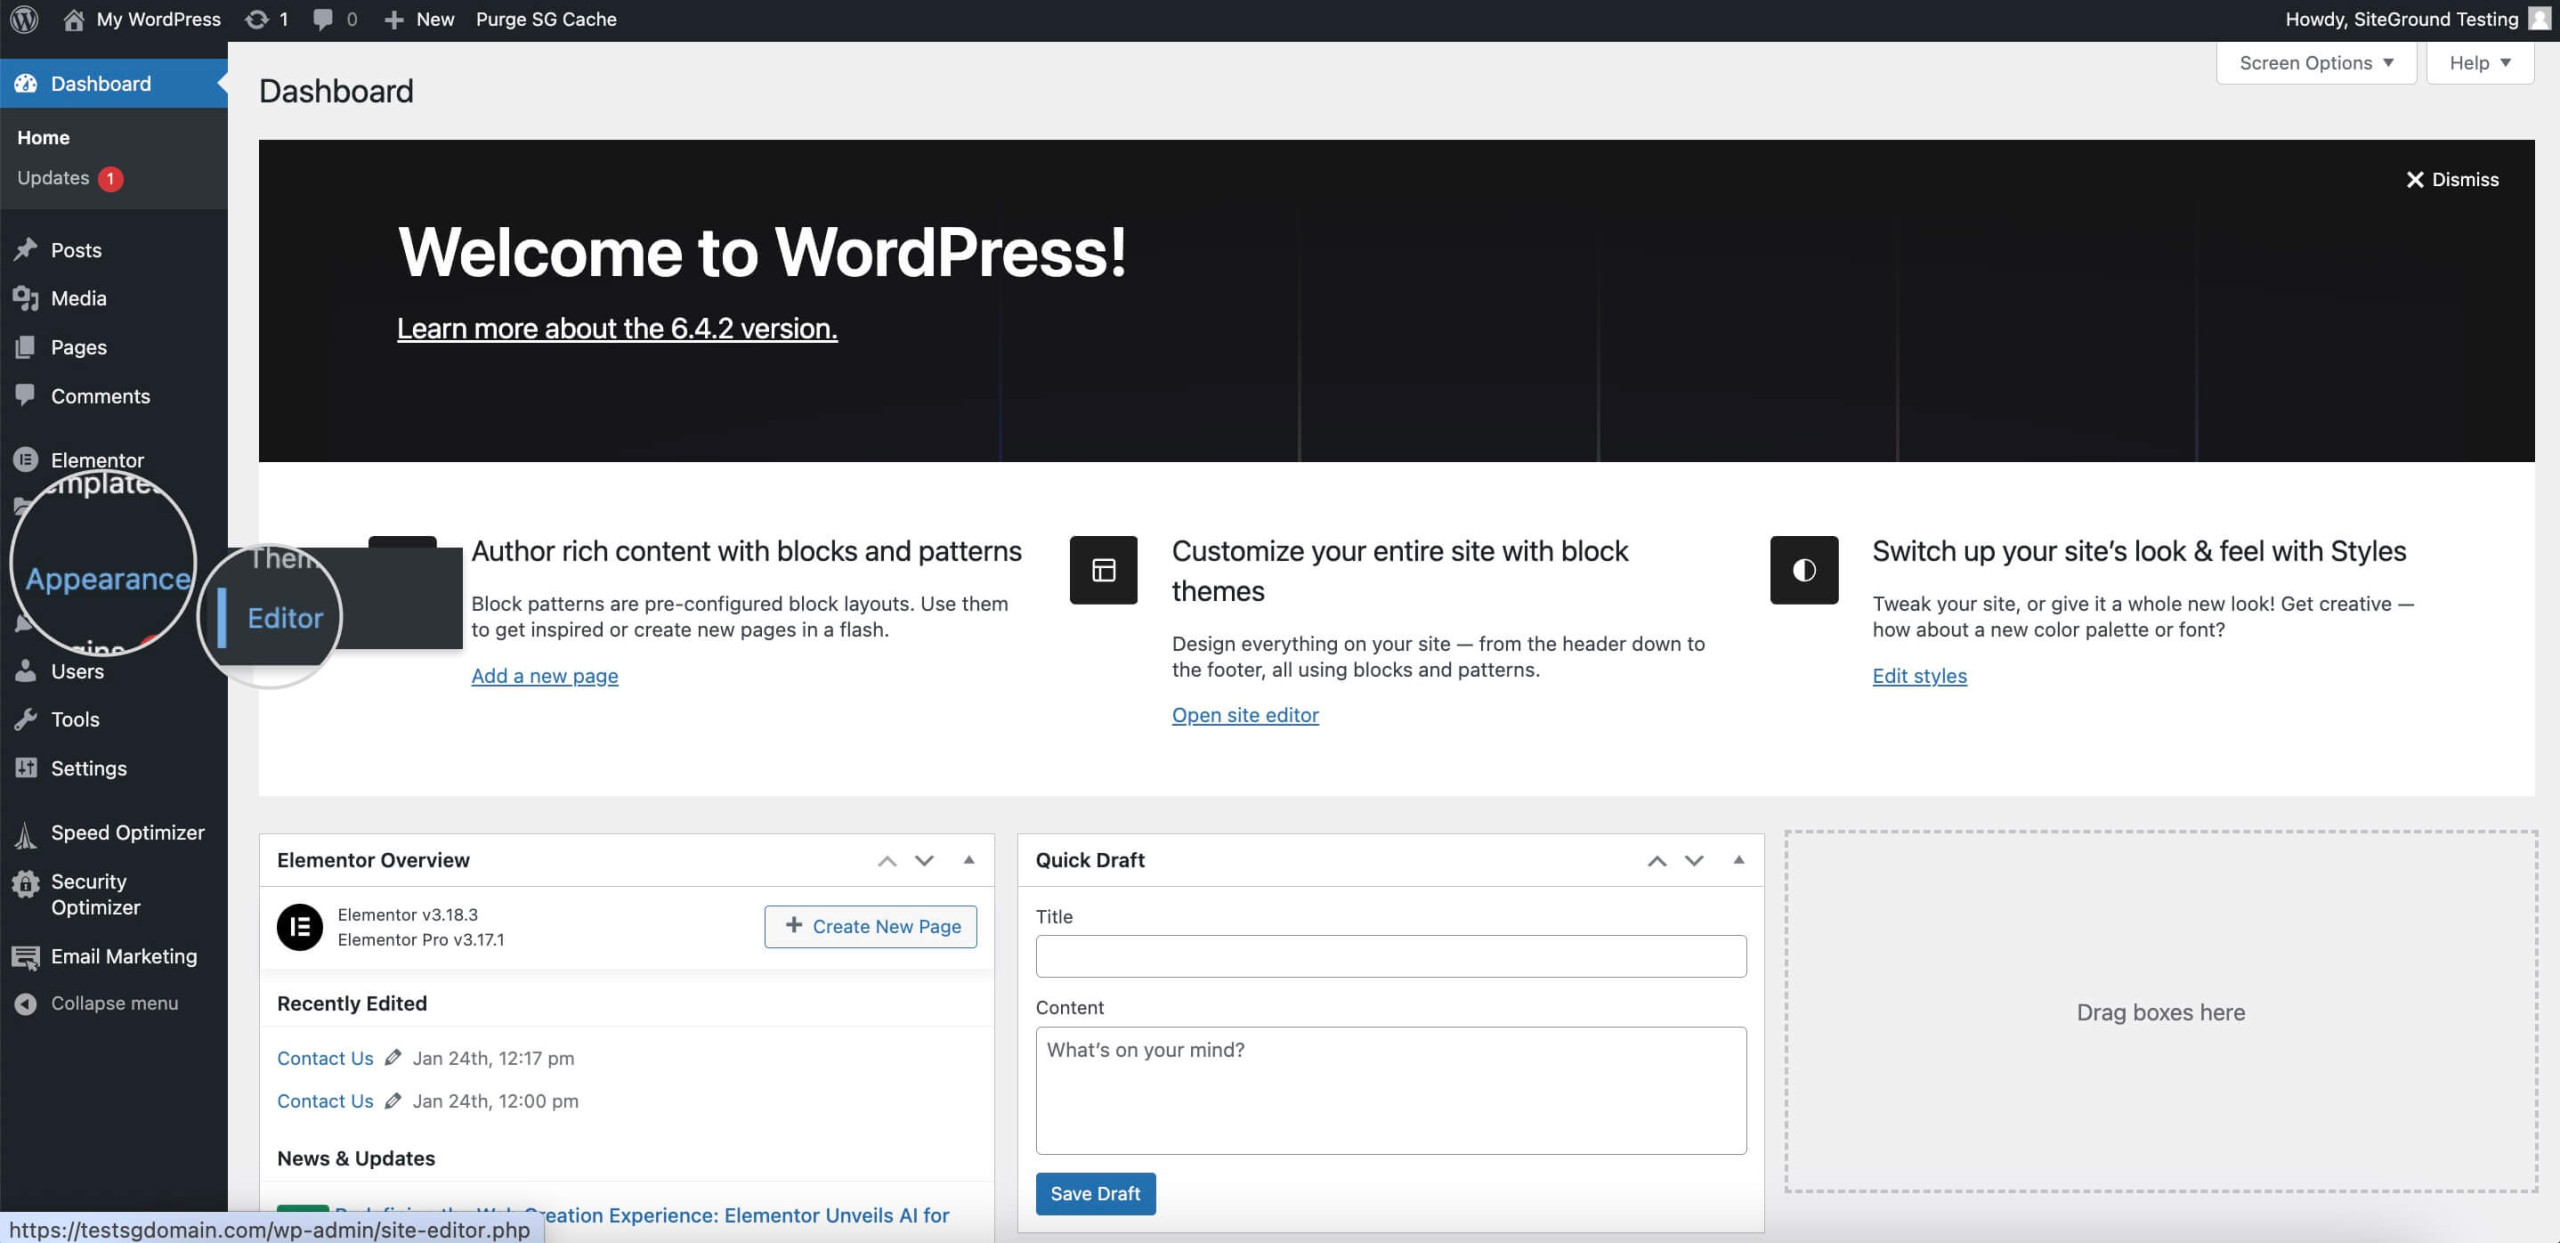
- Log in to your WordPress dashboard.
- Click on Appearance > Editor.
- Once in the Editor, look for the Patterns panel.
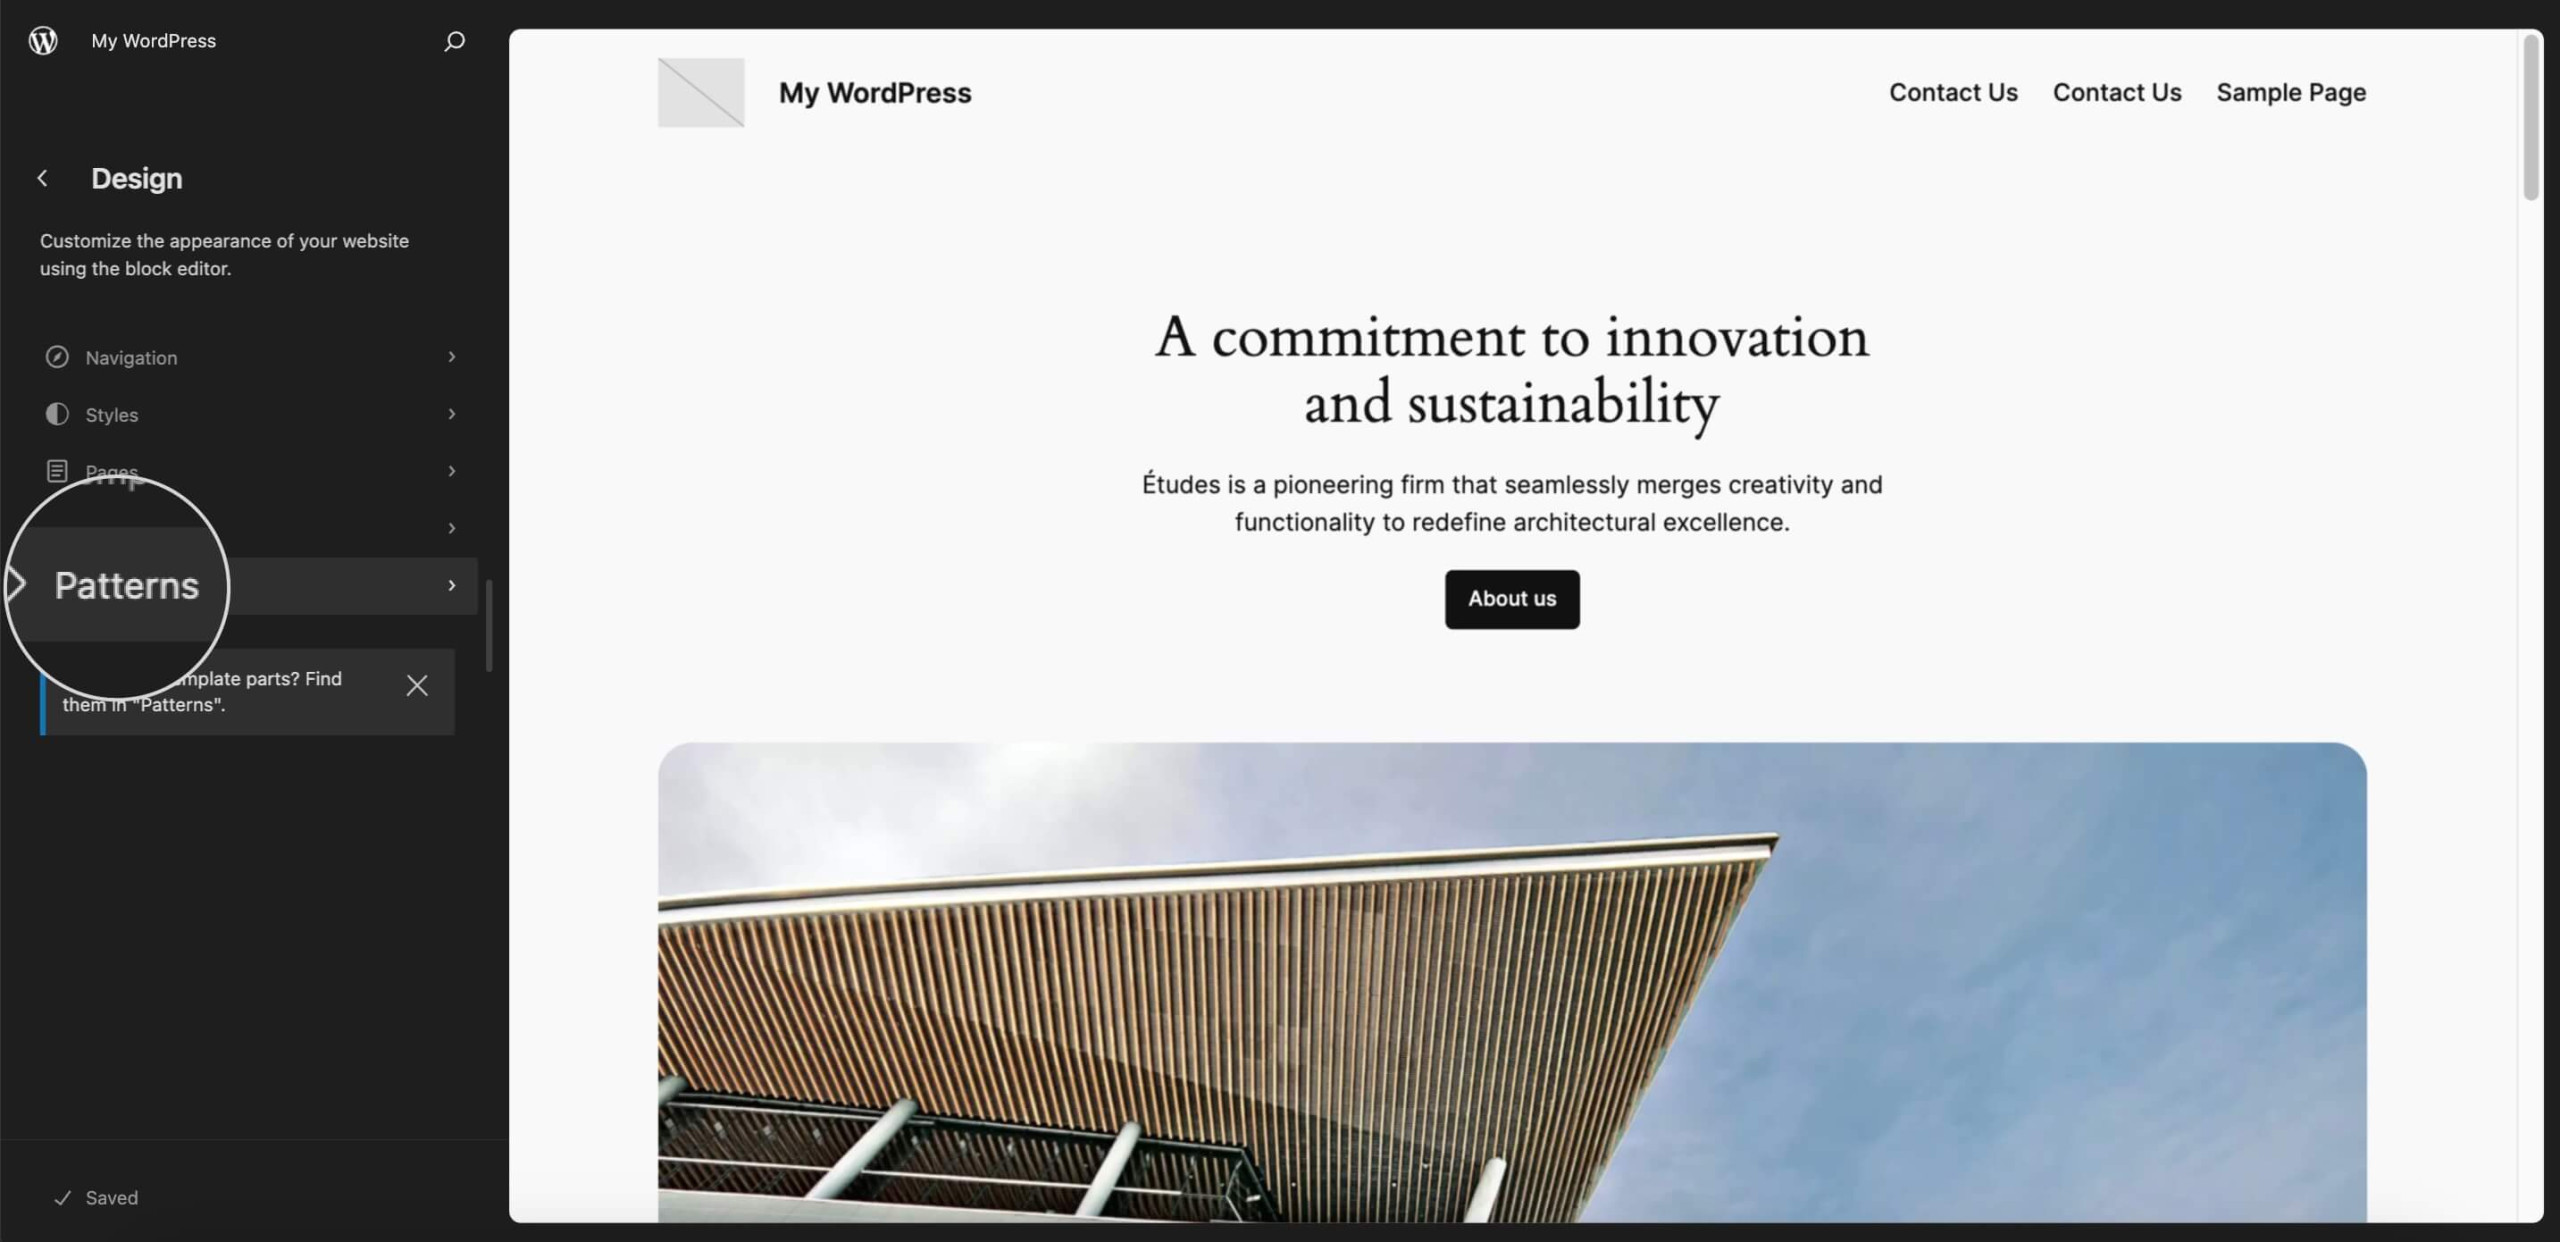
- Scroll down to the Header tab and click on the block pattern on the left.
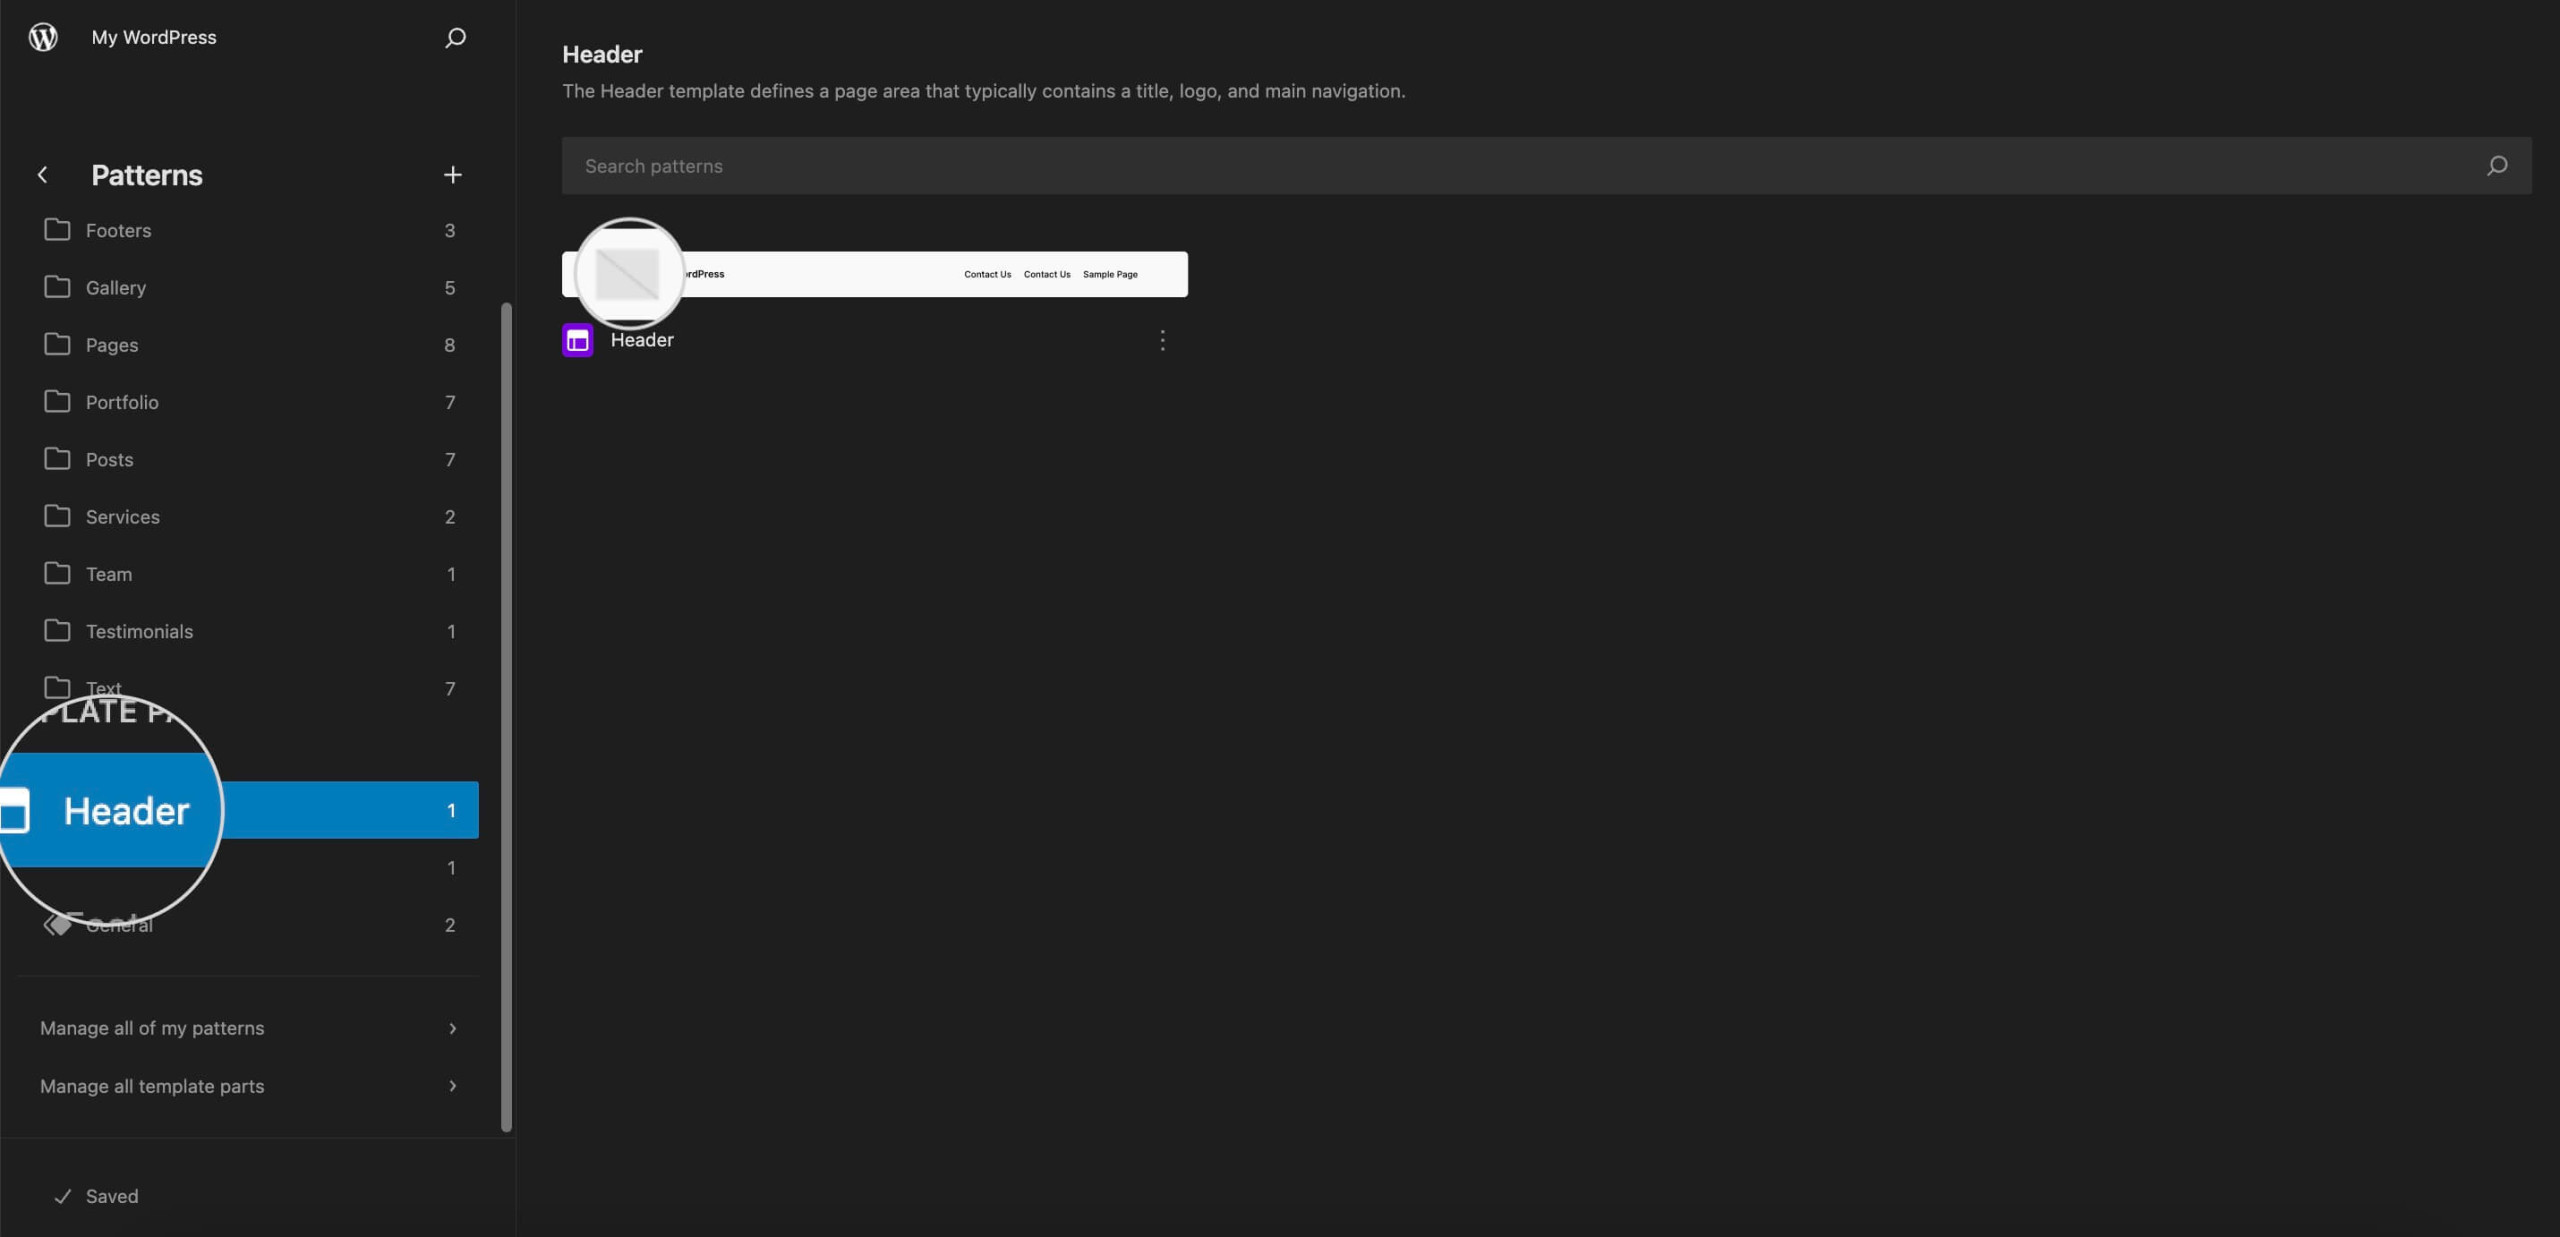
- Click on the site logo block to Add a Site Logo.
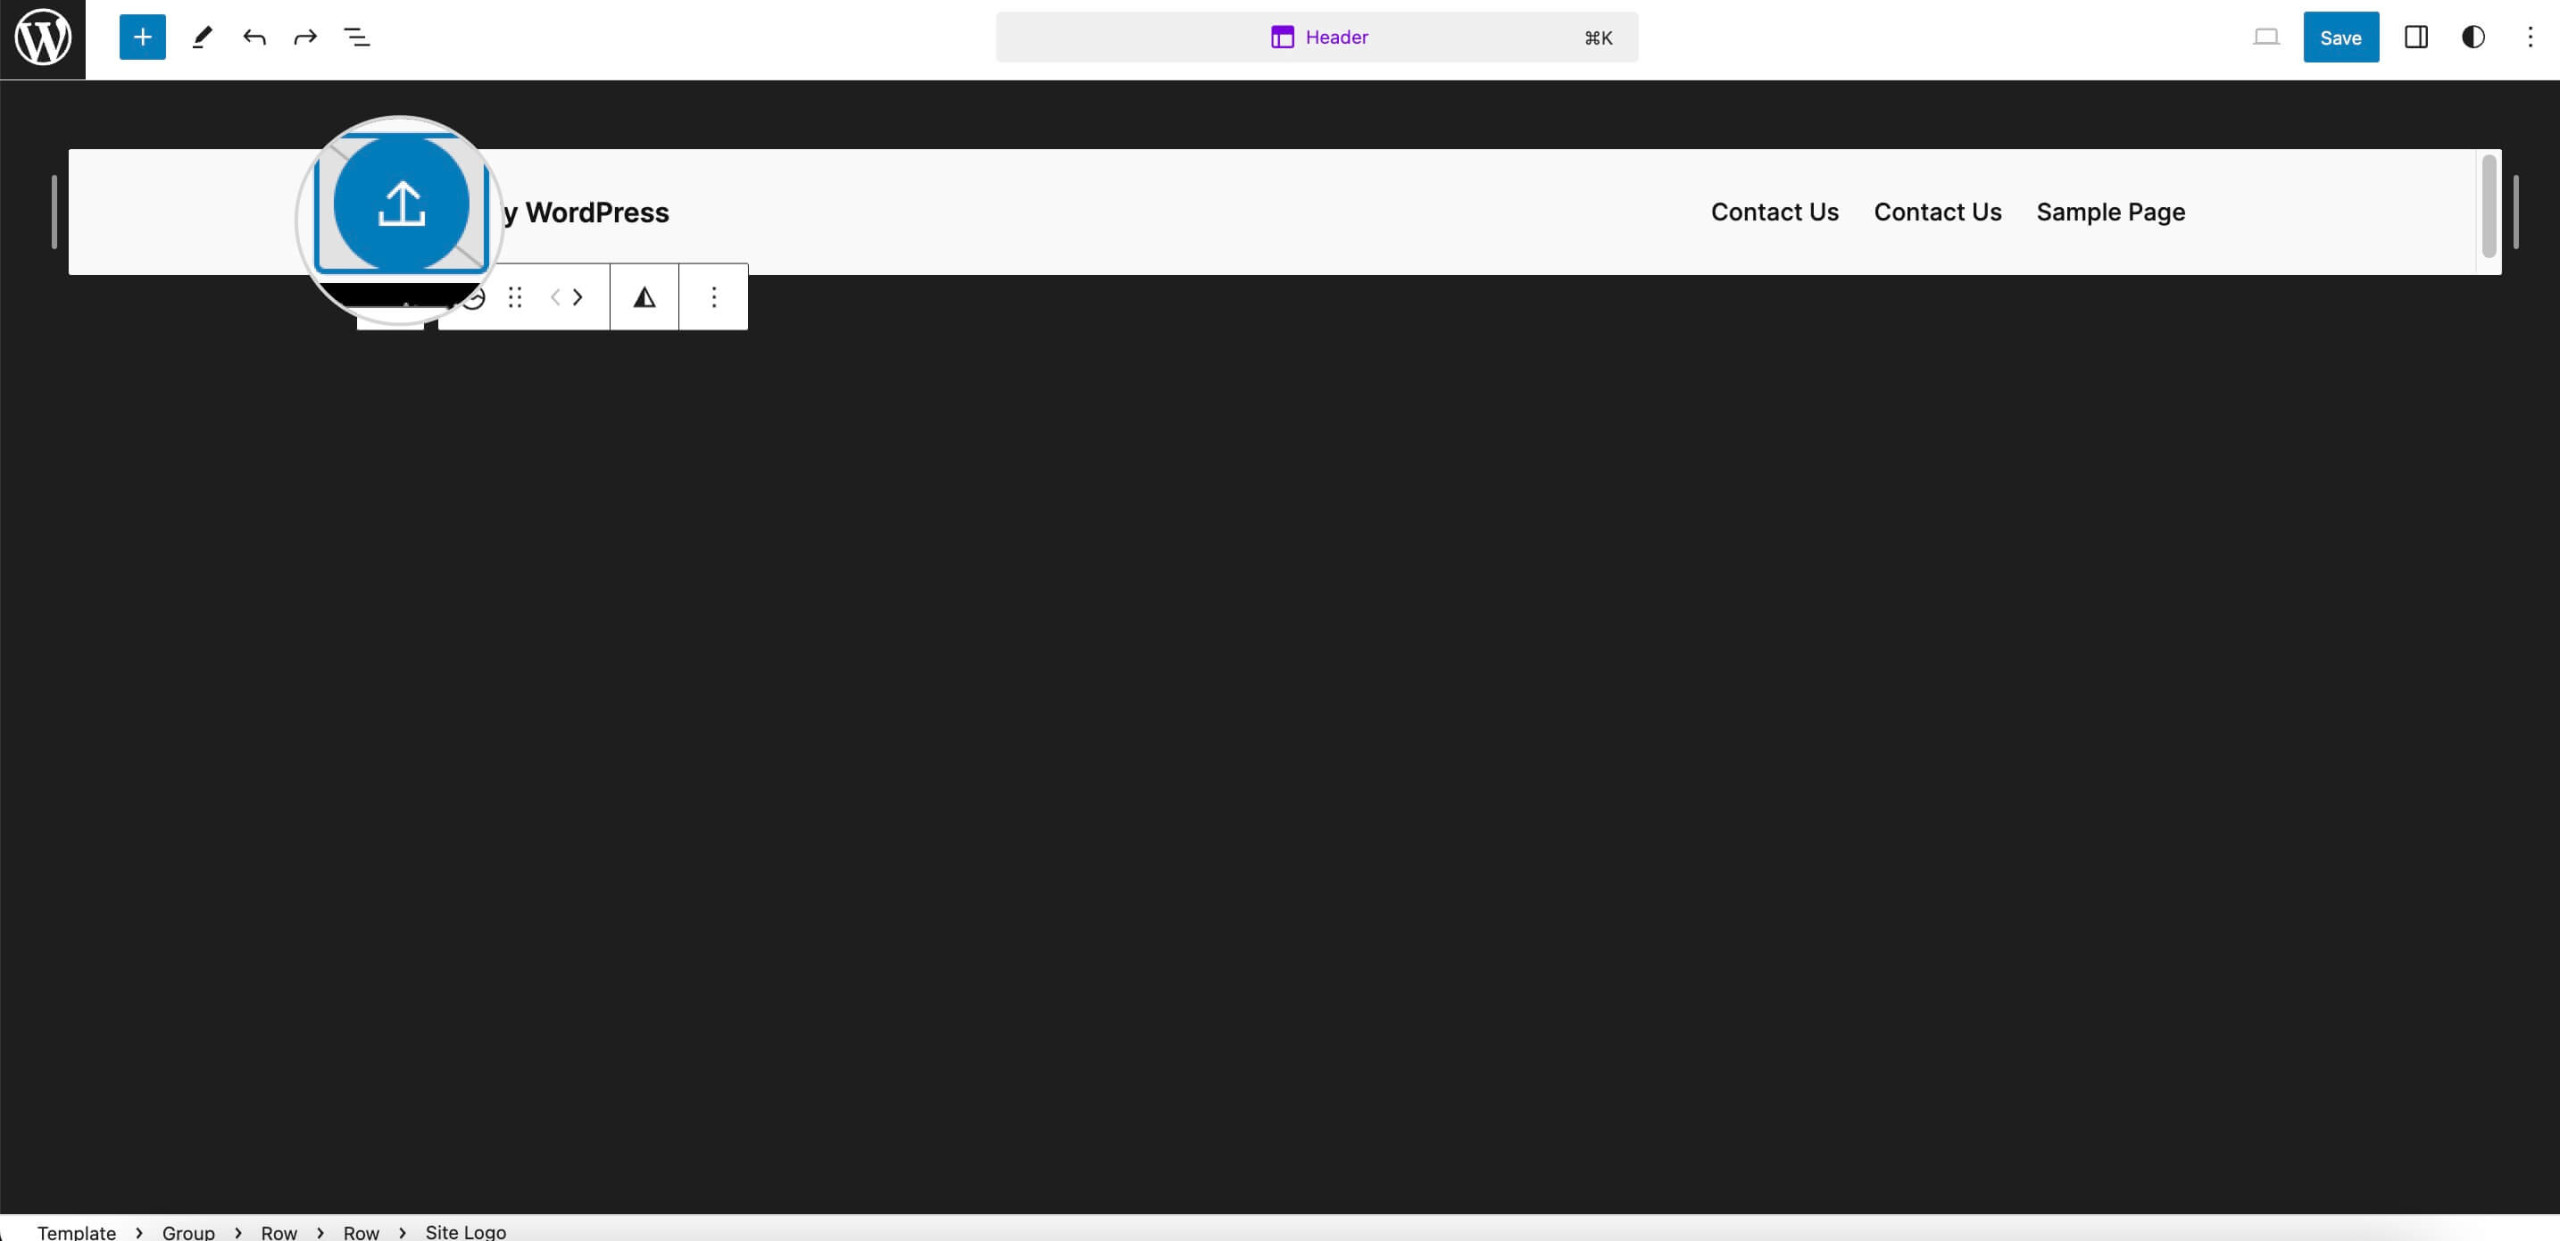
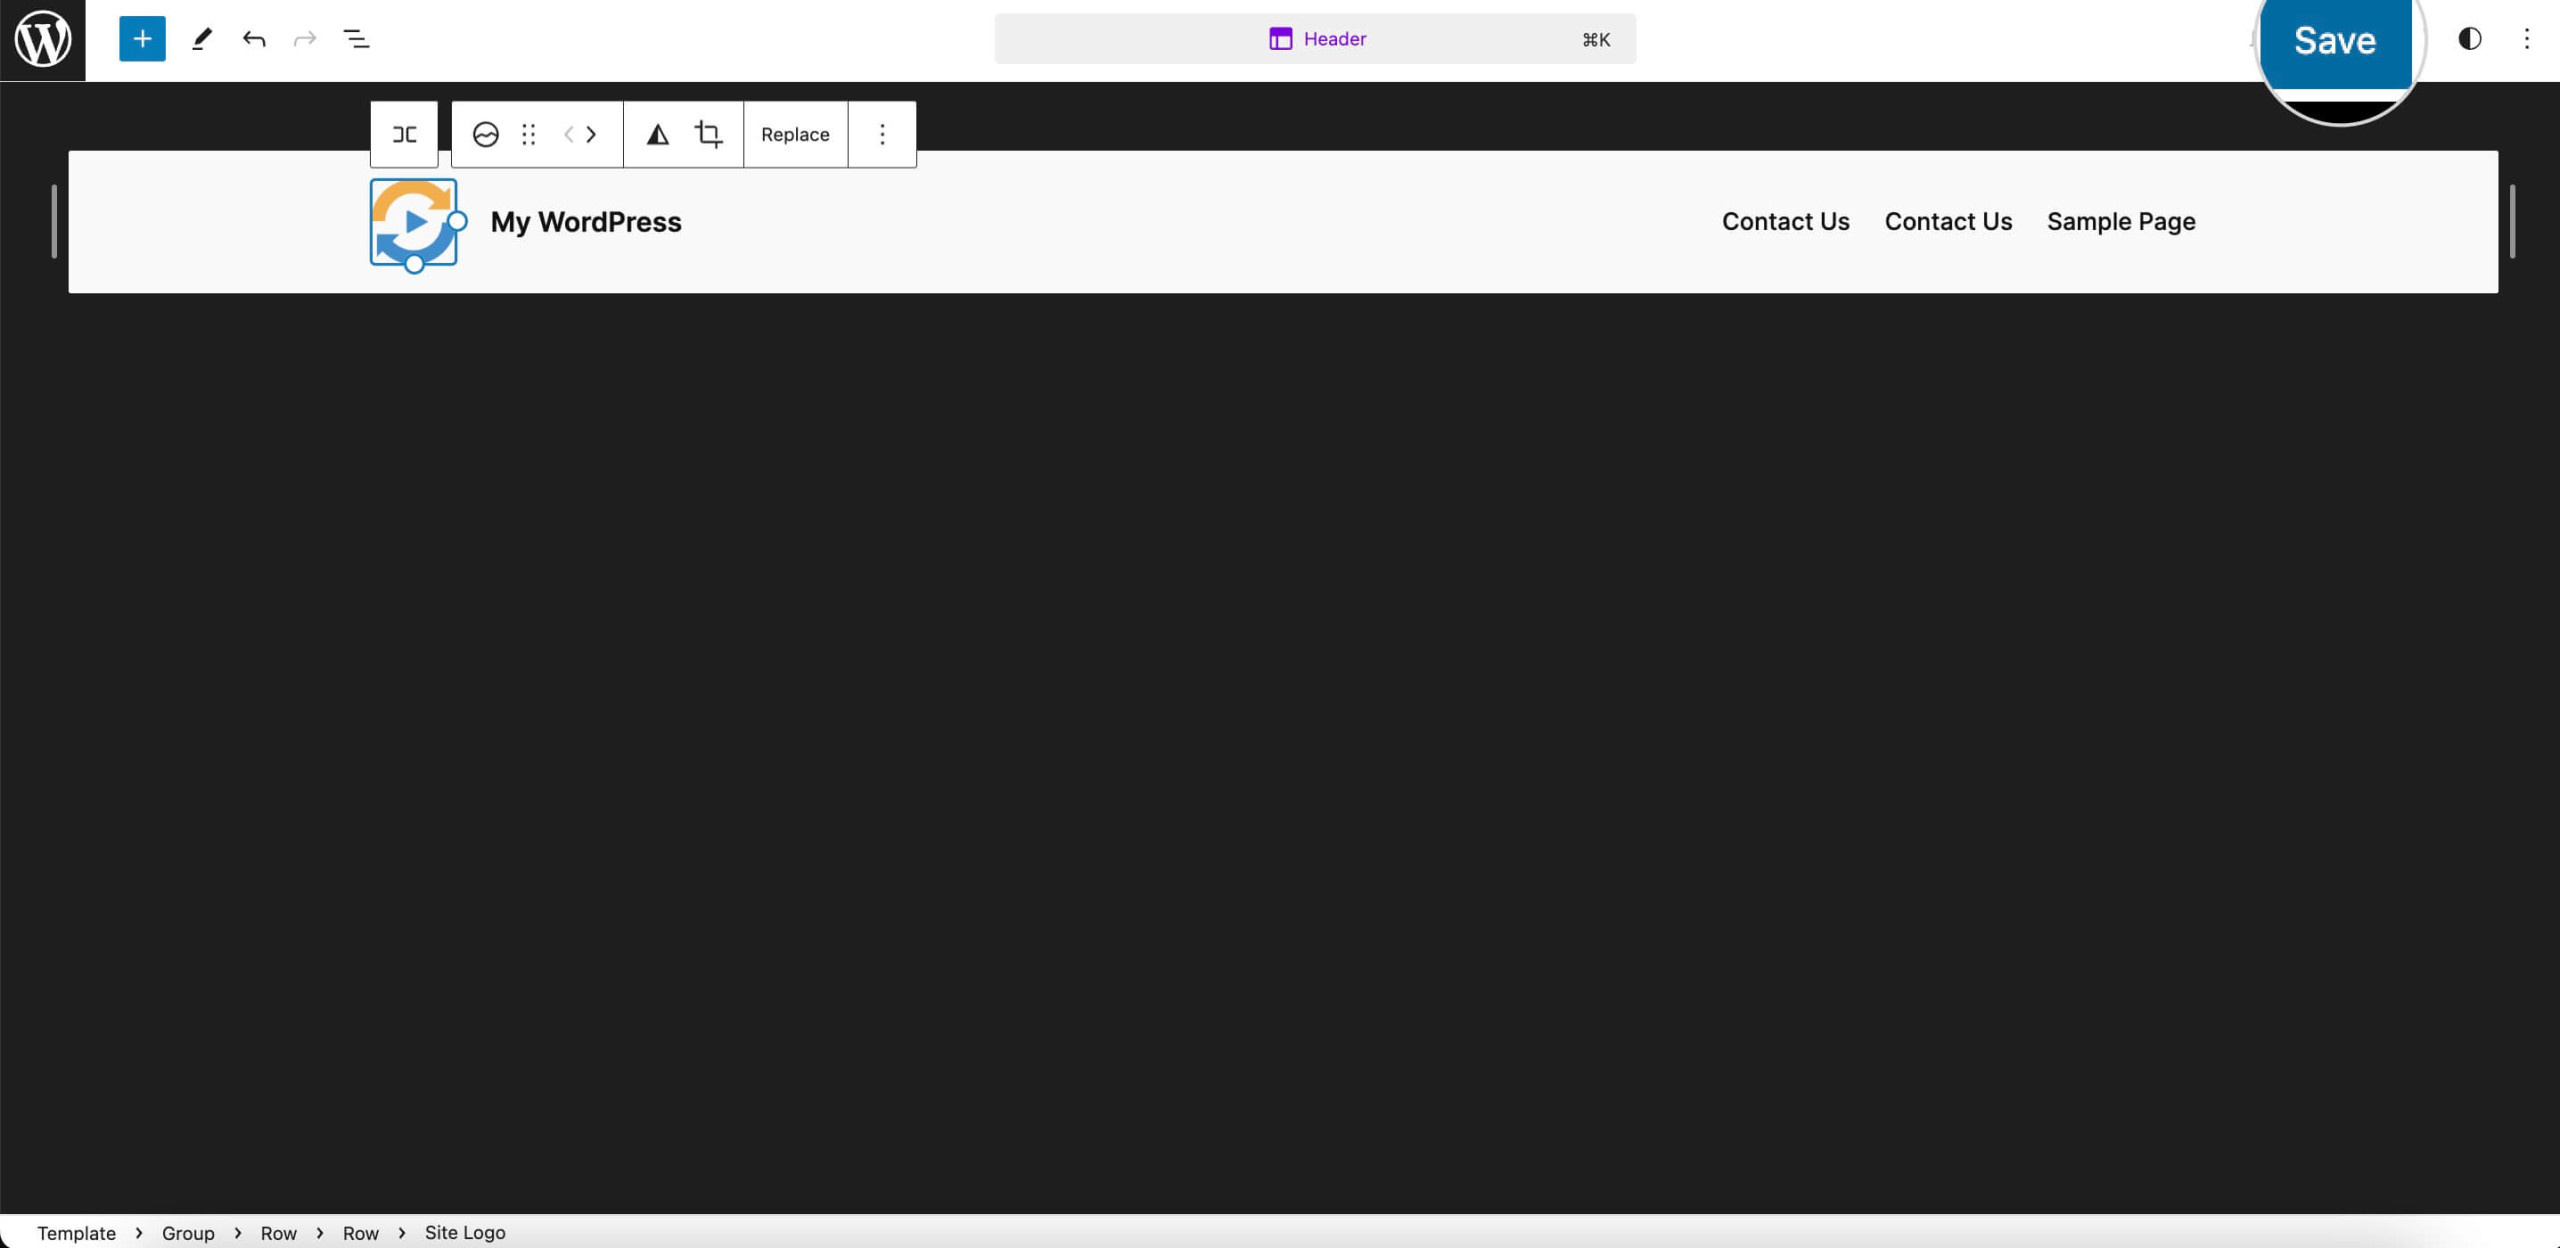
- Then select your unique favicon from the Media Library or upload it.
- Hit Save, then Publish to apply the changes.
3. Adding Site Icons with a WordPress Favicon Plugin
Another method of adding a WordPress favicon to your site using a plugin like RealFaviconGenerator. This free plugin provides a user-friendly interface to streamline the process of managing and updating your site icon.
Here’s how you can go about it:
- Go to Plugins > Add new from your dashboard.
- Install and Activate the plugin.
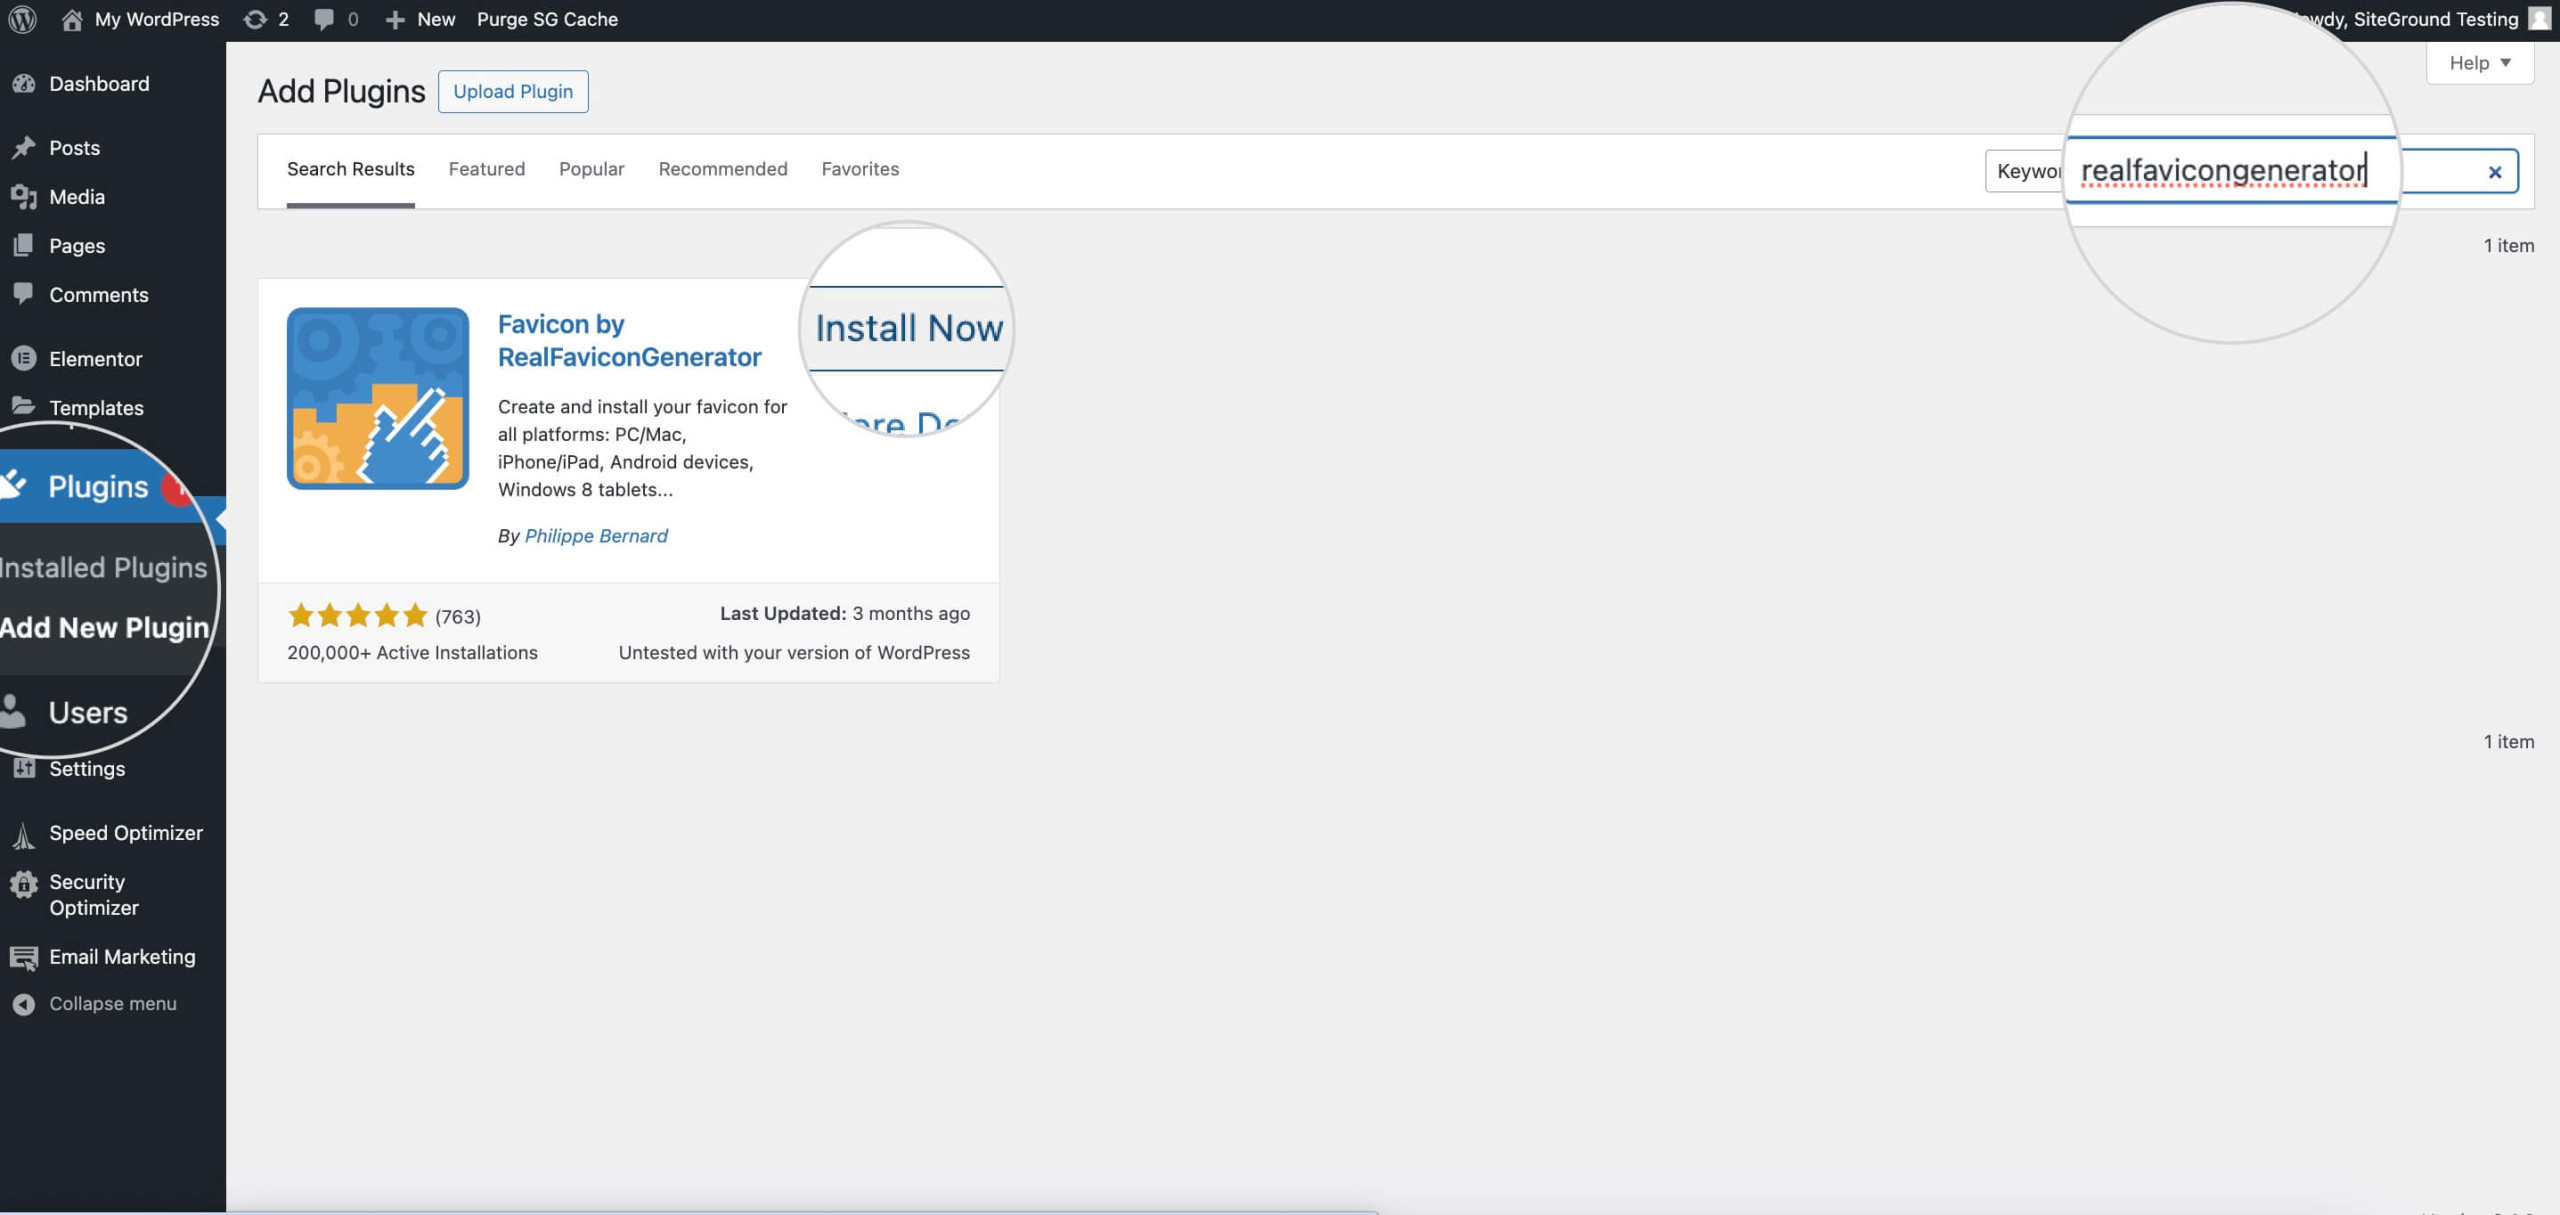
- Navigate to Appearance > Favicon.
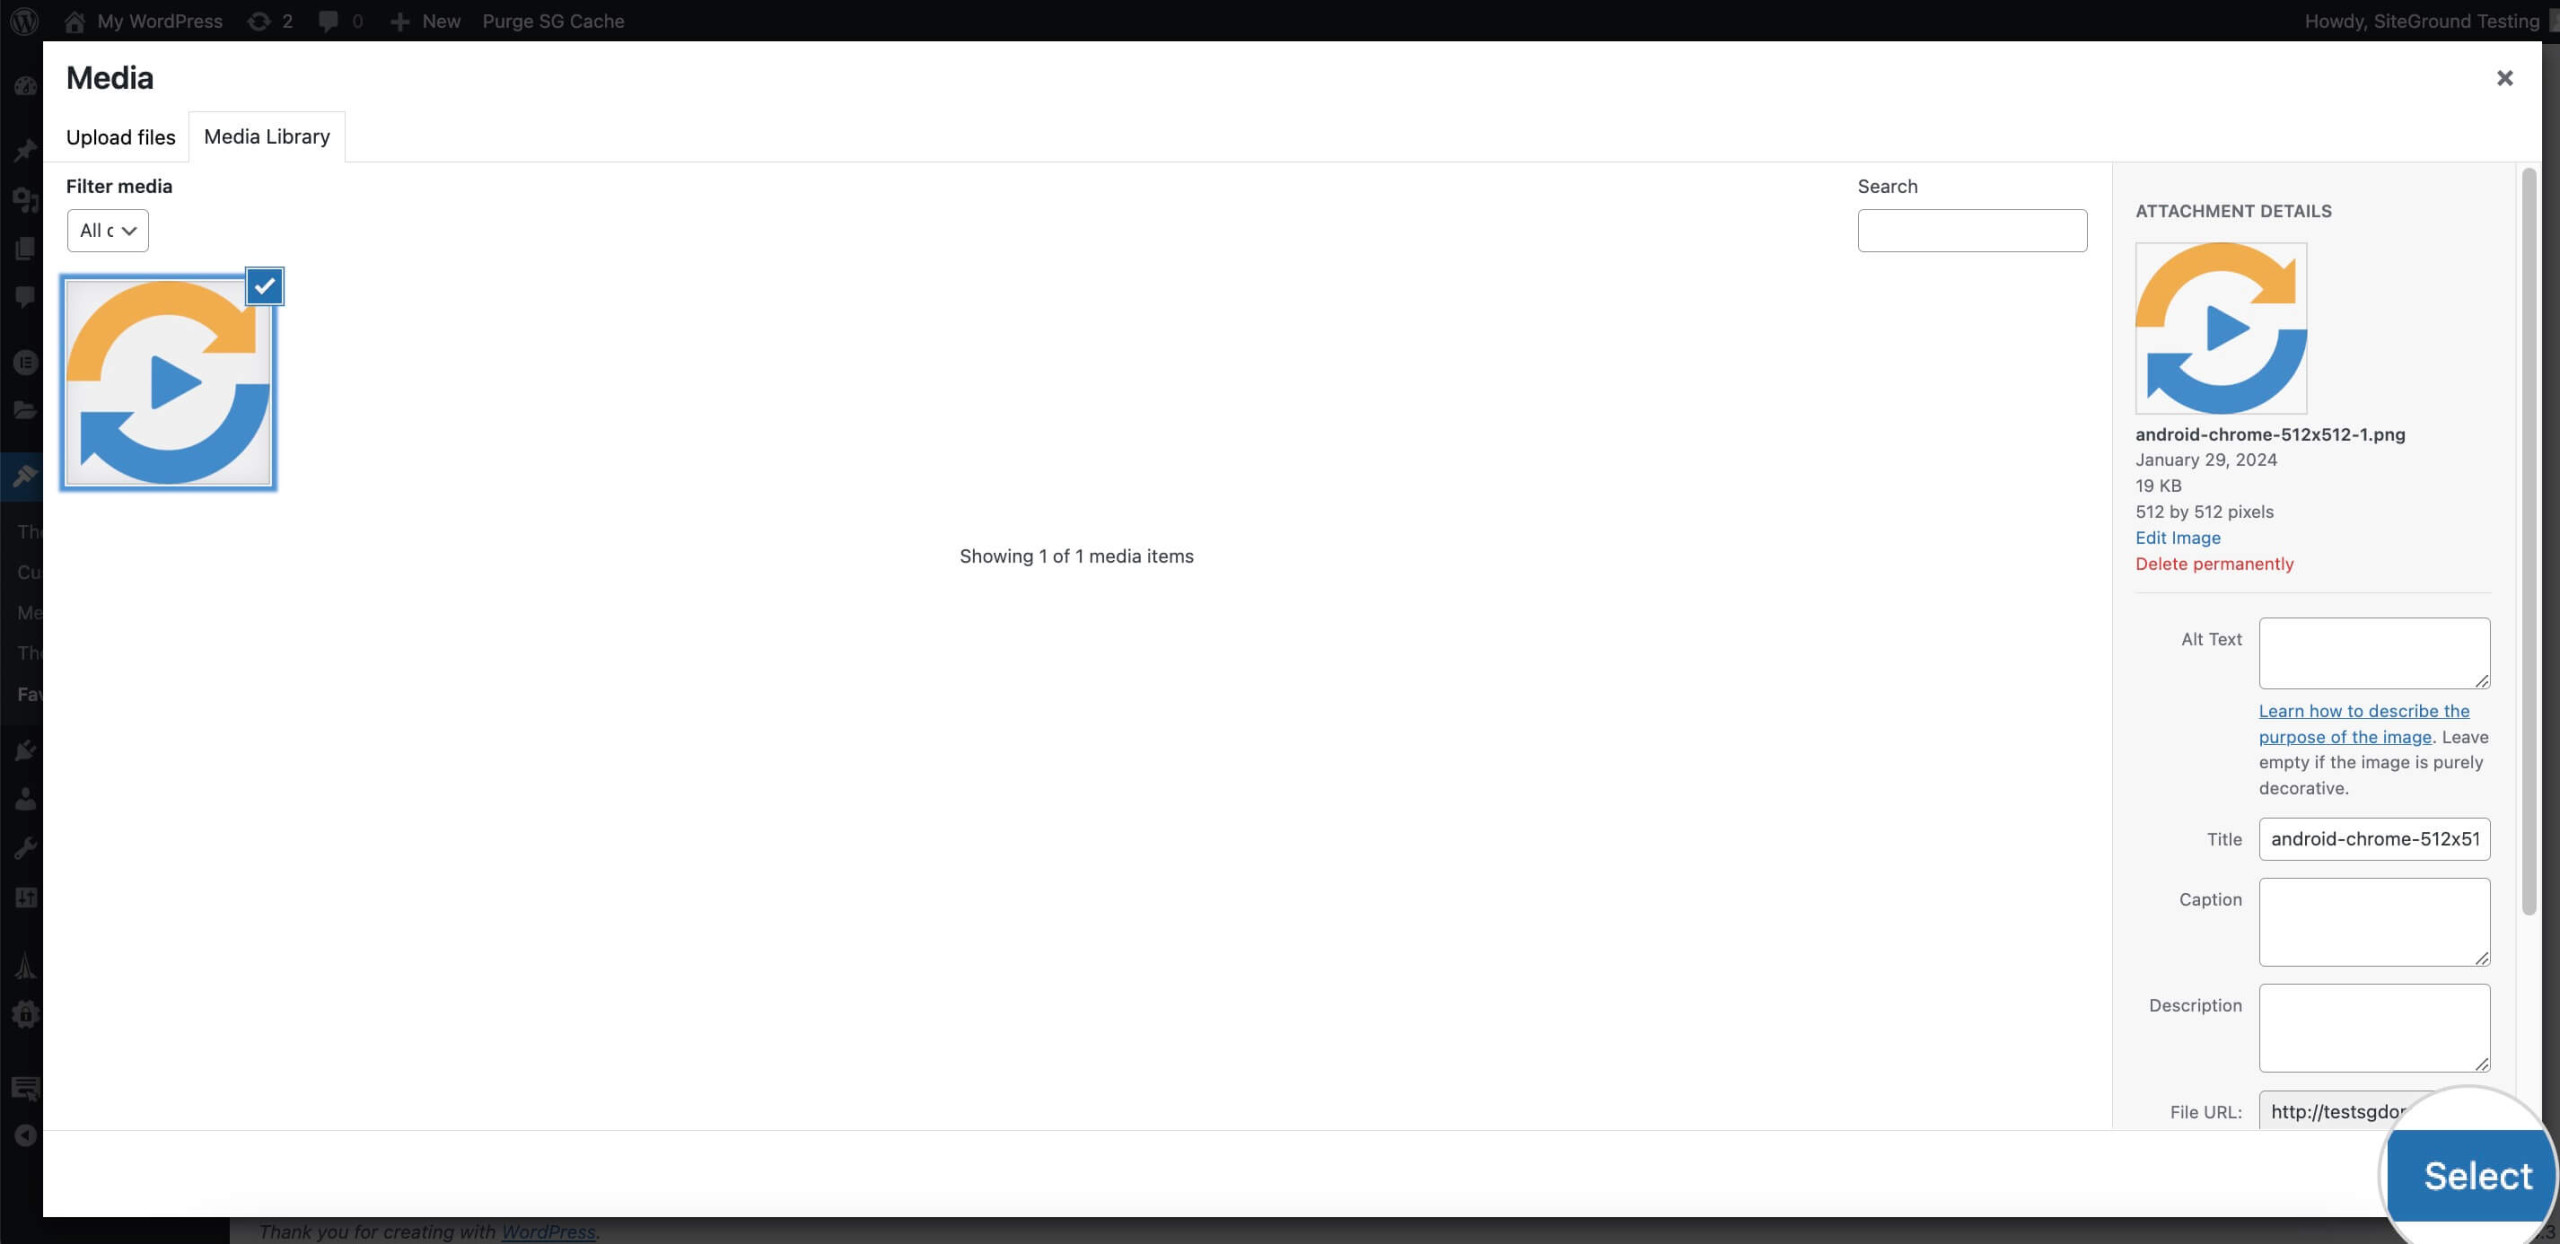
- Click the Select From Media Library button.
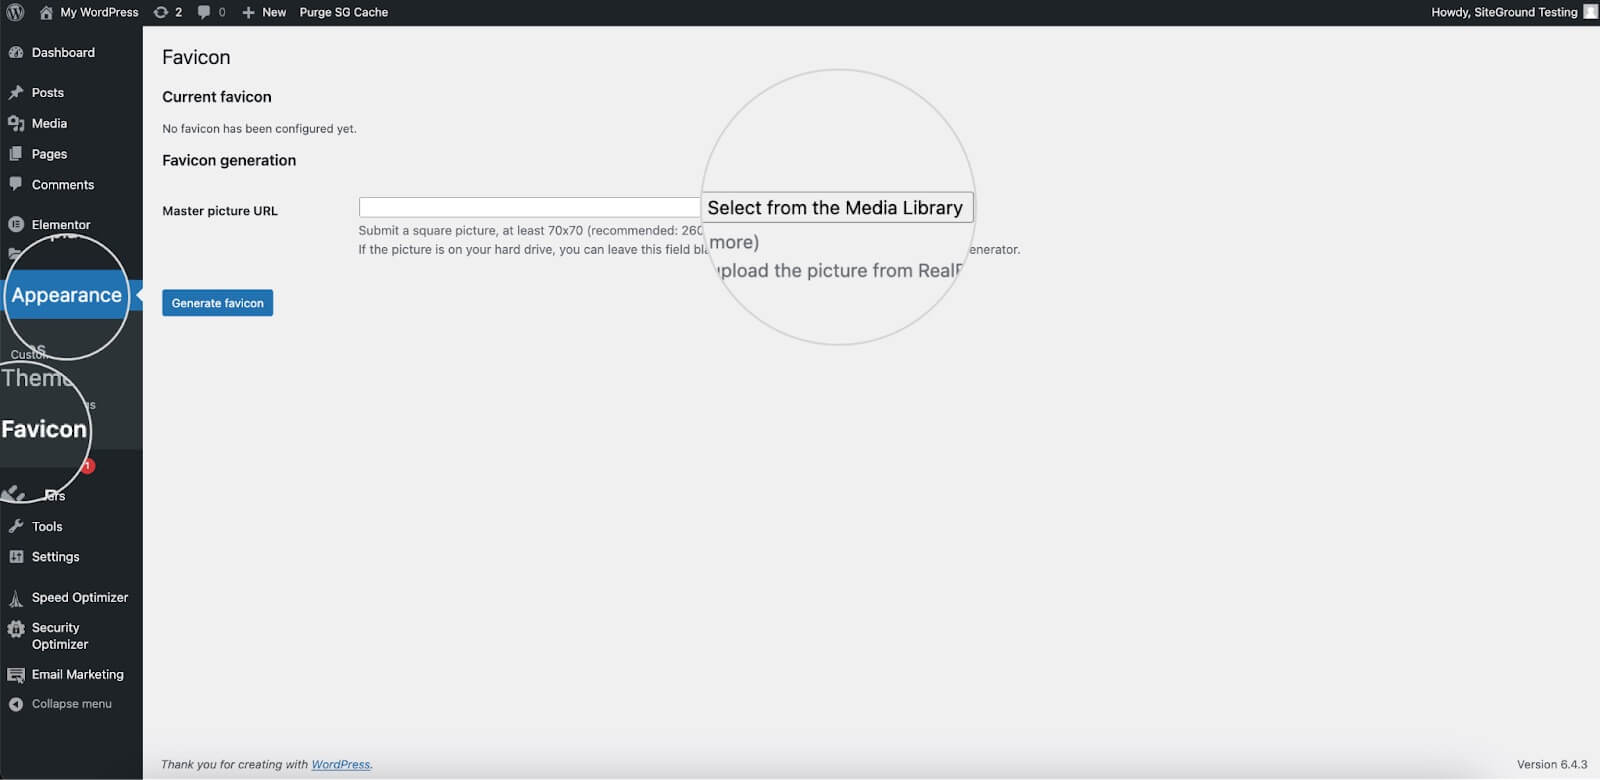
- Add the favicon image by clicking on it and hit Select.
- Click the Generate Favicon button.
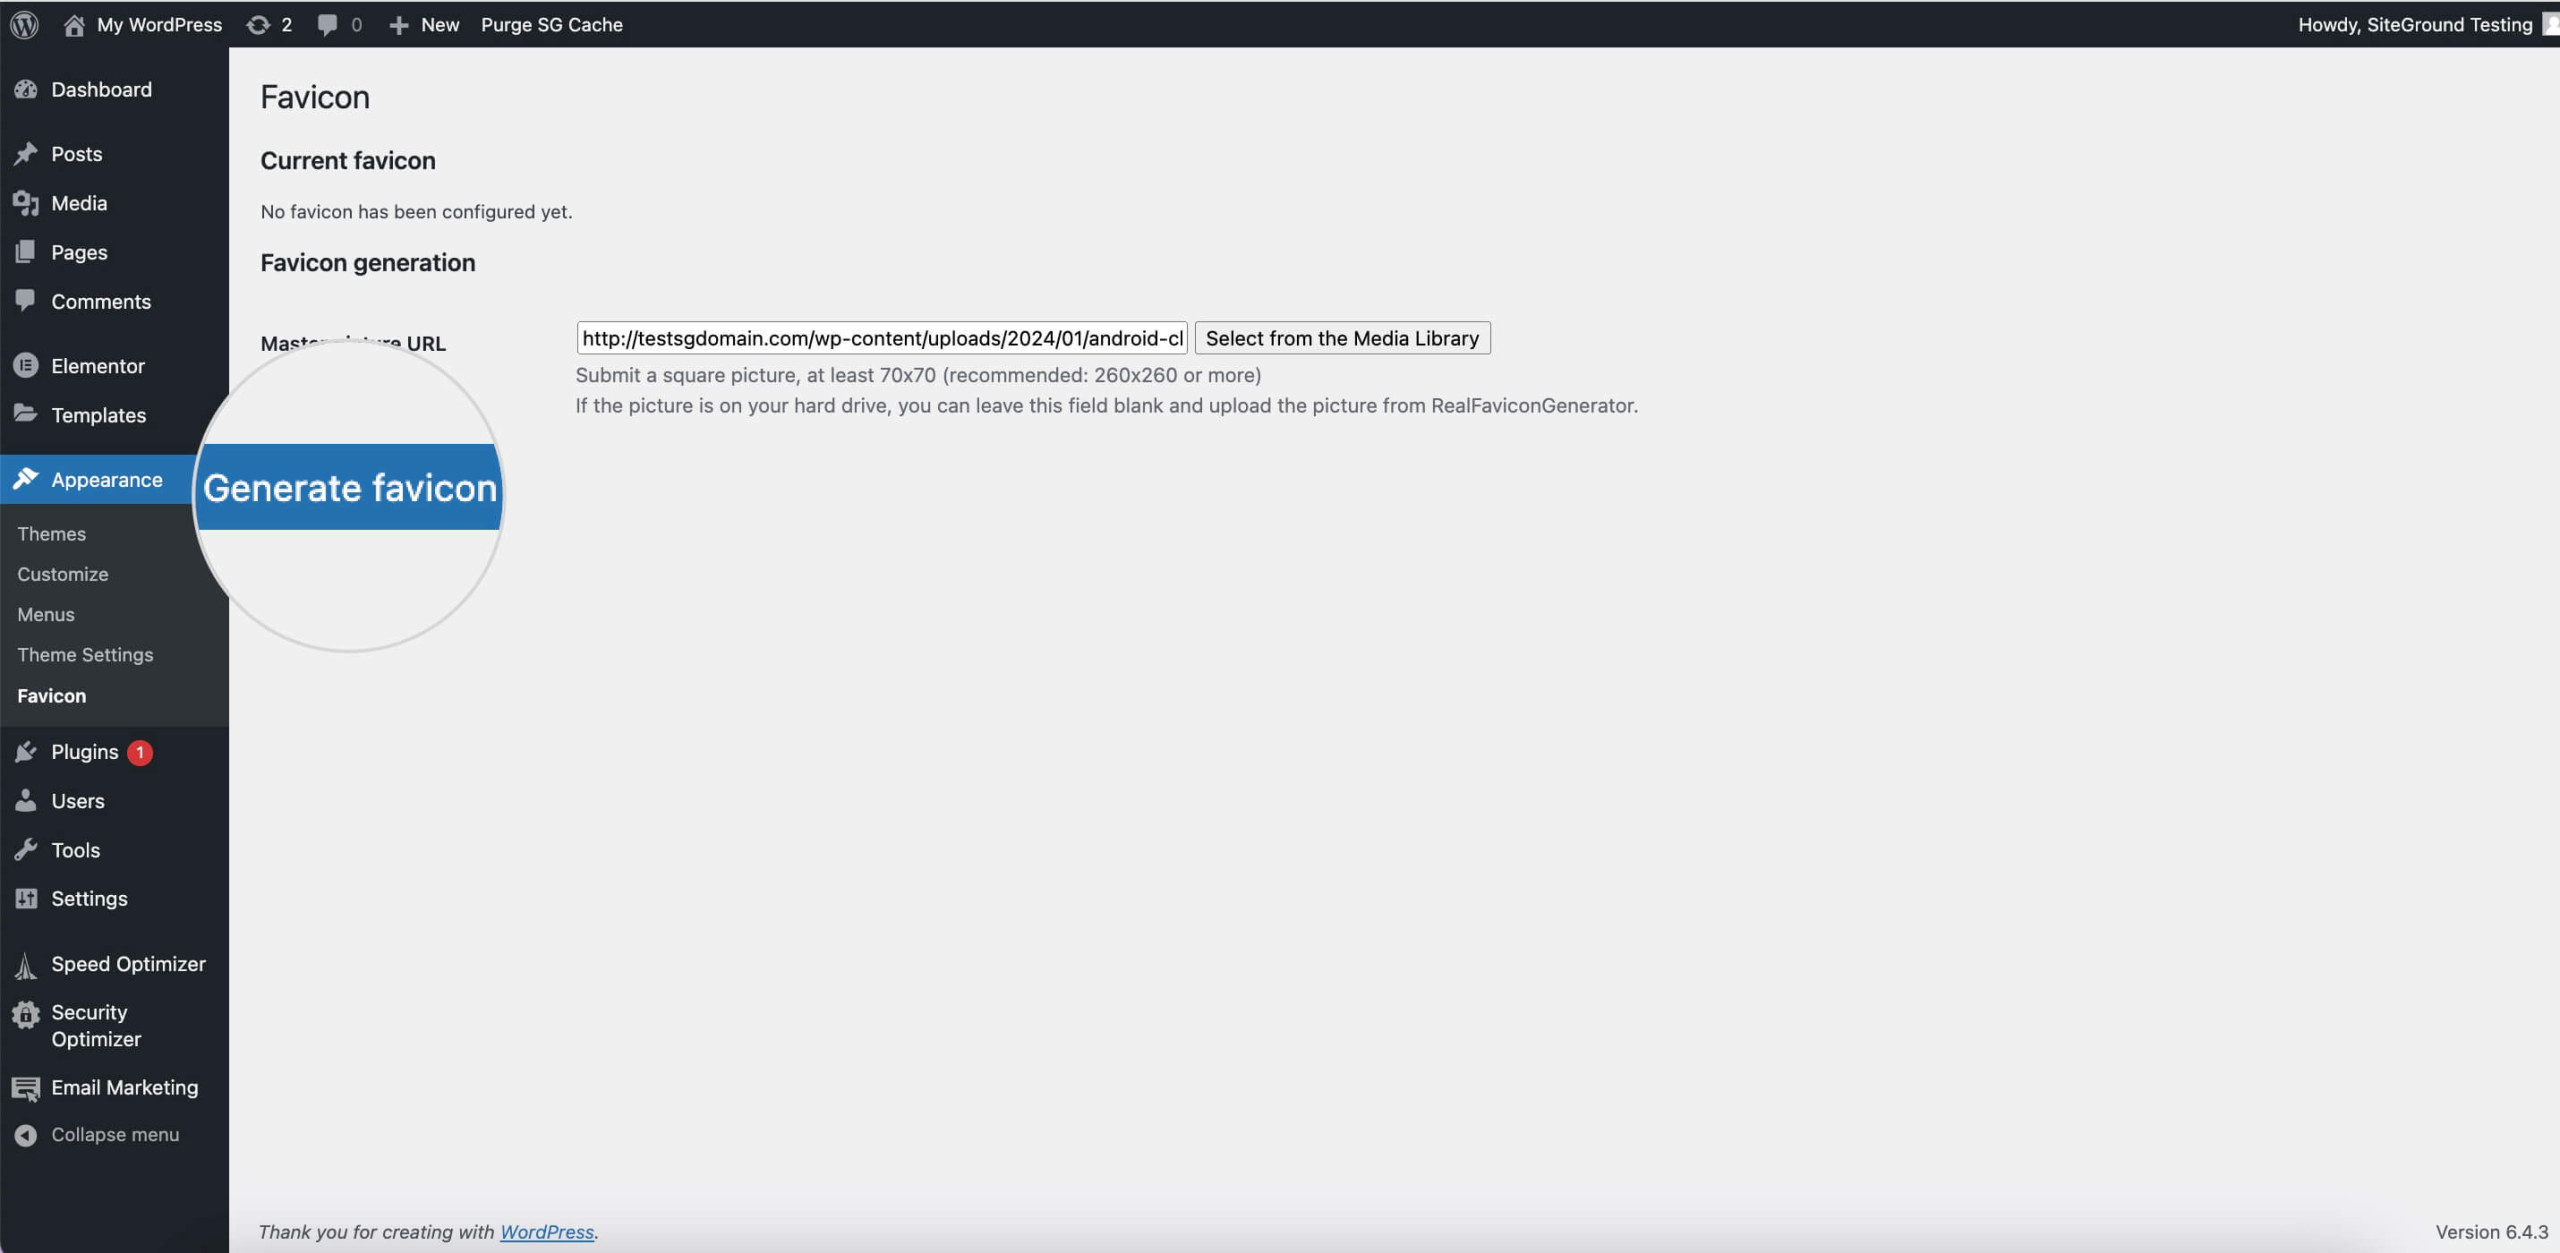
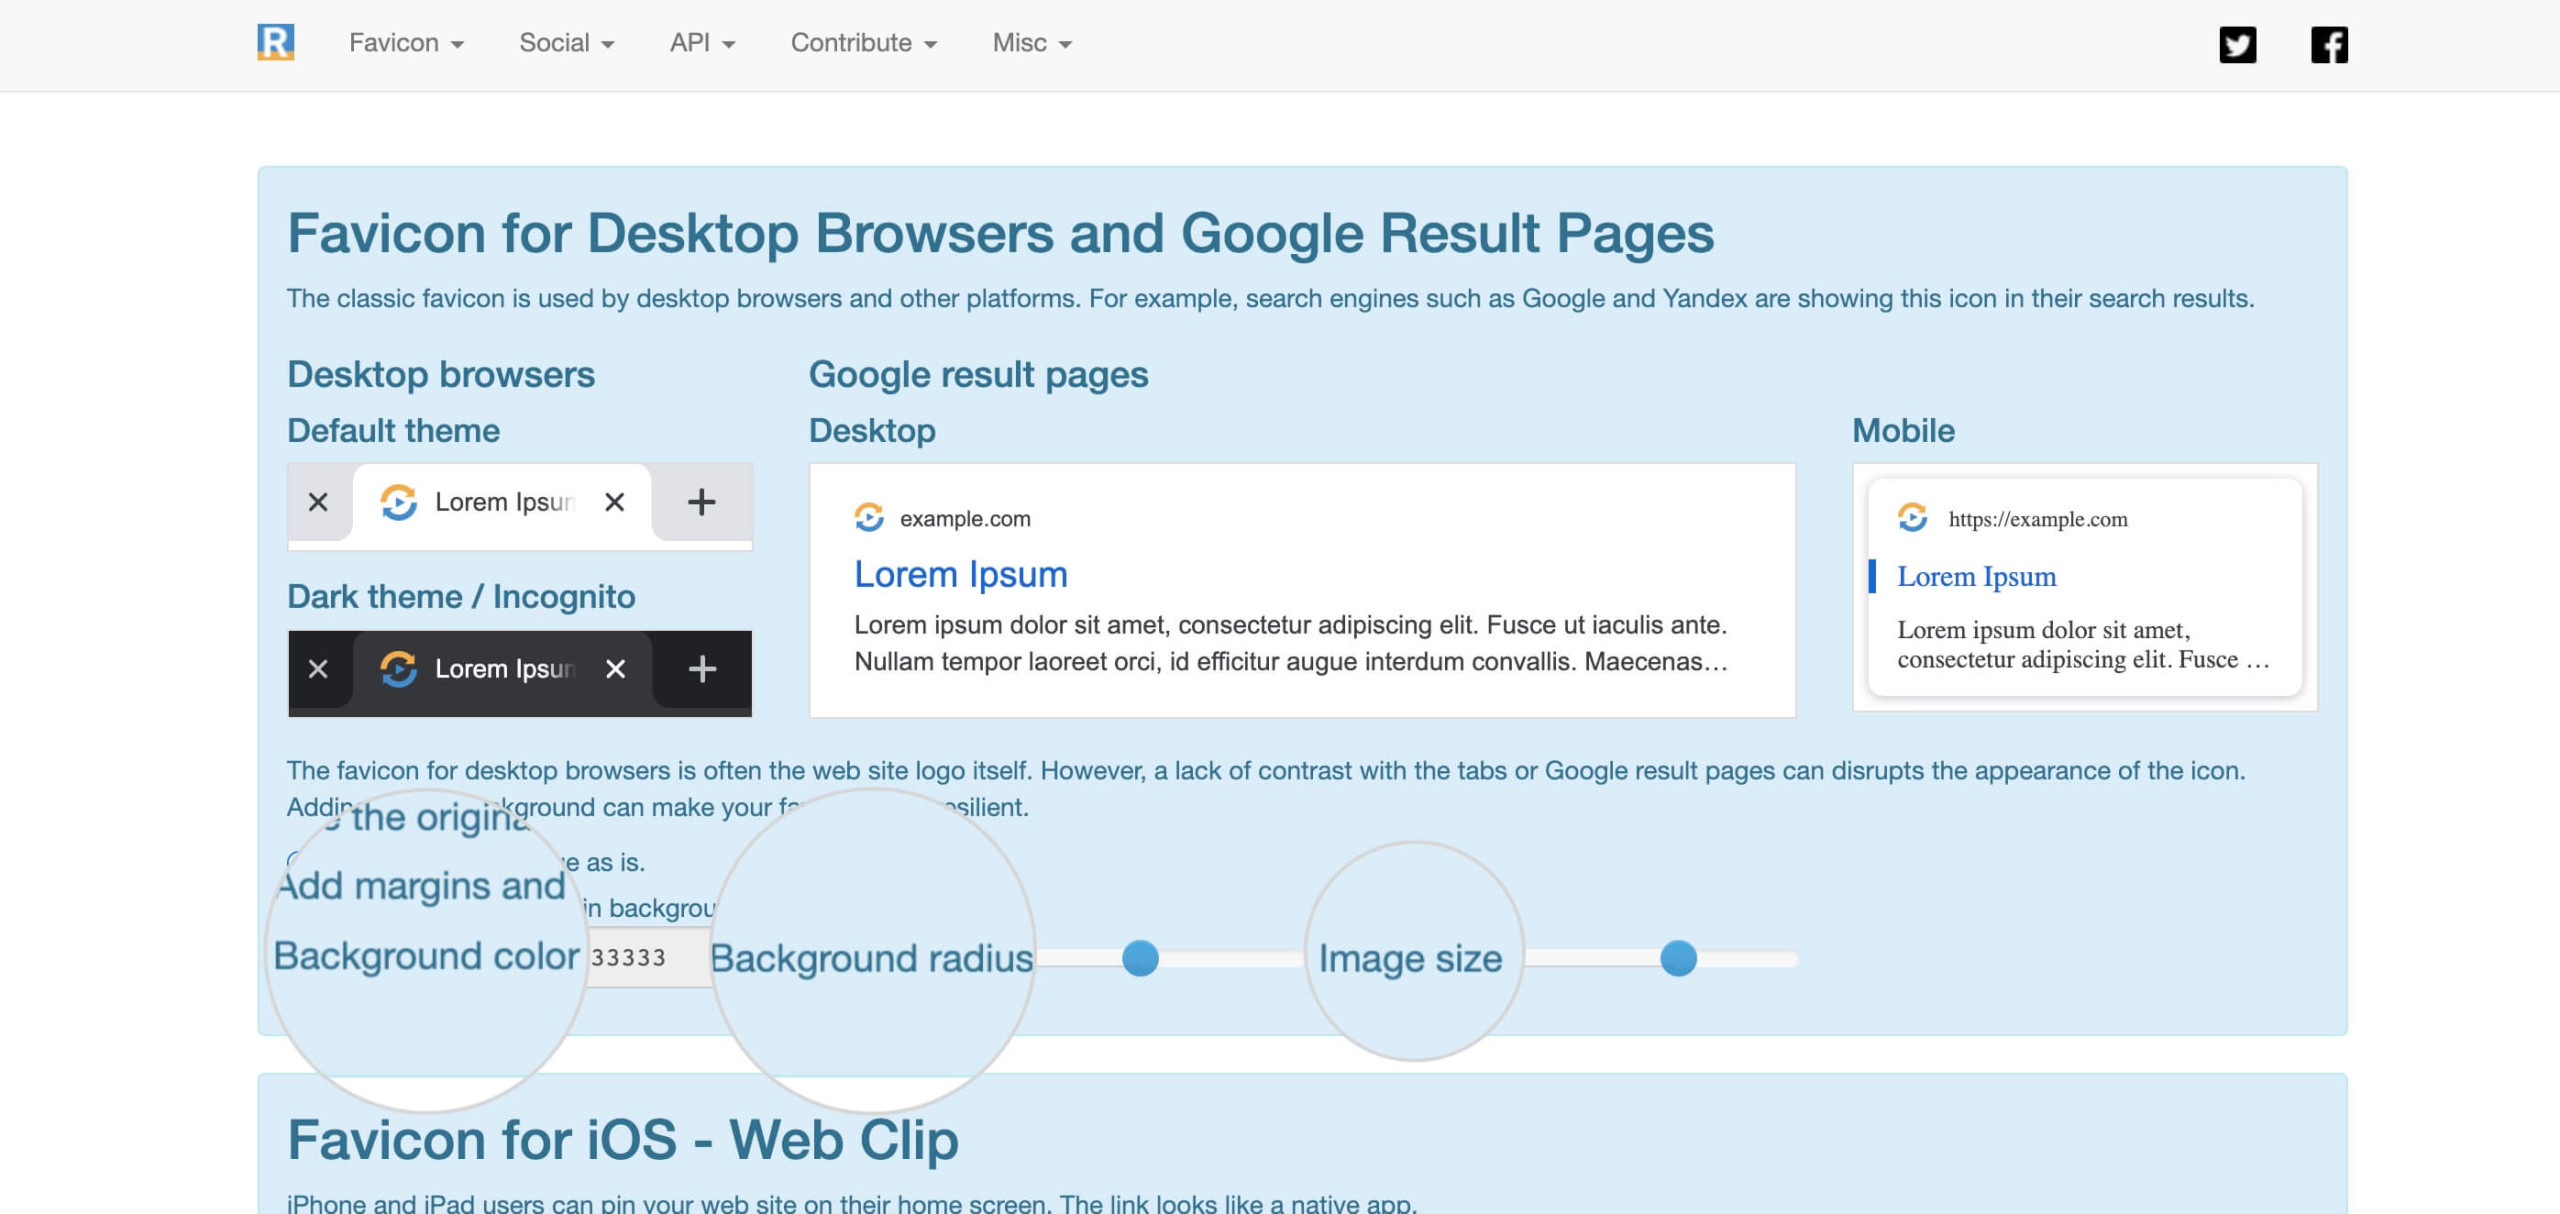
- That will forward you to the RealFaviconGenerator website. The tool allows you to choose WordPress icon fonts and sizes. You can also modify how it looks on Google Search Results pages, desktop web browsers, and mobile browsers like Chrome browser or Safari.
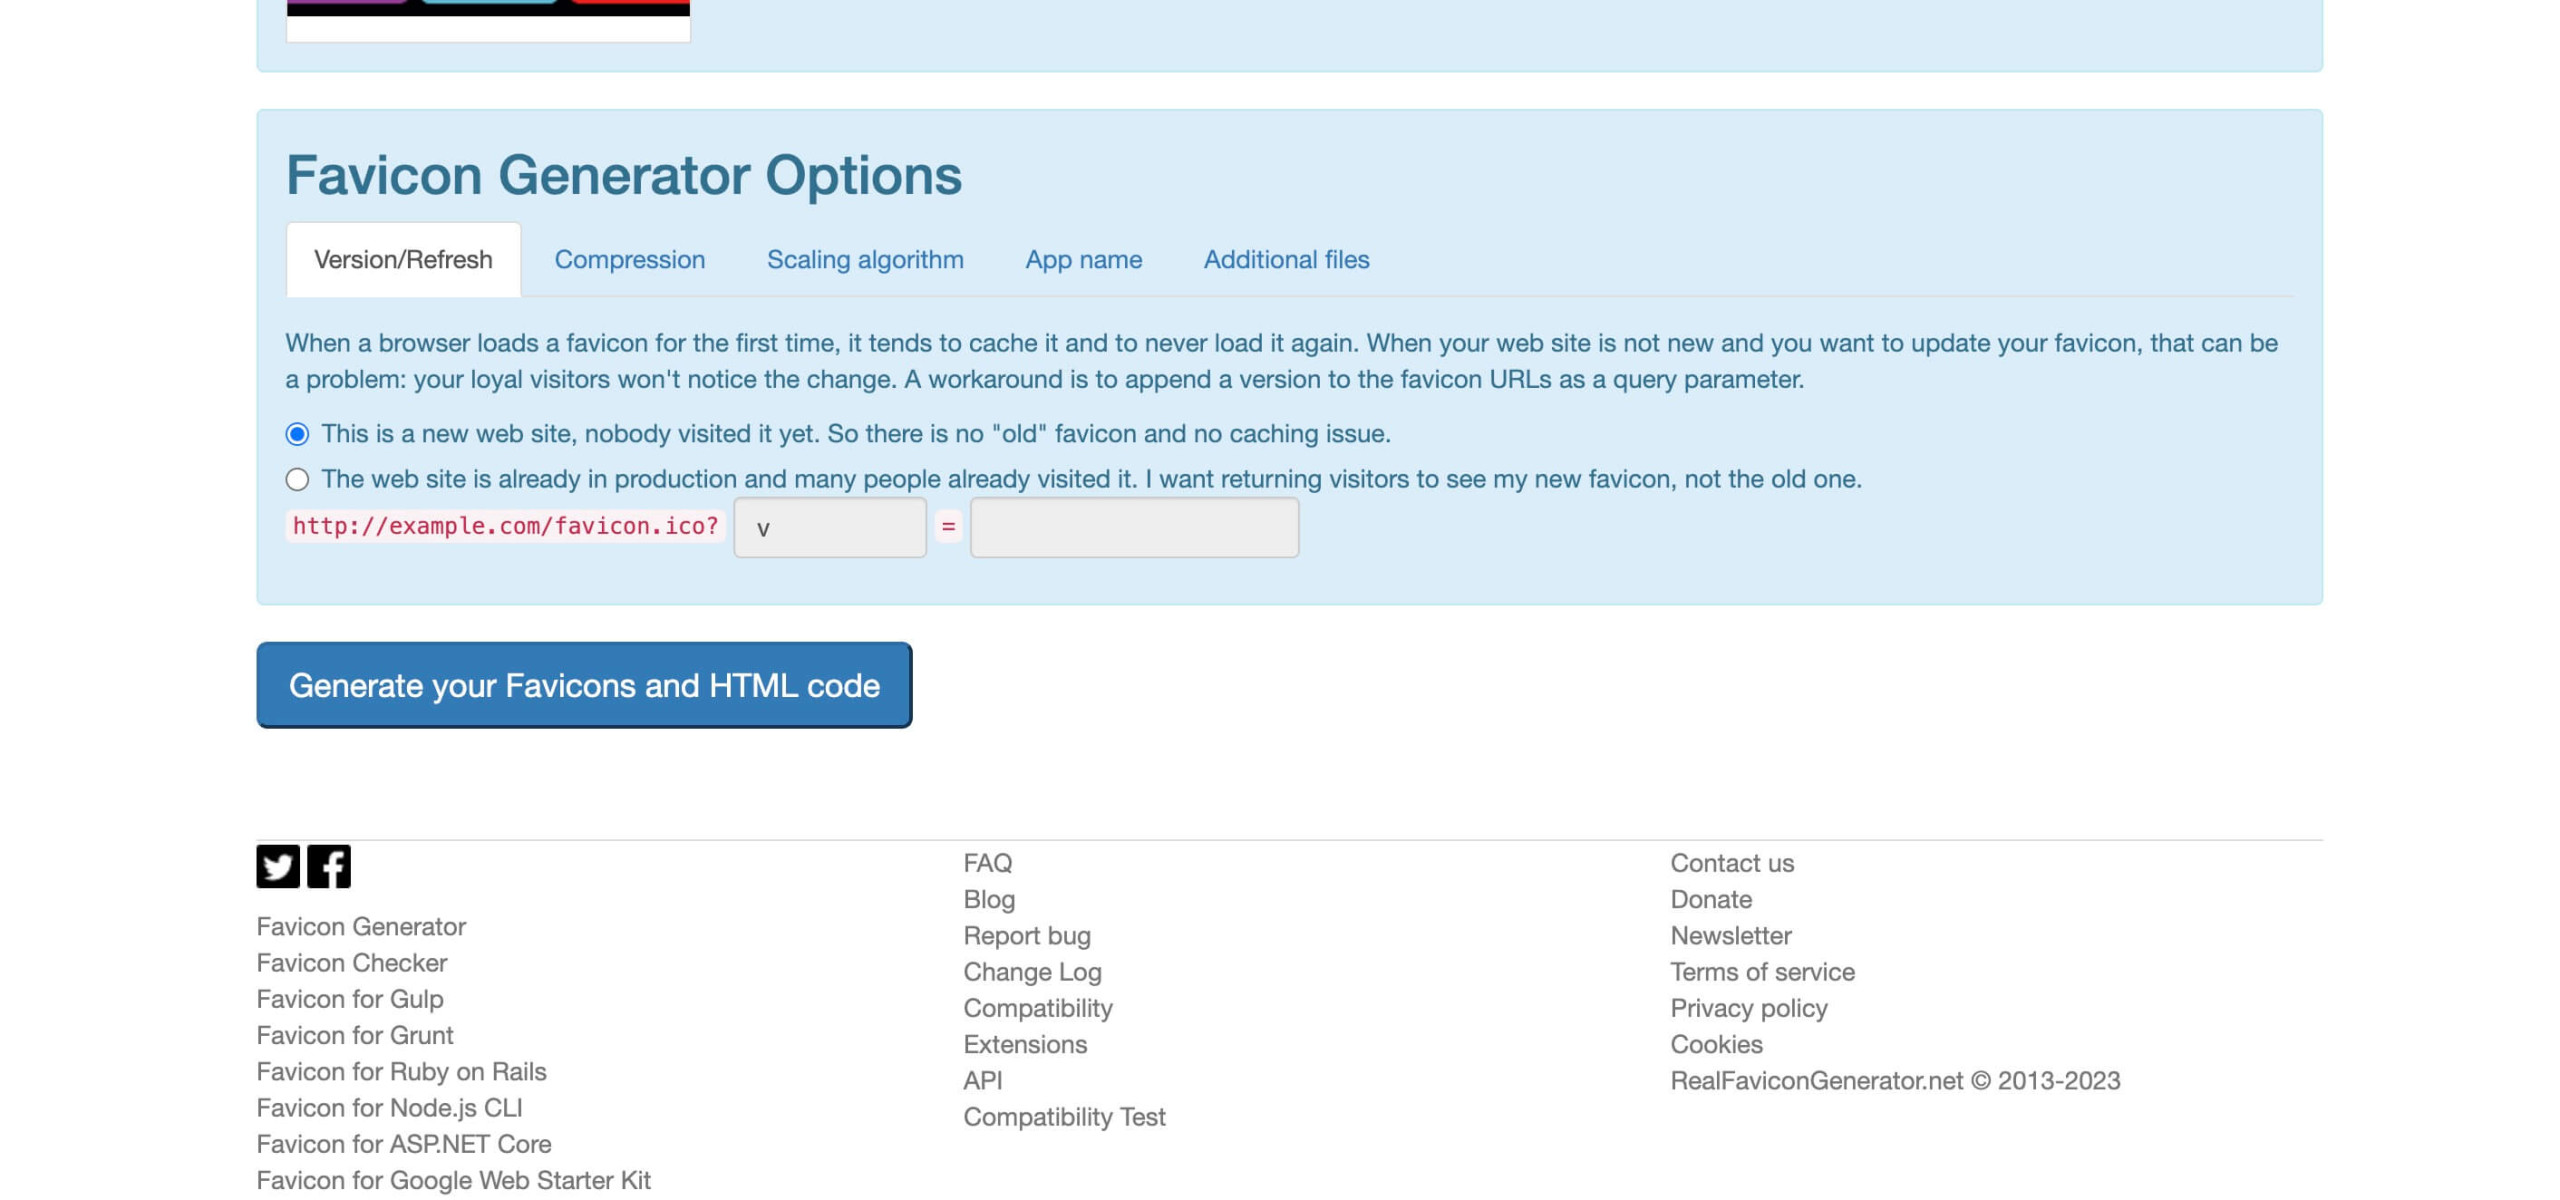
- Scroll down to the Favicon Generator Options and specify if that’s the first favicon package for your site or the favicon version if you are changing an existing one.
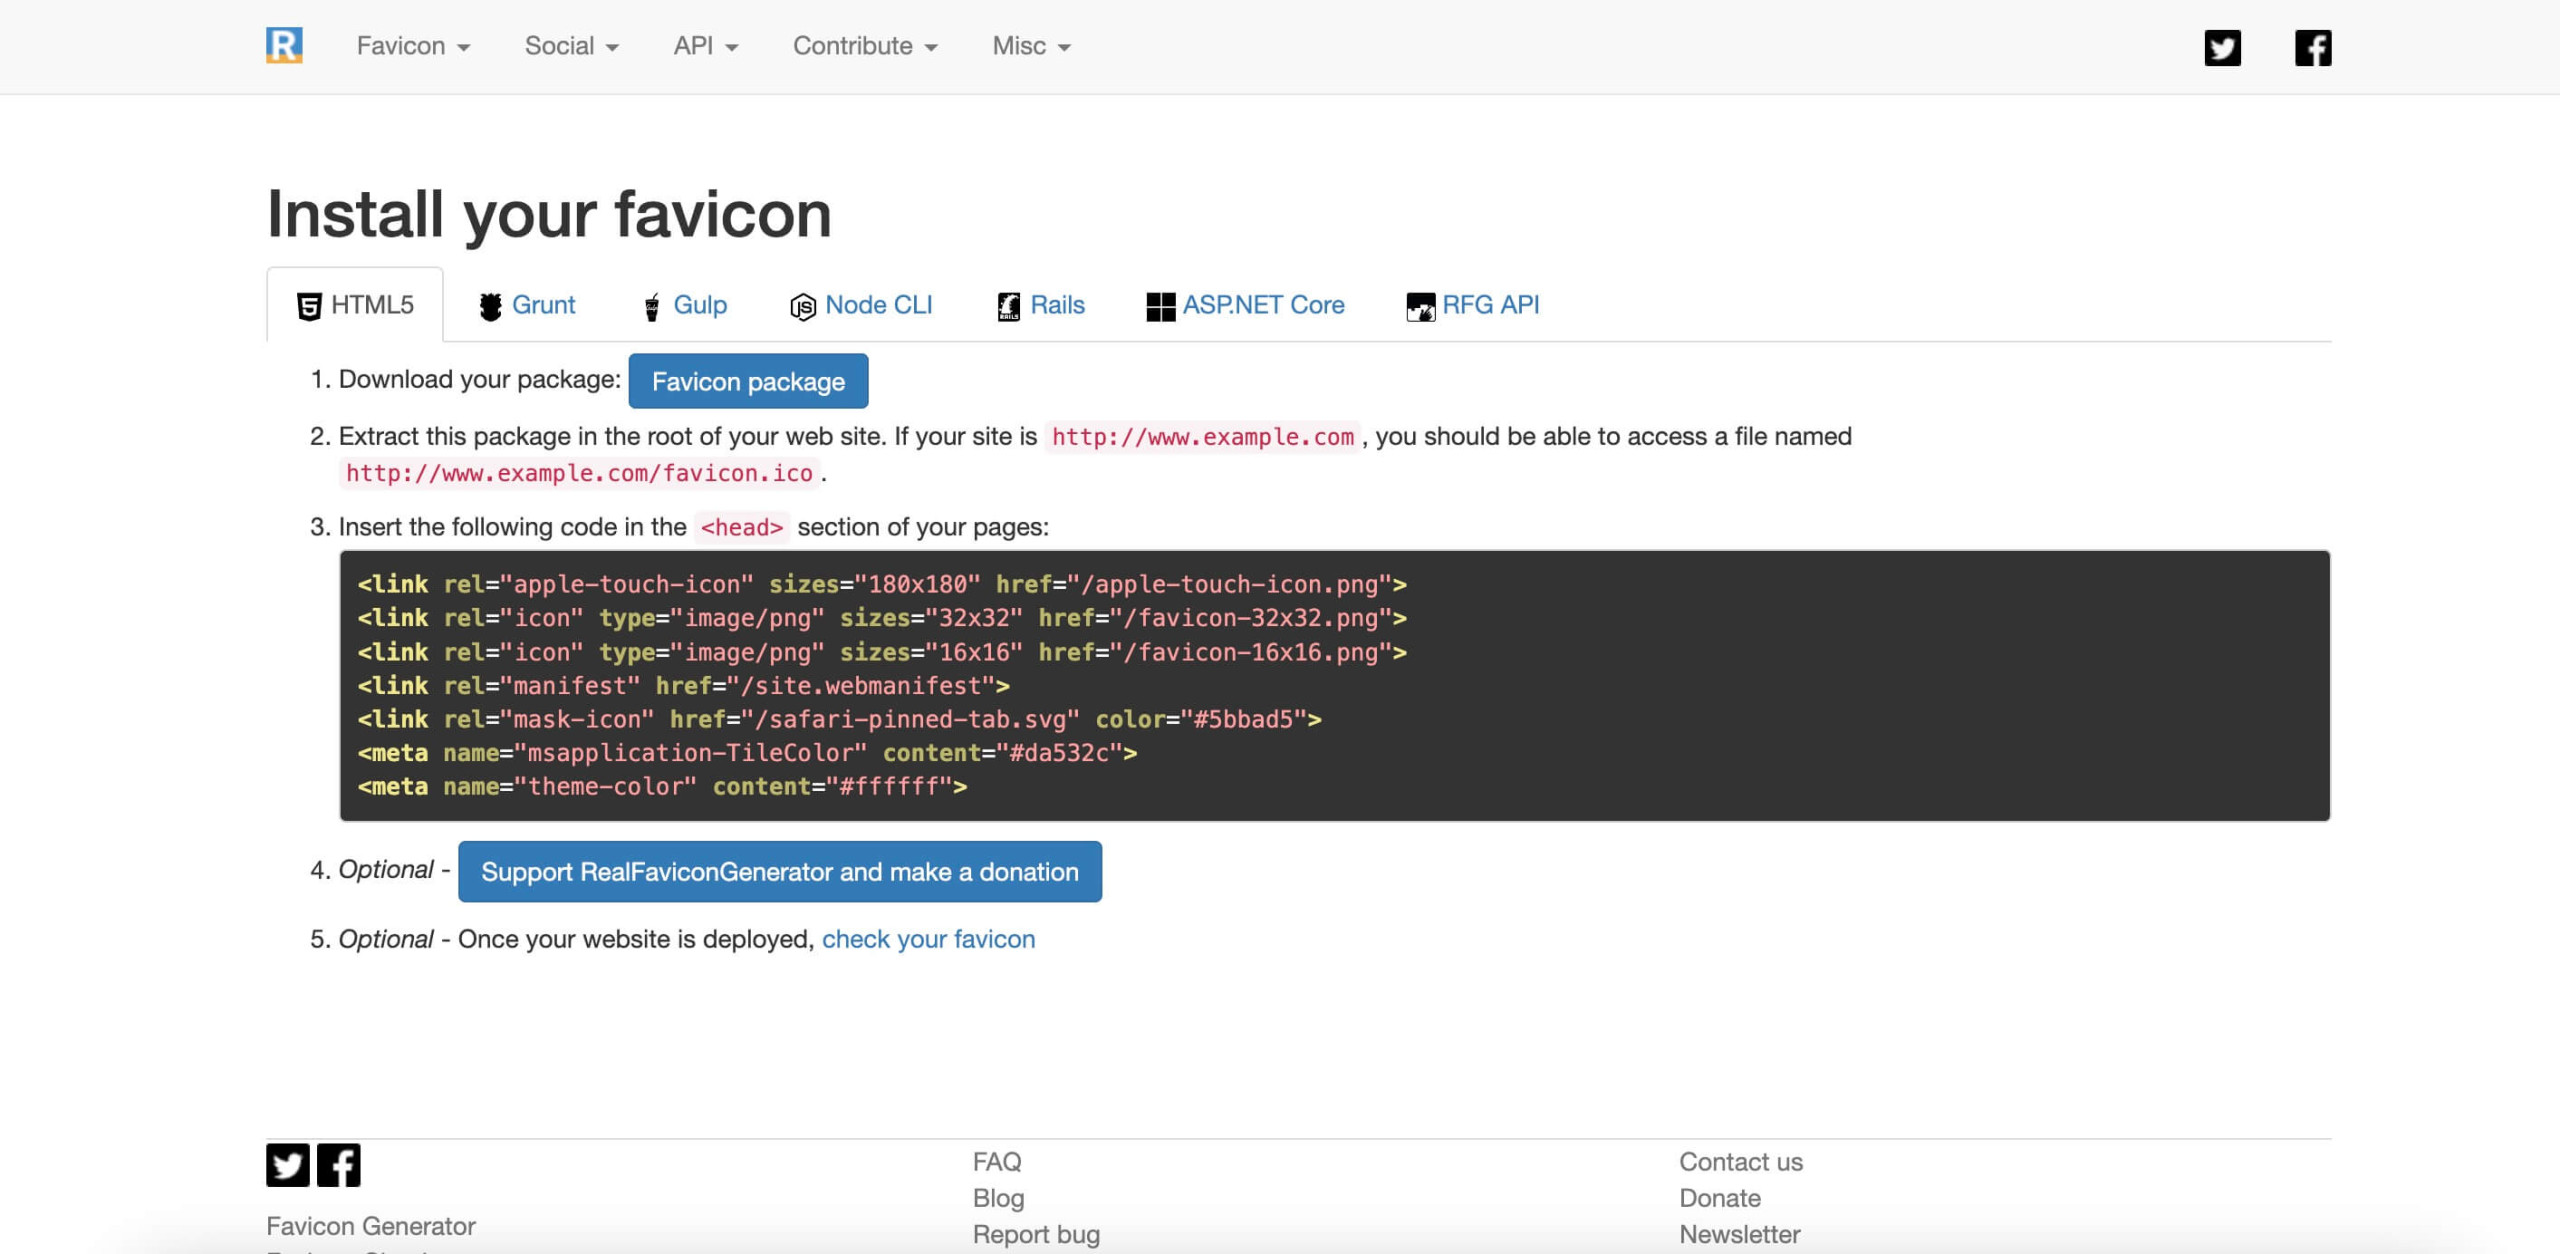
- Hit the Generate your Favicons and HTML code button.
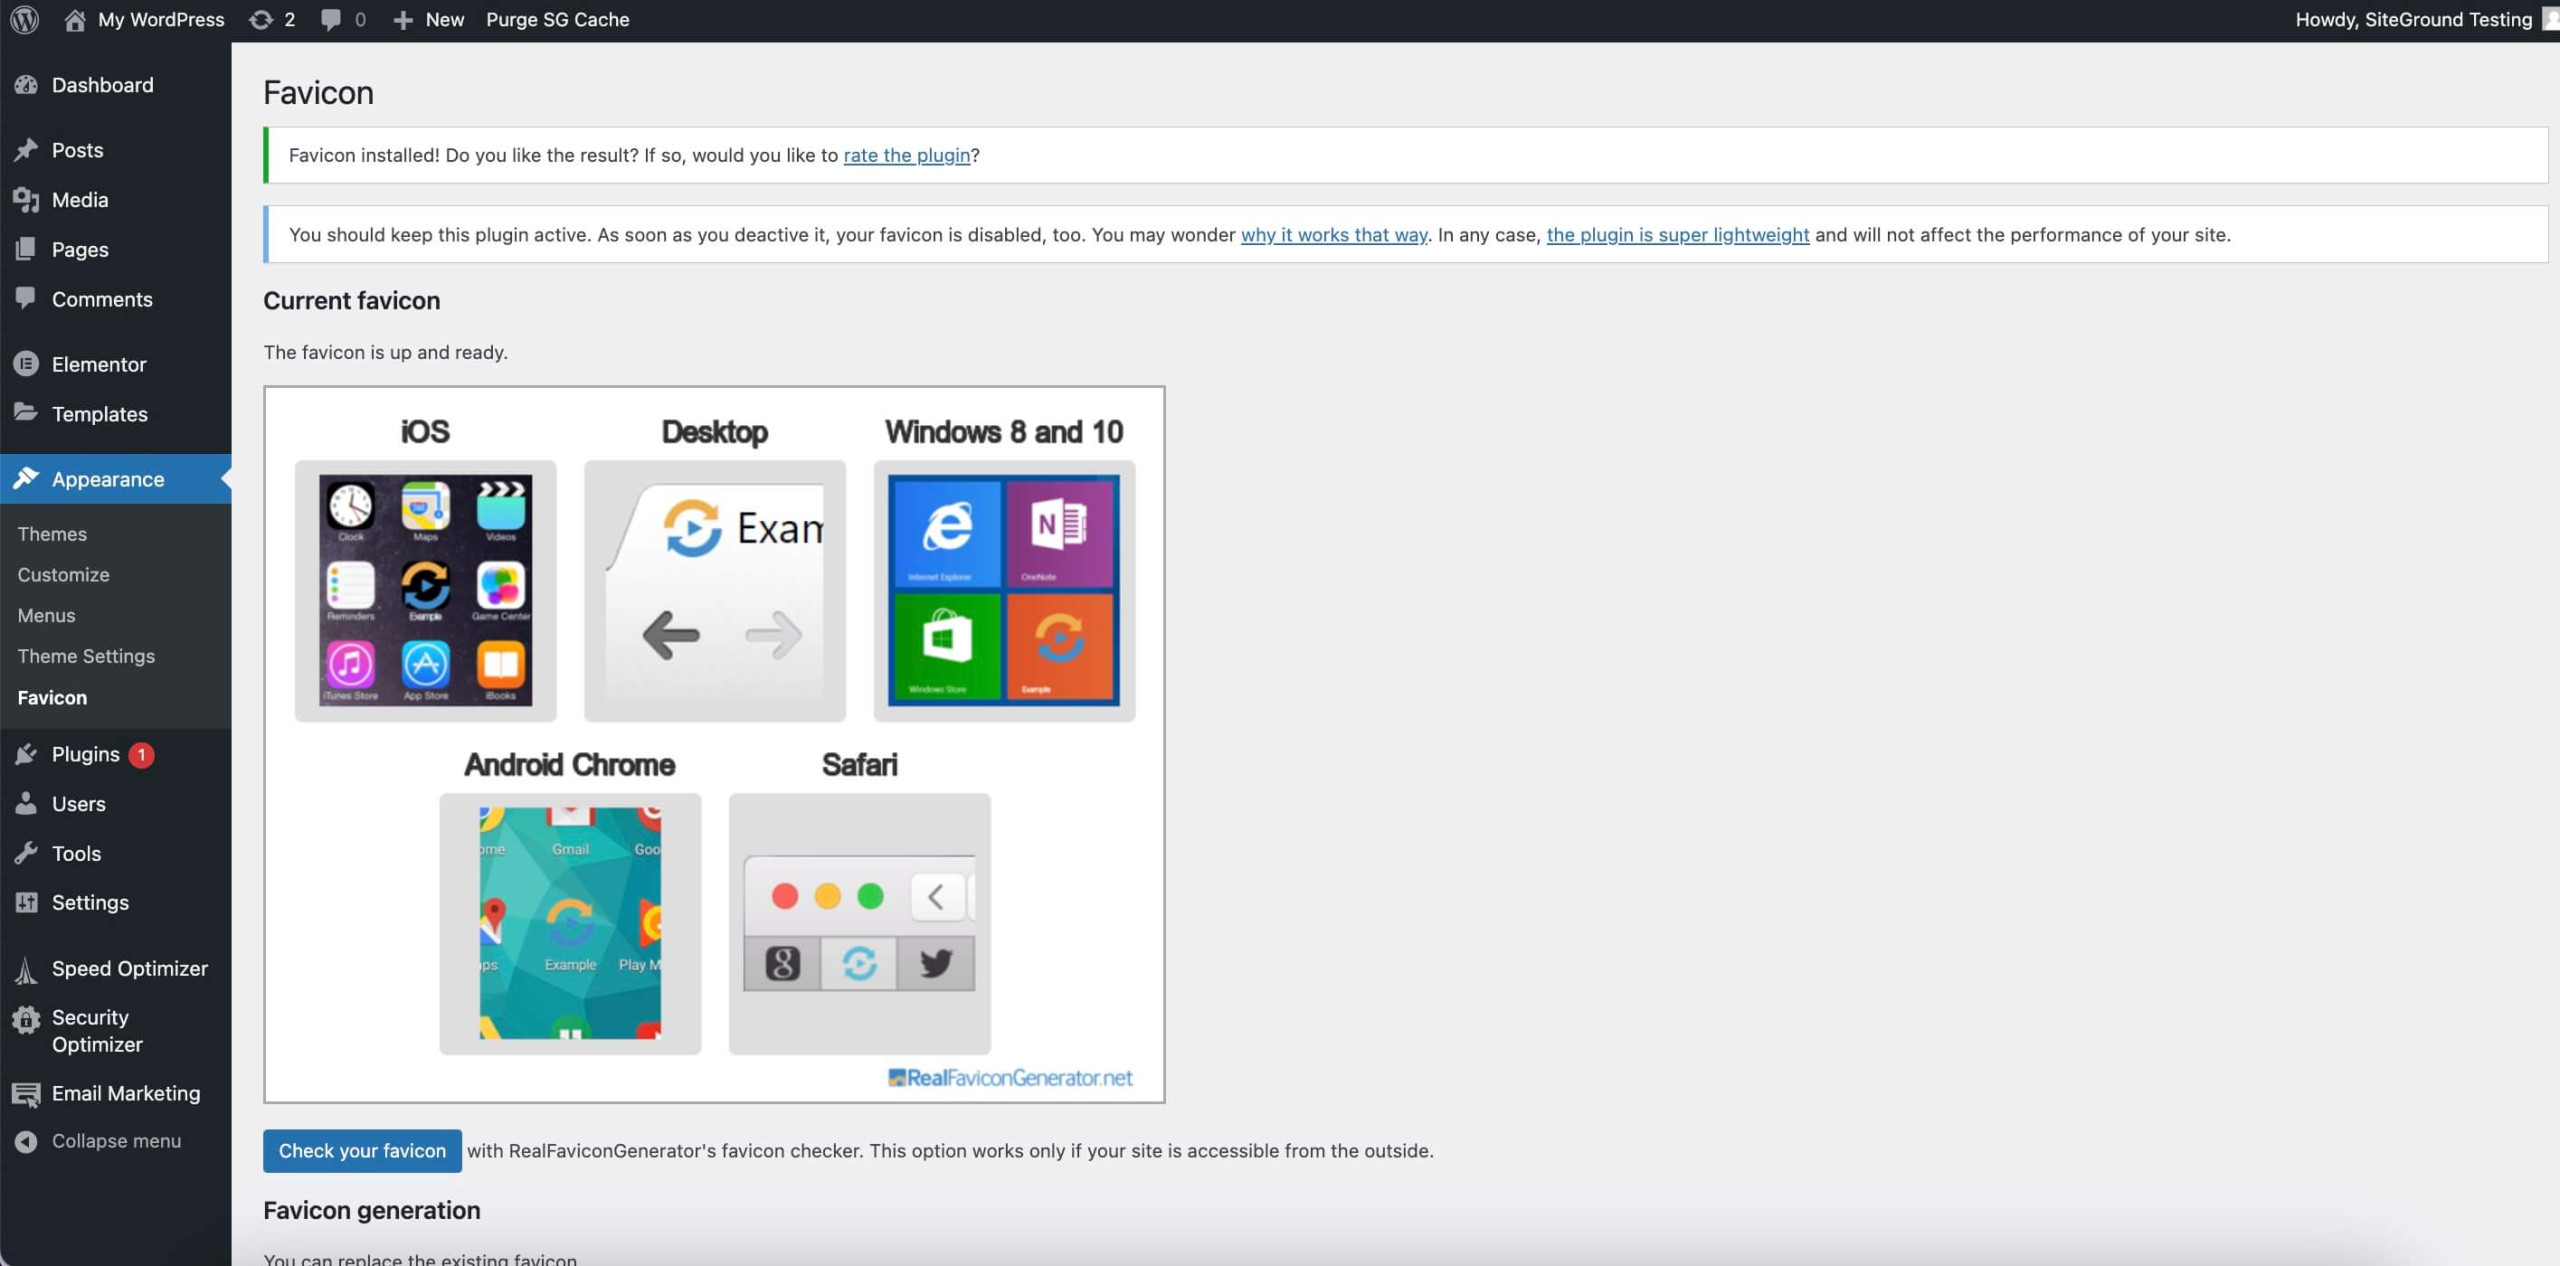
- The plugin will generate and install the Favicon files on your site, showing a “Favicon is installed!” message on your dashboard.
With Real Favicon Generator, you ensure your favicon will look sharp and professional, whether viewed on a desktop browser, a mobile device, or even as an app icon.
Remember that the plugin must remain active on your site to guarantee your favicon is always active. This contributes to a cohesive brand image that users will recognize and trust.
4. Manually adding a favicon to your WordPress website
This approach is suitable if your theme settings don’t include a Site Identity tab or just prefer to go the manual way.
To add a favicon manually, follow the steps below:
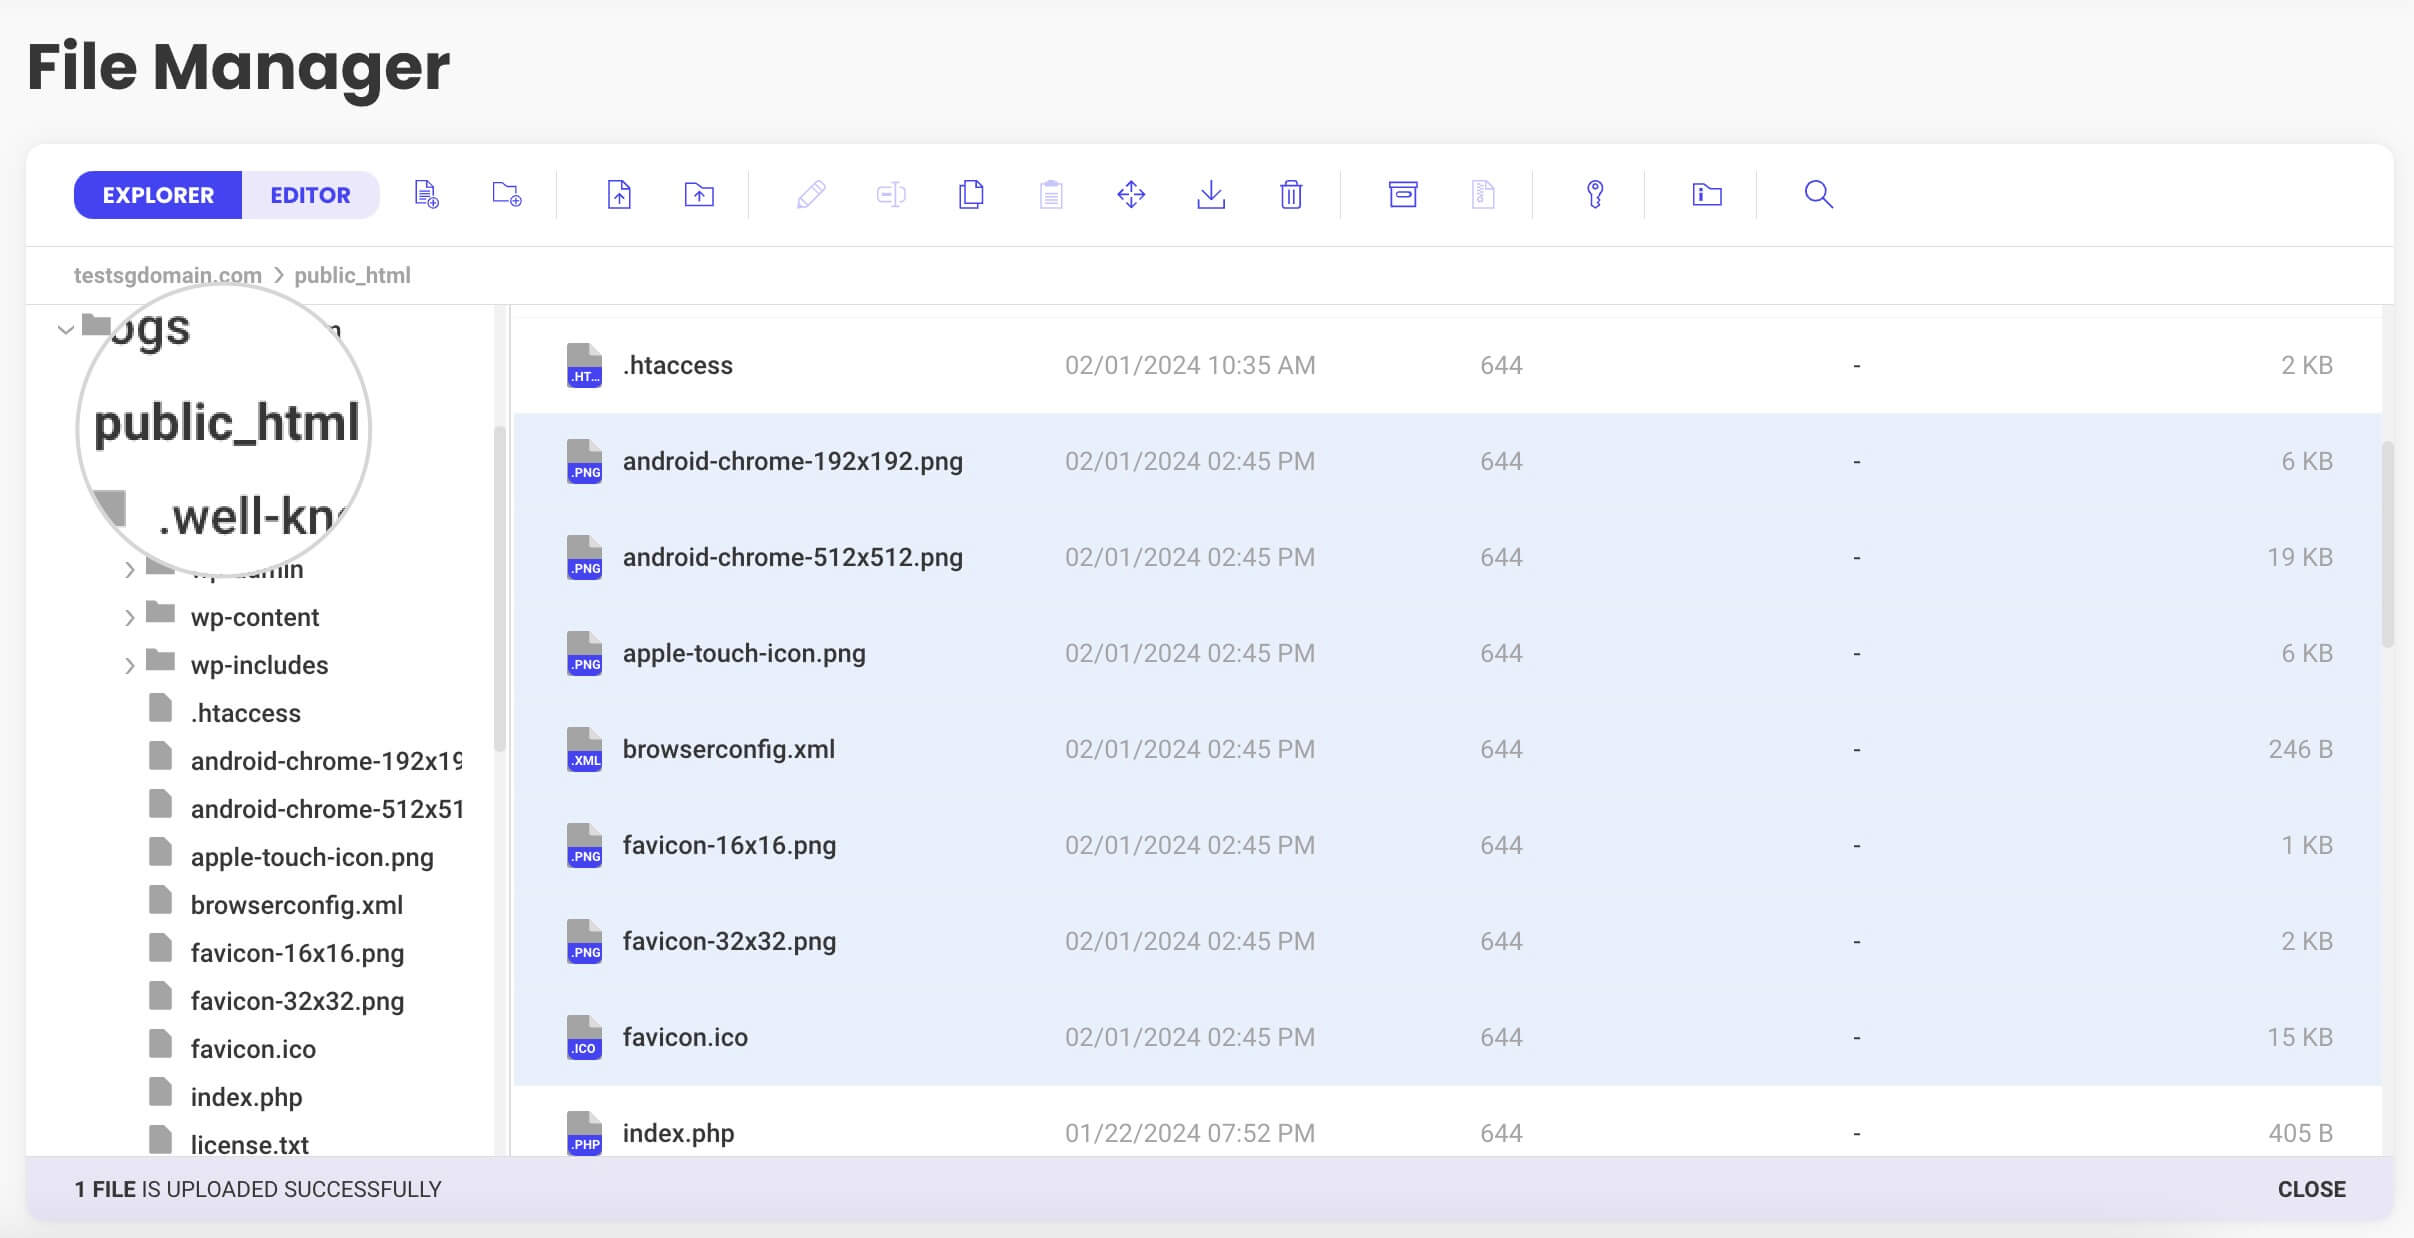
- Create a site icon and get your zip favicon package that contains all ico files.
- Upload its contents to your site’s root directory. You can use an FTP client or your web hosting control panel’s File manager. The root directory is usually public_html. That’s the same folder where you can find WordPress folders like wp-content and wp-admin.
- Next, you must add your favicon code to your WordPress so that browsers know where to find the favicon. Edit the header.php file of your theme files via FTP or File Manager.
-
- Insert the following line of code within the <head> section of your header.php file:
link rel="icon" href="http://www.yourdomain.com/favicon.ico" type="image/x-icon"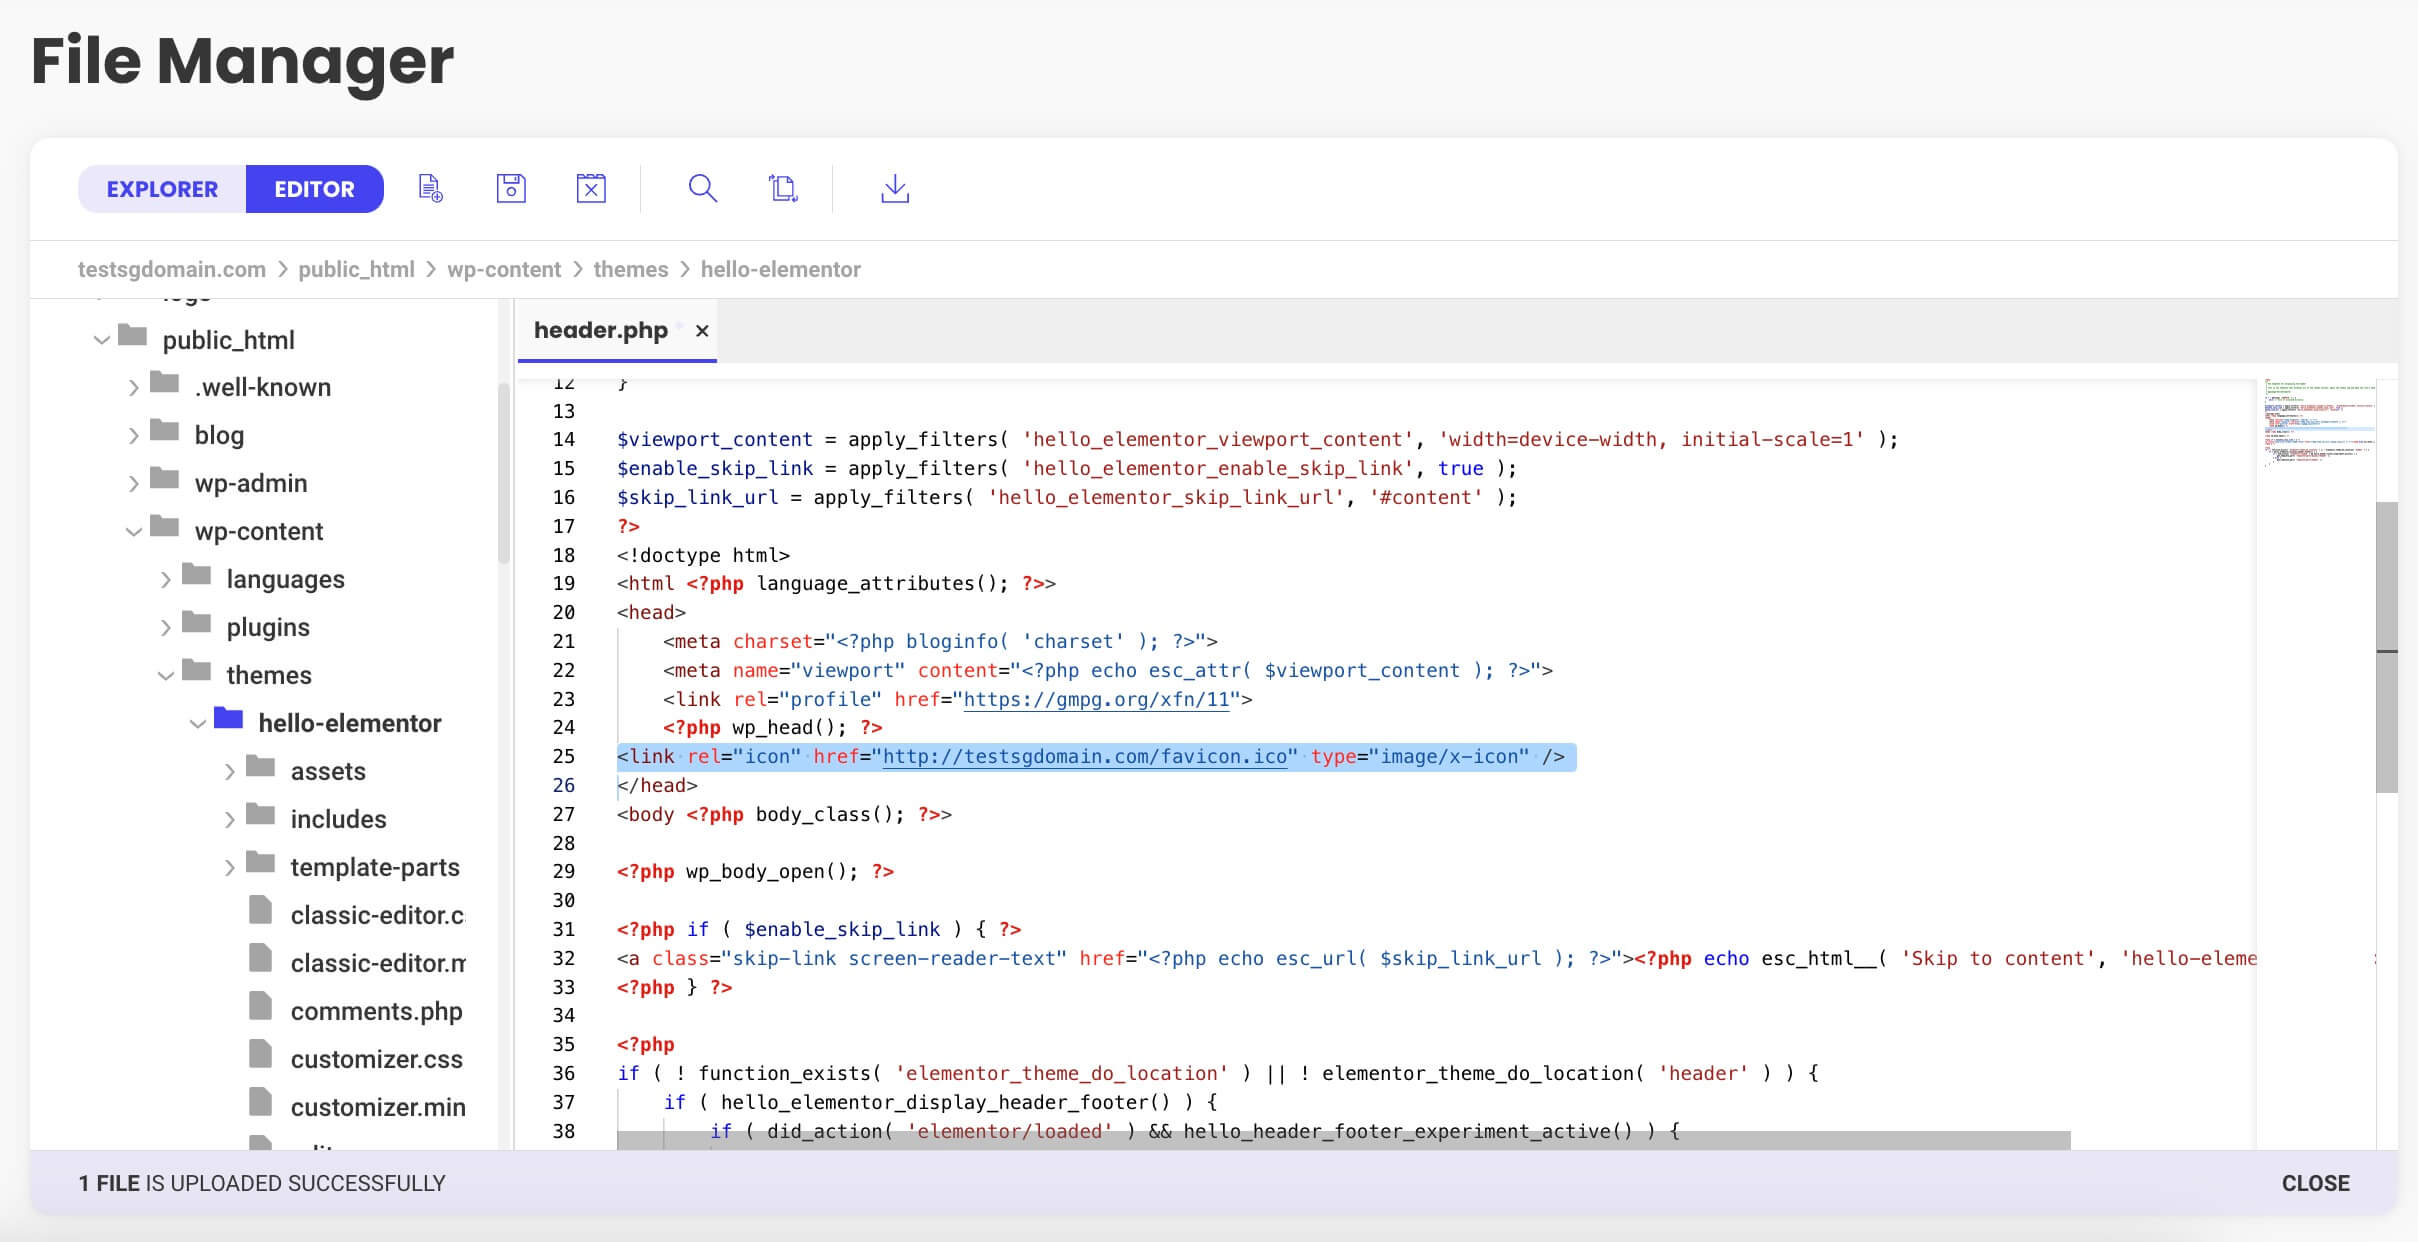
- Save the changes to the header.php file.
That’s all! Now you know 4 different ways to add a favicon in WordPress.
How to remove a Favicon in WordPress?
You haven’t created your logo or favicon icon yet, but you want to remove the default WordPress favicon? Or maybe you’re making branding changes and revamping your site? Whatever the reason, read on to learn how to delete an existing favicon image
To remove a favicon from your WordPress site, follow these steps:
- Go to your WordPress dashboard.
- Click on Appearance > Customize.
- Find the Site Identity tab
- Scroll down to the Site Icon option.
- Click Remove or clear the existing image file set as the favicon.
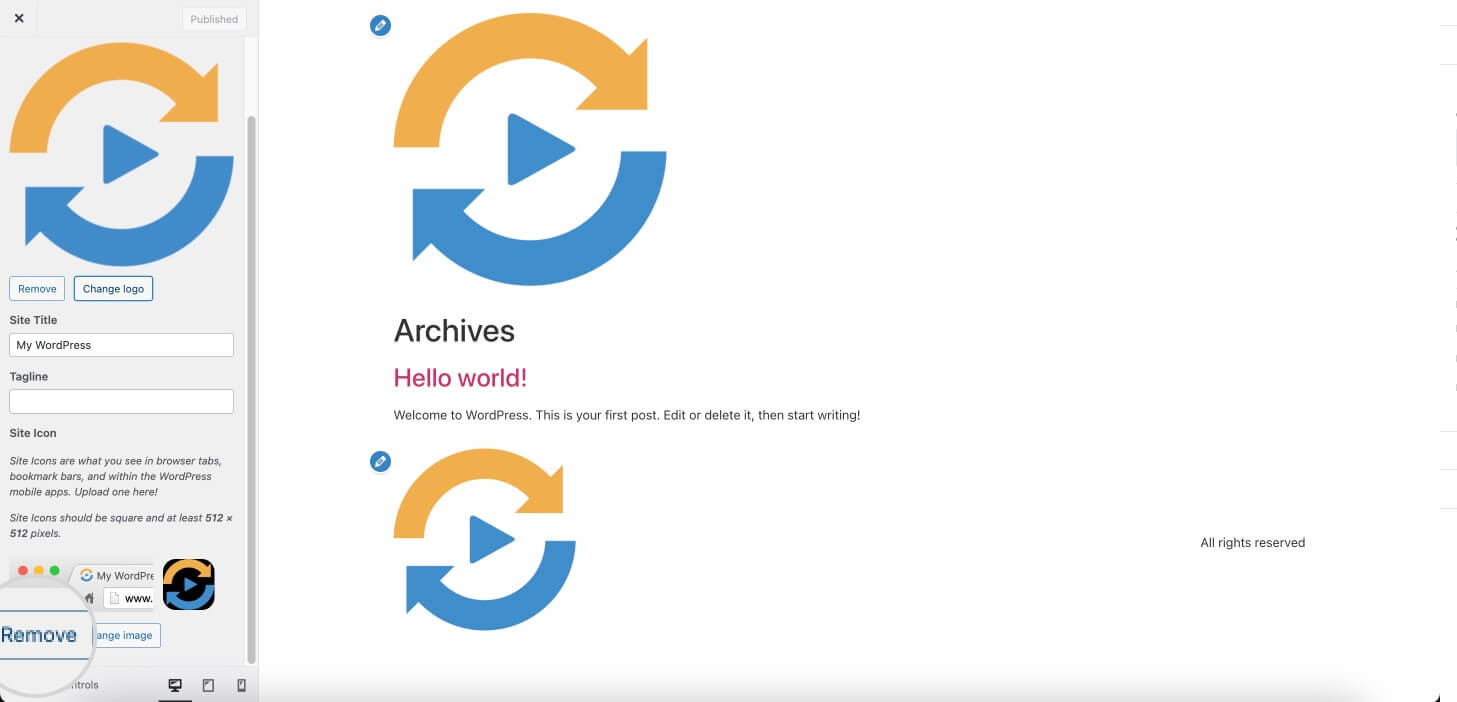
- Don’t forget to save your changes by clicking Publish.
That’s it! Your WordPress favicon is now removed, and you can add a new one if that’s your goal.
How to create a Favicon?
Creating a favicon can be quick and easy, especially with web tools like the RealFaviconGenerator.
Here’s a condensed guide:
- Design Your Icon. Craft a simple, clear design. Start with a square image (512×512 pixels is ideal) representing your brand, like a simplified logo. You can use various tools like Adobe Photoshop, GIMP, or Canva.
- Go to the realfavicongenerator web tool and upload your image.
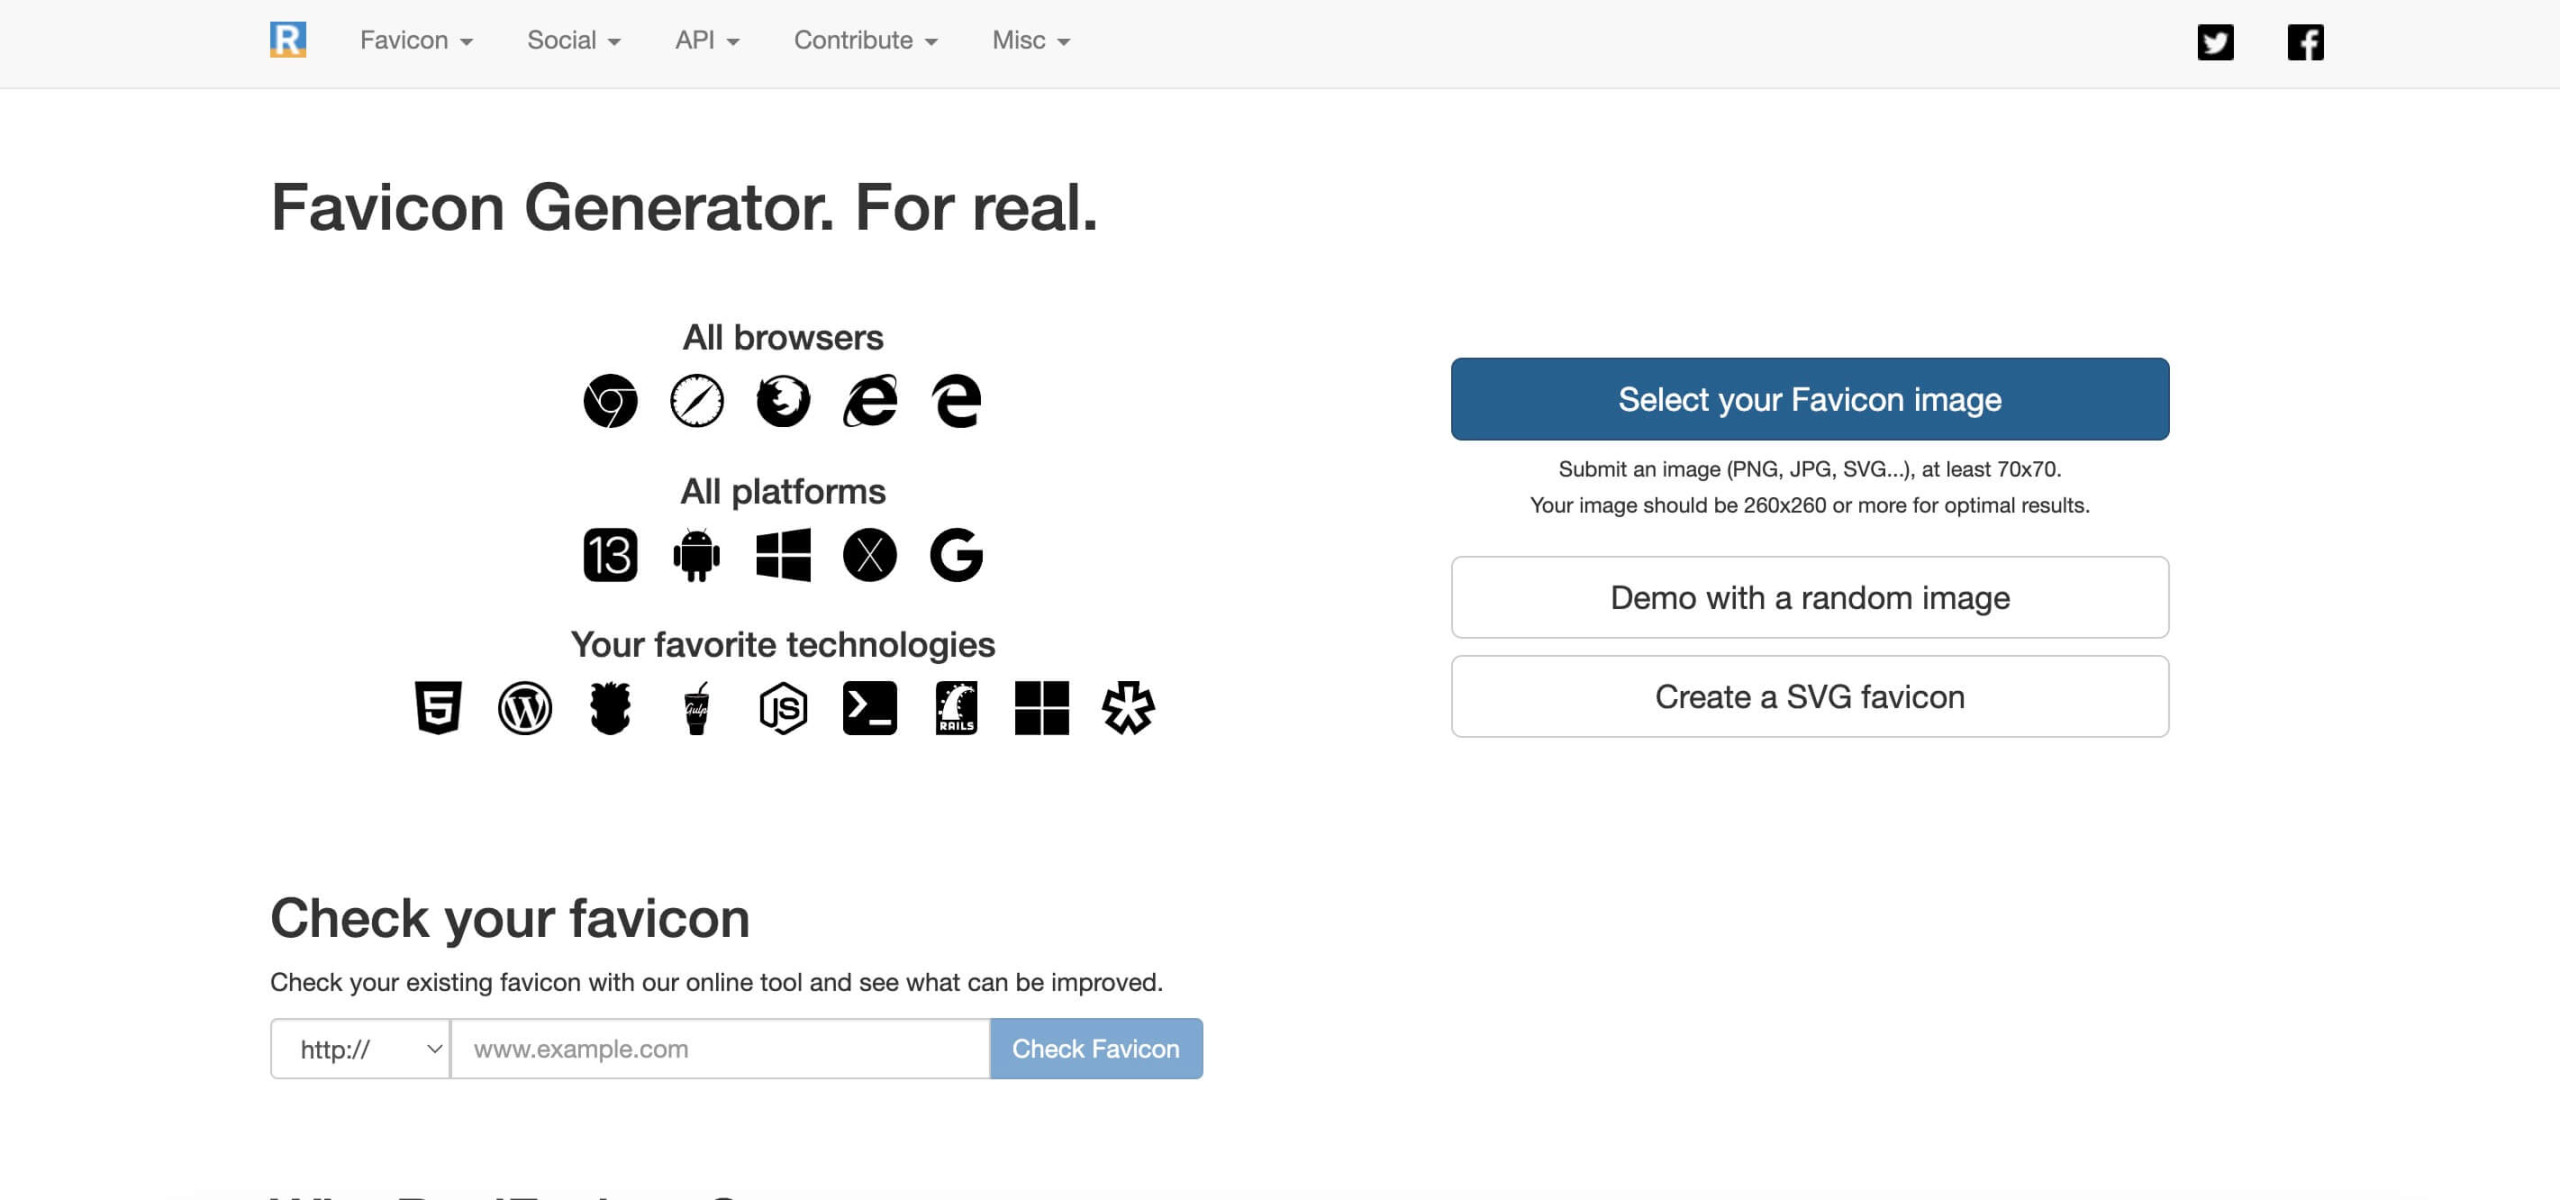
- Get your Favicon package and HTML code and proceed with the Manual upload method
- Alternatively, install the RealFaviconGenerator plugin on your WordPress site. It will help you convert your image into .ico format. Also, it will assist in implementing your design across all platforms and devices without manually creating different sizes.
- Upload and Generate. Through the plugin’s interface, upload your design. The RealFaviconGenerator will automatically create the necessary favicon files and HTML code.
- Publish. Save your changes within the plugin and add the HTML code to your header.php. Then, your new favicon will be live, providing a consistent brand experience for all your visitors.
Favicon image Size & Guidelines
When creating a favicon, make sure your image is a square with dimensions of at least 512×512 pixels. Opt for saving it in PNG or SVG formats for their broad browser support and scalability.
Here’s how to craft an effective favicon:
- Simplicity is Key: A clean and straightforward design will be most effective with limited space.
- Brand Representation: Your favicon should clearly reflect your brand. If your logo isn’t square, adapt it to fit the favicon format without losing its essence.
- Minimal or No Text: Avoid using text unless it’s part of your brand’s identity. If it’s necessary, use as few characters as possible.
- Color Considerations: Choose colors that pop against different browser backgrounds, including white, gray, and black, to ensure visibility in light and dark modes.
Your favicon should be easily recognizable to maintain brand continuity across various platforms and browsing environments.
The Role of a WordPress Site Icon in Brand Recognition
A site icon in WordPress plays a crucial role in brand recognition by visualizing your website across modern browsers and devices. This small yet significant graphic appears in the browser tab, bookmarks, history listings, and even when saved to a smartphone’s home screen. It offers a consistent and immediate identifier for your site amidst the many tabs and bookmarks a user may have open.
Adopting a unique and memorable favicon that aligns with your brand’s logo, colors, and identity establishes a more professional online presence. It enhances user experience and fosters brand familiarity. Each time a user encounters your WordPress favicon, it reinforces your brand’s image, making it essential to building trust and recognition in the digital space.