View This Article in BOSS Magazine
Diamond Pharmacy Services broadens the healthcare horizon for the digital age
There was a time when corner drugstores were neighborhood anchors, providing care, community, and the kind of customer service that made them seem indispensable. These days, independent pharmacies are losing ground to an array of challenges, such as the vagaries of operating in the digital world and fierce competition from sprawling retail chains, big box stores, and online providers.
In 1970, When Gilbert and Joan Zilner opened their first neighborhood pharmacy in Indiana, Pa., they couldn’t have seen today’s landscape, but given their current standing as the largest family-owned independent pharmacies in the nation it’s tempting to think they had an incredible crystal ball.
Diamond Pharmacy Services is on the forefront of progress in the sector with a unique digital health platform that’s transforming the very concept of the independently owned pharmacy. With the ability to service all 50 states, this innovator is the nation’s largest correctional facility provider, Pennsylvania’s largest family-owned nursing home provider, and a leading provider of other specialty pharmacy and software services across the nation.
They’re also a managed services provider whose lines of business include retail mail order pharmacy services, patient healthcare portal software, drug wholesaling, kitting and packaging, and medical supplies. Through their SapphireHealth division, they’ve developed ecommerce sites, a direct-to-consumer retail platform, and an electronic health record program (EHR) for correctional facilities. They serve approximately one third of the country’s inmate population and fill over 16 million prescriptions per year.
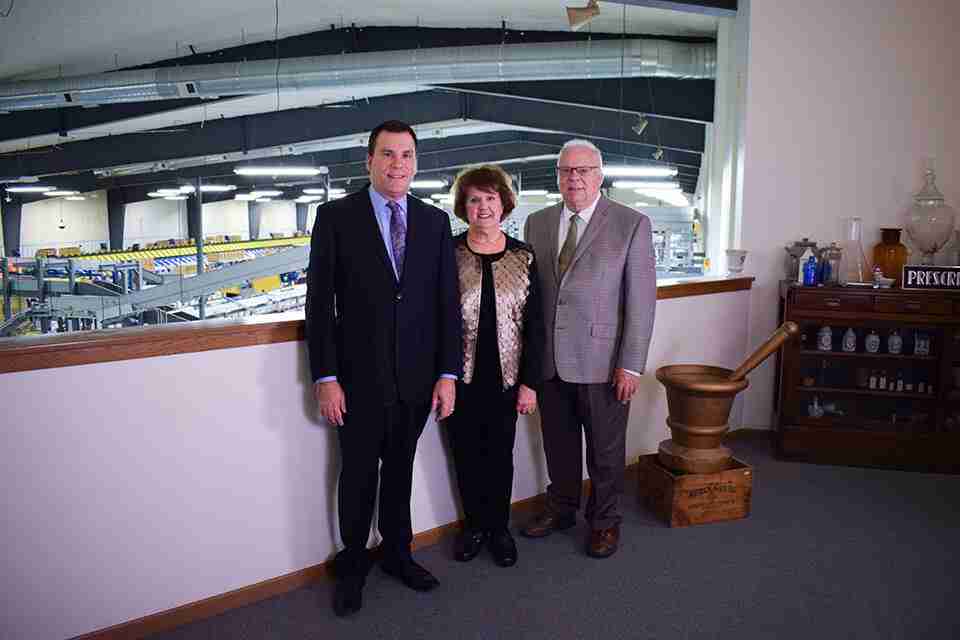
“My father was very innovative. He would always put the customer first and created services before anyone else was even thinking about it,” said Diamond’s CEO, Mark Zilner, R.Ph. Gib, as his father was known, inspired Mark to become a pharmacist. “I worked around the pharmacy and watched him spend time with patients, explaining their medications to them. … I saw how he made a difference in people's lives and decided I wanted to enter the profession.”
Together with his pharmacist parents Gib and Joan, Mark helped to propel Diamond nationwide. When they purchased a typical corner drug store in 1970, Gib came up with a plan to service the area’s nursing homes.
“That was unheard of at the time. Most often family members picked up the medications at the pharmacy for their loved ones,” Mark explained. “My father was a leader in providing delivery, the compliance packaging, and the printed medical administration records to the facilities.”
When Gib bought Diamond’s first fax machine so his nursing home customers could transmit their prescriptions directly to the pharmacy, their response was, “What’s a fax machine?”
Pass the success, please
A conversation over Thanksgiving dinner led to their development of Diamond’s largest line of business, providing correctional facility services. A guest mentioned that the Pennsylvania Department of Corrections was closing the in-house pharmacies they operated and suggested that the Zilners take advantage of the opportunity. “My father said, ‘I don't know anything about corrections,’ and the warden said, ‘No one does because we've always done our own.’ We bid on it and won, and that was our start into this space over 40 years ago,” Zilner recalled.
That led them to a number of other healthcare groups and facilities. “We started out as a regional provider and in the late ’80s we decided to expand nationwide.”
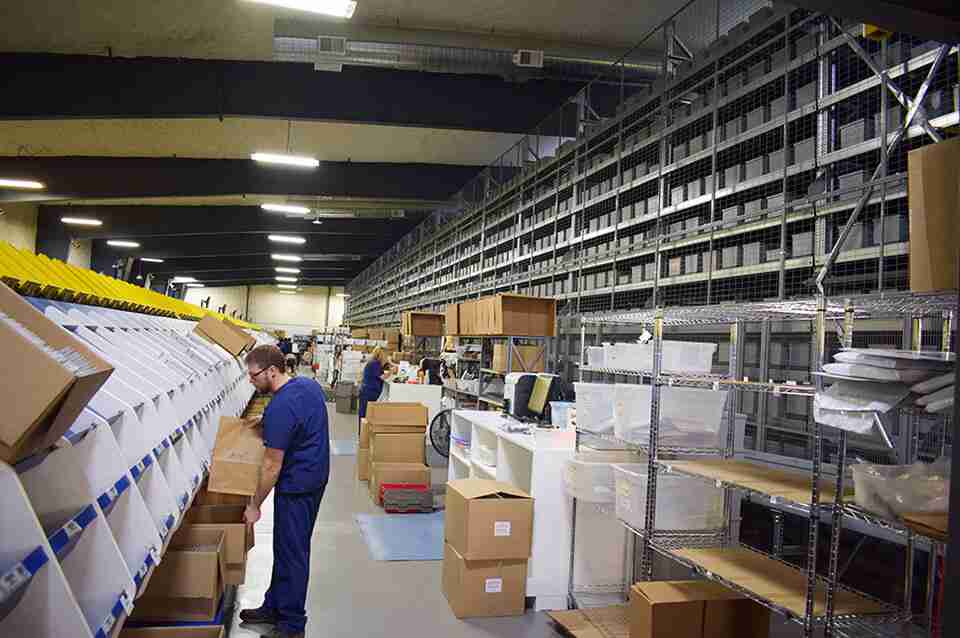
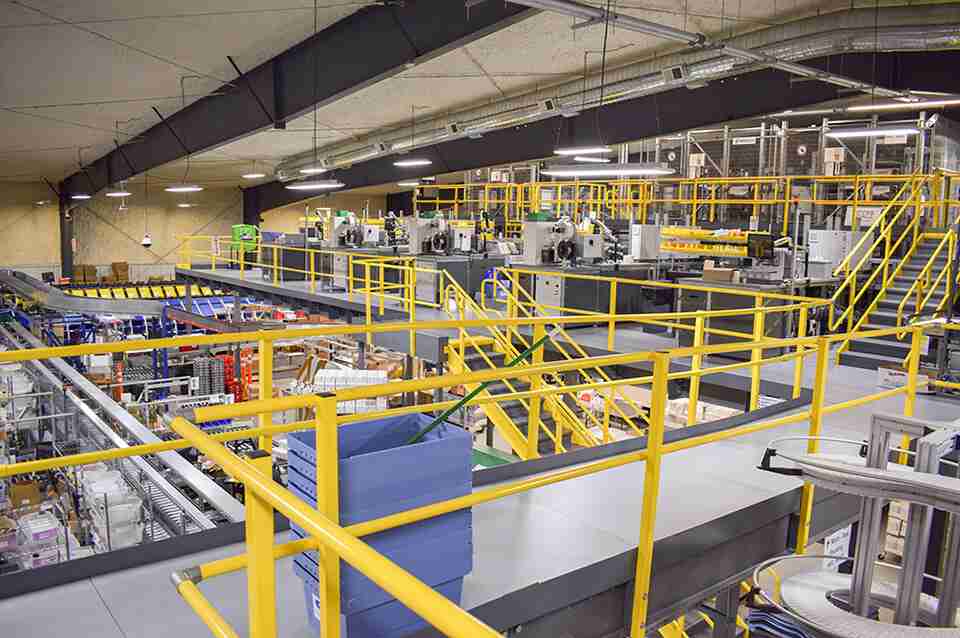
Servicing institutional customers is a complex proposition, particularly in corrections. Fast turnaround times necessitate next-day air medication deliveries, for example. “We typically provide compliance packaging so nurses can account for doses and dispense medication more conveniently,” he said, noting that Diamond supplies carts for medication storage as well. Diamond provides specialty software so nurses can order medications or use the company’s EHR to fully manage the healthcare needs of the patients in their institution.Diamond works closely with healthcare groups as well as state and county officials to design cost effective drug formularies that help reduce costs while providing the patient with the best possible outcomes. “We meet with the staff on a regular basis, reviewing the usage in order to provide the best care in order to keep patients out of the hospital while managing the cost. We select the best outcome medications at the best price.”
In addition, Diamond has seen significant growth in the retail mail order space with its InnovaScript division and its quello division that provides patient and healthcare groups a front facing healthcare platform which offers a host of ancillary services, including mail order prescriptions and medical supplies, telemedicine, mail order laboratory services and remote patient monitoring (RPM) service to manage patients healthcare without leaving their home. With Diamond's telemedicine offering, patients can typically get a consultation within an hour. “The visits are cost-effective,” Zilner added. “In most cases, all of the components we offer are less expensive than patients' insurance plan copay.”
On the prescription side, Diamond is able to dispense a three-month supply typically for less than the cost of a one-month supply with an insurance plan copay. Cost-effective treatments, virtual doctor visits, and rapid, in-home mail-order laboratory services are potent differentiators.
Remote patient monitoring (RPM) is another Diamond advantage. They collaborate with a RPM company that oversees at home cost effective patient management programs including wearable products that monitor critical vital signs for recovering patients, such as temperature, oxygen, blood pressure, pulse, blood glucose levels as well as detecting when recovering patients are ready to have a drug relapse, eliminating the need for costly in home nursing services.
“We are working with different wearable companies to kit and supply their product directly to the patient so they can be monitored cost-effectively at home.” Diamond is also developing programs that will help patients better manage their particular disease state, using at home lab test results to recommend proper medication and nutritional needs, and will be working with grocers for their specific stores and offer employer healthcare plan-paid cash cards that cover these specific foods and over the counter products that their health conditions require.
“We're more than just a pharmacy. We are a pharmacy, technology company, and a healthcare solution provider. We have over 20 software developers that creating our own platforms. We've also developed software for other companies that have online portals for accessing specialty items such as wound care, eye drops, and erectile dysfunction medications,” he stressed. “Our quello product is a full digital healthcare platform that delivers quality, cost effective healthcare directly to patients home, this is an exciting time for us as we are seeing fast growth and benefiting patients and employer groups.
Diamond Pharmacy Services is the nation’s largest family-owned pharmacy, the nation’s largest correctional pharmacy provider and Pennsylvania’s largest independently owned long term care pharmacy. Founded in Indiana, Pa., in 1970 as a family-owned retail pharmacy, our business expanded greatly in the coming years thanks to a focus on customer service and competitive pricing. We entered the mail-order correctional pharmacy market in 1983 and in 2001 surpassed our competition to earn the “nation’s largest” status. We currently serve over 700,000 correctional patients in 48 states.
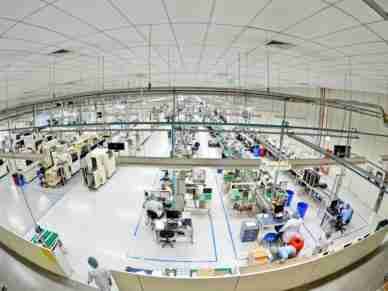
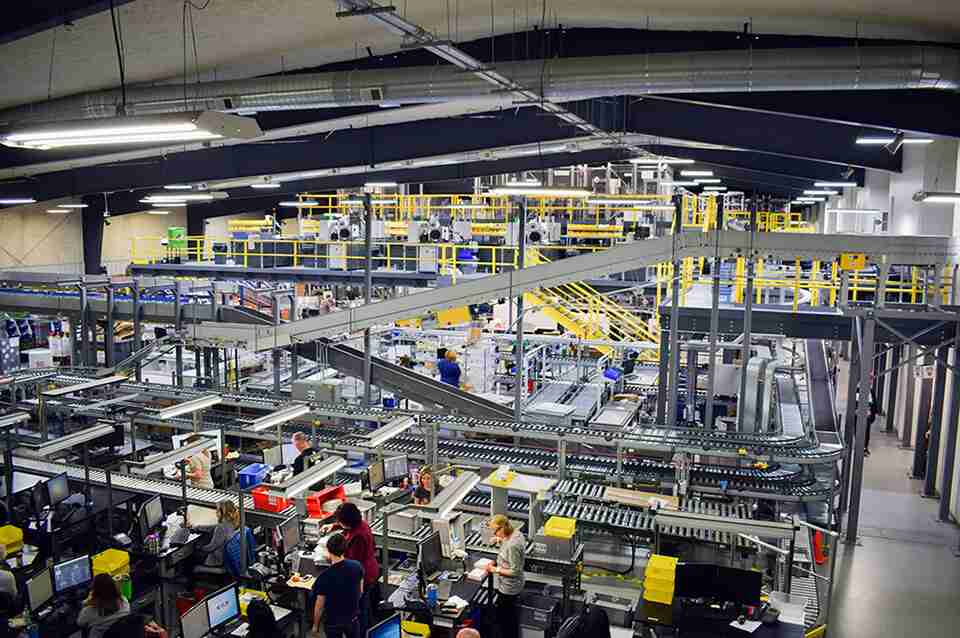
Today, Diamond remains a family-owned community institution, employing over 1,000 people in the greater Indiana County area and beyond. The centerpiece of their operations is a 135,000 square foot state of the art institutional pharmacy facility. They also own a retail pharmacy, a retail medical supply store, and satellite pharmacy facilities in Eastern Pennsylvania and Ohio to serve long-term care customers. Diamond also oversees an institutional medical supply division; Sapphire Health, a developer of electronic medical record (eMAR) and electronic health record (EHR) software; InnovaScript, a retail mail order pharmacy, drug wholesaler and RemedyRepack, an FDA-registered drug repackager.
While the look of their business has changed over the last 53 years, their feel for dedicated, personalized customer service remains the same. This fundamental area of excellence, combined with affordability, an extensive inventory, and pharmacy management resources makes them a comprehensive pharmacy solutions and software provider.
Corporate Office
645 Kolter Dr.
Indiana, PA 15701
Phone Number: 800.882.6337
Homepage Link: https://www.diamondpharmacy.com/
Twitter: https://twitter.com/diamondpharm
LinkedIn: https://www.linkedin.com/company/diamond-pharmacy-services/
YouTube: https://www.youtube.com/channel/UCTcVdQF-IxDO5oeFUNsJ-eg