Energy consumption is set to rise in the coming decades. How will we meet demand?

Not everything is great, but overall, we who are alive today are experiencing the greatest era humanity has ever known. We’re living longer, healthier lives with luxuries that people in even the recent past could not have dreamed of. Humanity is thriving, with the global population growing and standards of living are on the rise as well. All that development comes with a wide variety of consequences, both good and bad. Among those is that, with more people enjoying higher standards of living, energy consumption is going to go way up. The U.S. Energy Information Administration projects a 34% increase in global energy demand by 2050, enough to outpace gains in energy efficiency. In some ways, it’s a good problem to have, but it remains one we need to solve.
Population & Industrialization

Population growth, which will push the number of living humans to nearly 10 billion in 2050, will be concentrated in less-developed areas (Africa, India, Asia-Pacific). These areas will also see rapid industrial and manufacturing growth. As they are places that have been more reliant on fossil fuels, the EIA projects a 15% increase in carbon dioxide emissions over the next quarter-century.
The good news is that generating capacity will increase steeply in that time frame, anywhere from 55% to 108% depending on the scenario, according to the EIA’s projections, and electricity generation will go up between 30% to 76%. So it’s likely we’ll be able to meet the increased demand.
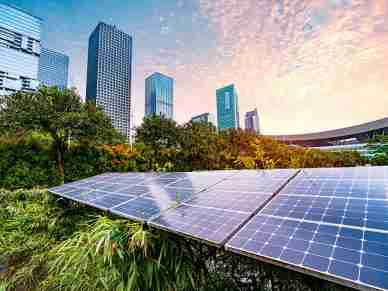
The even better news is that most of the growth in both capacity and generation comes from zero-carbon technologies such as renewables, nuclear power, and battery storage. In terms of capacity, that trio accounts for 81% to 95% of new installation through 2050. In the most optimistic timeline, renewable and nuclear energy could be responsible for two thirds of the world’s electricity generation by then.
“Renewables become an increasingly cost-competitive source of electricity and grow the fastest in cases that assume high economic growth and greater electricity demand,” EIA administrator Joe DeCarolis said.
Demand In Cities

Especially in the developed world, the population will concentrate in large cities. In a way, that’s good, because densely packed urban areas have lower per capita carbon footprints than surrounding areas in many developed countries. But more people crowding into cities’ residential and commercial buildings, combined with the rising temperatures that come with climate change, could push energy consumption for cooling those spaces up as much as 20% in American cities by 2050. When we use fossil fuels for that task, we make things better in the short term by keeping people cool but do more damage in the long term by increasing emissions and contributing more to climate change.
“We’re locked in a vicious cycle where warming is turning air conditioning into a necessity rather than a luxury,” Rob Jackson, a professor at the Stanford Doerr School of Sustainability and the senior author of a paper on power sector decarbonization and urban energy use, said.
The paper projected climate conditions for 277 cities across the U.S., analyzing the potential effects of going net zero by 2050, making no changes from the status quo, and scenarios in between.
What the authors found was that more hot summer days with extreme temperatures will dramatically increase energy use intensity. There will be more “peak energy hours,” times when buildings across cities will be running the A/C at full blast just to keep cool. This effect will take place not only in the Sun Belt, but in northern and more temperate cities that aren’t used to hot summers.
“This will require higher grid capacity and also greater resilience against power outages during extreme heat waves,” lead author and University of Oklahoma professor Chenghao Wang said.
Decarbonization can help a great deal, but it will have to happen fast.
“Simply put, to achieve carbon neutrality by 2050, we need rapid electrification for future urban buildings,” Wang said.
Encouraging Developments

This year will mark the fourth time since 2019 that electricity generated from fossil fuels will decline. It could be the first year that renewables generate more electricity worldwide than coal. While energy consumption dropped across the U.S., EU, and Japan in the last two years, demand increases elsewhere have offset that. A strong economic forecast points to even higher energy consumption increases.
“The world’s need for electricity is set to grow strongly in the years to come. The global increase in demand through 2024 is expected to amount to about three times the current electricity consumption of Germany,” said Keisuke Sadamori, the IEA’s director for energy markets and security. “And we’re encouraged to see renewables accounting for a rising share of electricity generation, resulting in declines in the use of fossil fuels for power generation. Now is the time for policymakers and the private sector to build on this momentum to ensure emissions from the power sector go into sustained decline.”
One weapon that might help us meet demand amid growing energy consumption is AI. While widespread AI use will require more data centers and could cause a spike in energy demand, its computing power and problem-solving capabilities could find better ways to get the most out of grids.
“Many traditional approaches to forecasting only have the capacity to look at a small number of parameters with small datasets,” Karen Panetta, a fellow of the Institute of Electrical and Electronics Engineers, told Reuters. “AI can allow us to explore relationships and look at ways to mitigate failures in the grid and understand how to redistribute energy in the most efficient ways.”
What a time to be alive.


Leave a Reply