How to Import Contacts from CSV into SiteGround Email Marketing
Table of Contents
Adding contacts one by one to your marketing campaigns can take time and effort. It’s not an issue when you have to enter several contacts, but when you have dozens, it can take hours.
Thus, having the option to bulk import contacts is a must. For this purpose, SiteGround Email Marketing features the functionality of importing contacts from CSV files. This guide will explain how to use it, so read along.
How to find the Import function in SiteGround Email Marketing
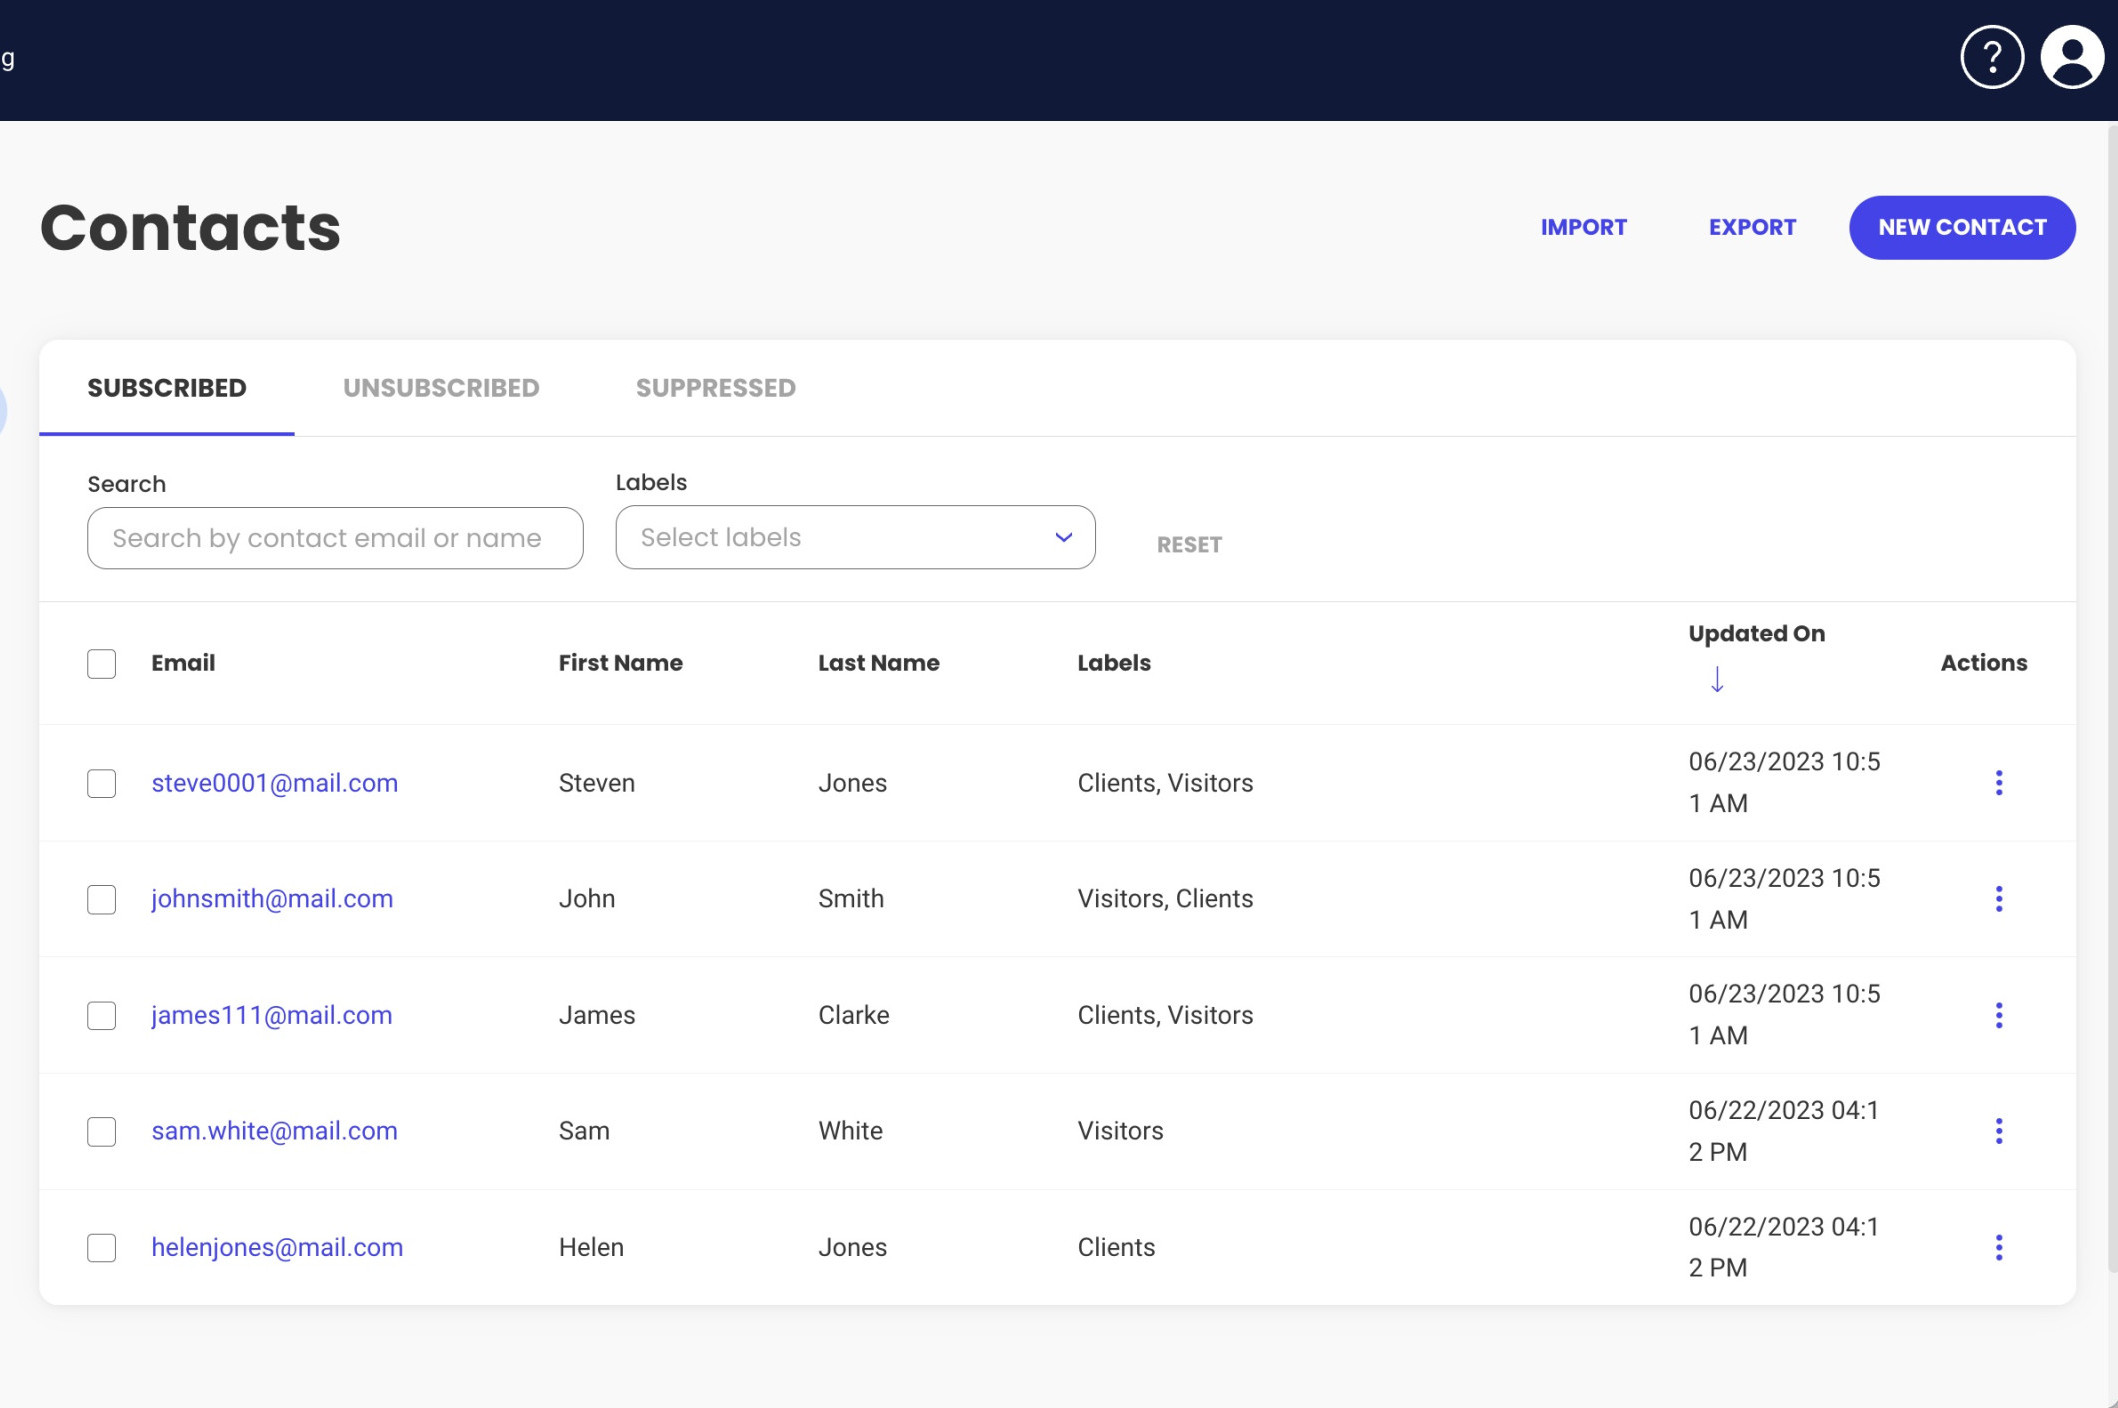
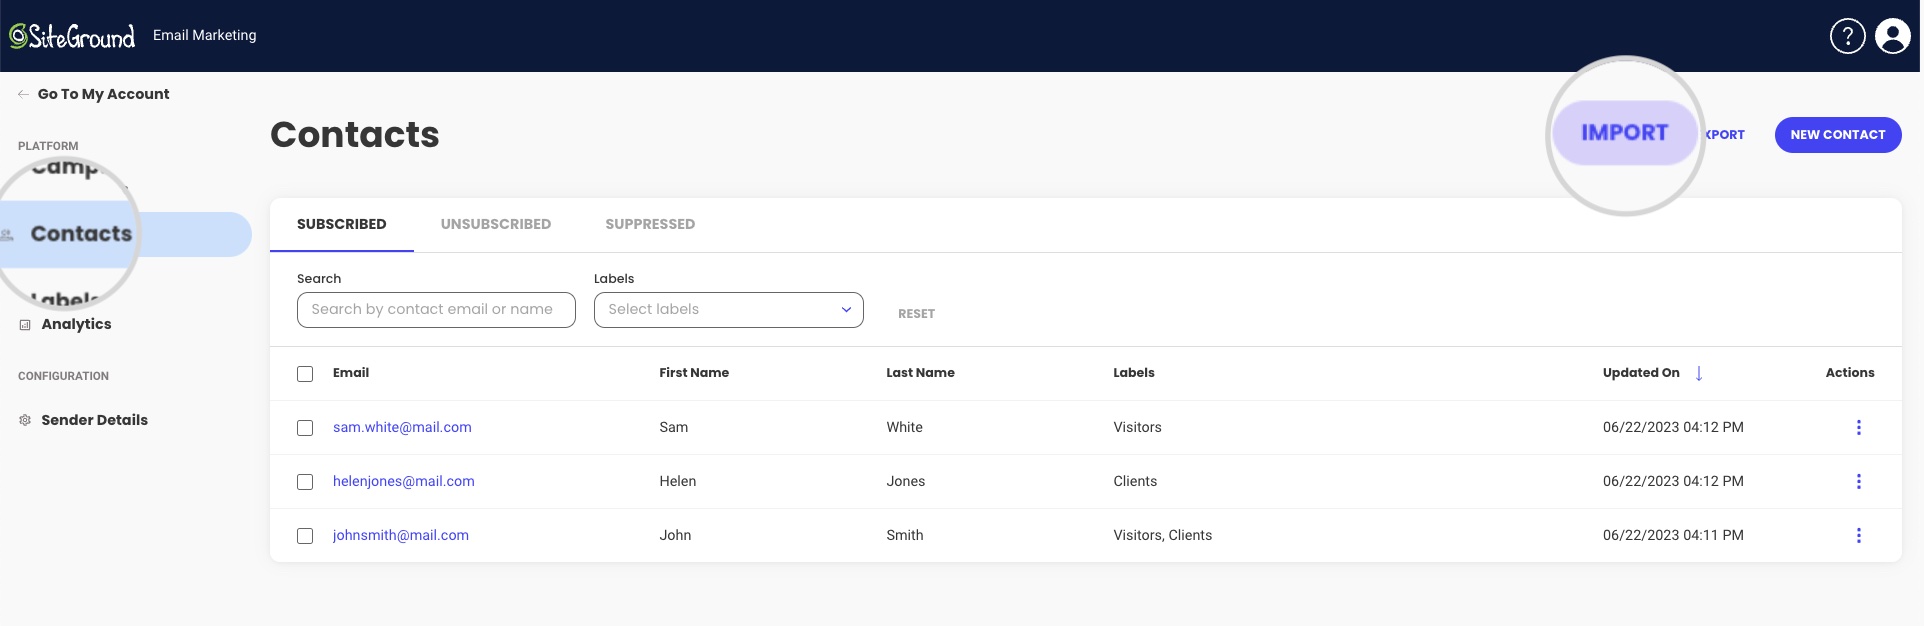
To use the Import option, go into your Client Area > Services > Email Marketing > Contacts. In this section, you can manage existing contacts, add new ones, and import from a file. Hit the Import button in the top right corner to import contacts from a CSV file.
How to Create a CSV File
To import contacts, you will need to prepare a CSV file containing the contacts you wish to import. If you already have a CSV file, you can upload it directly. If not, here’s how to prepare one.
Your CSV file should contain column names and the details of the subscribers you wish to import under those column names. You can import a CSV file containing random column names and assign any to the preset fields in SiteGround Email Marketing. However, it could be confusing when your file’s column names don’t match the field names from the Contacts page in Email Marketing.
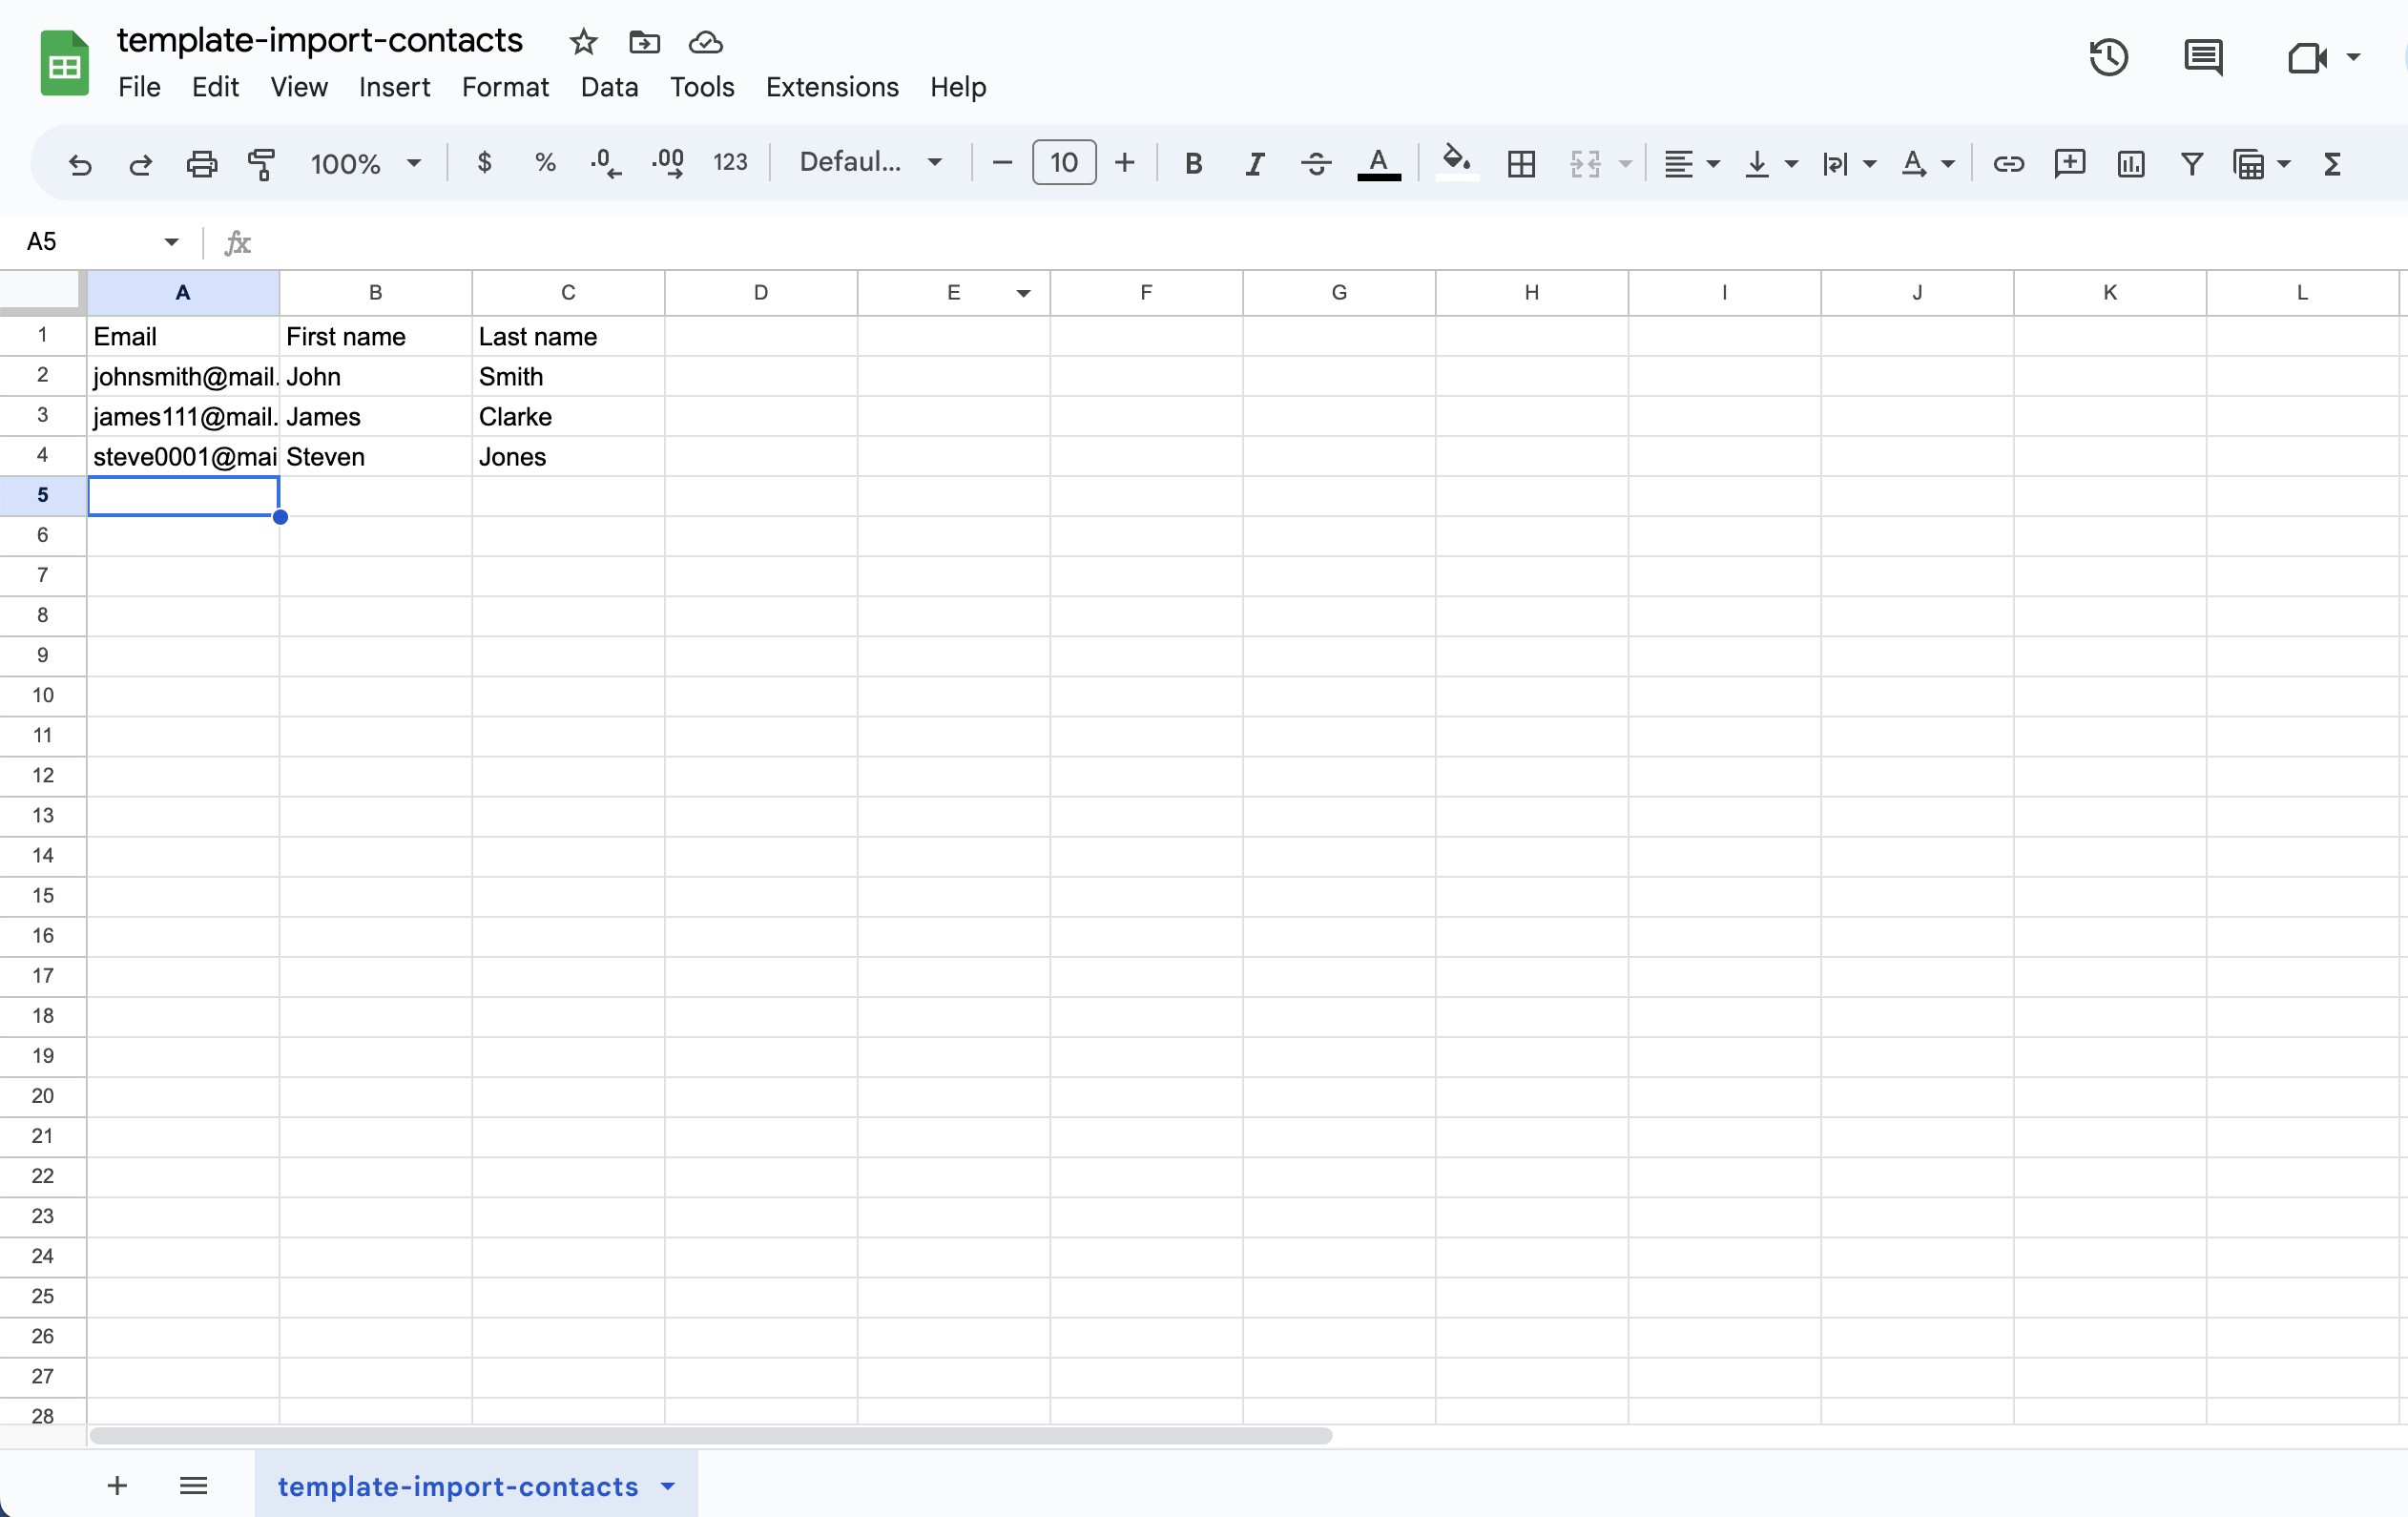
Therefore, your CSV file should contain the columns Email, First Name, and Last Name.
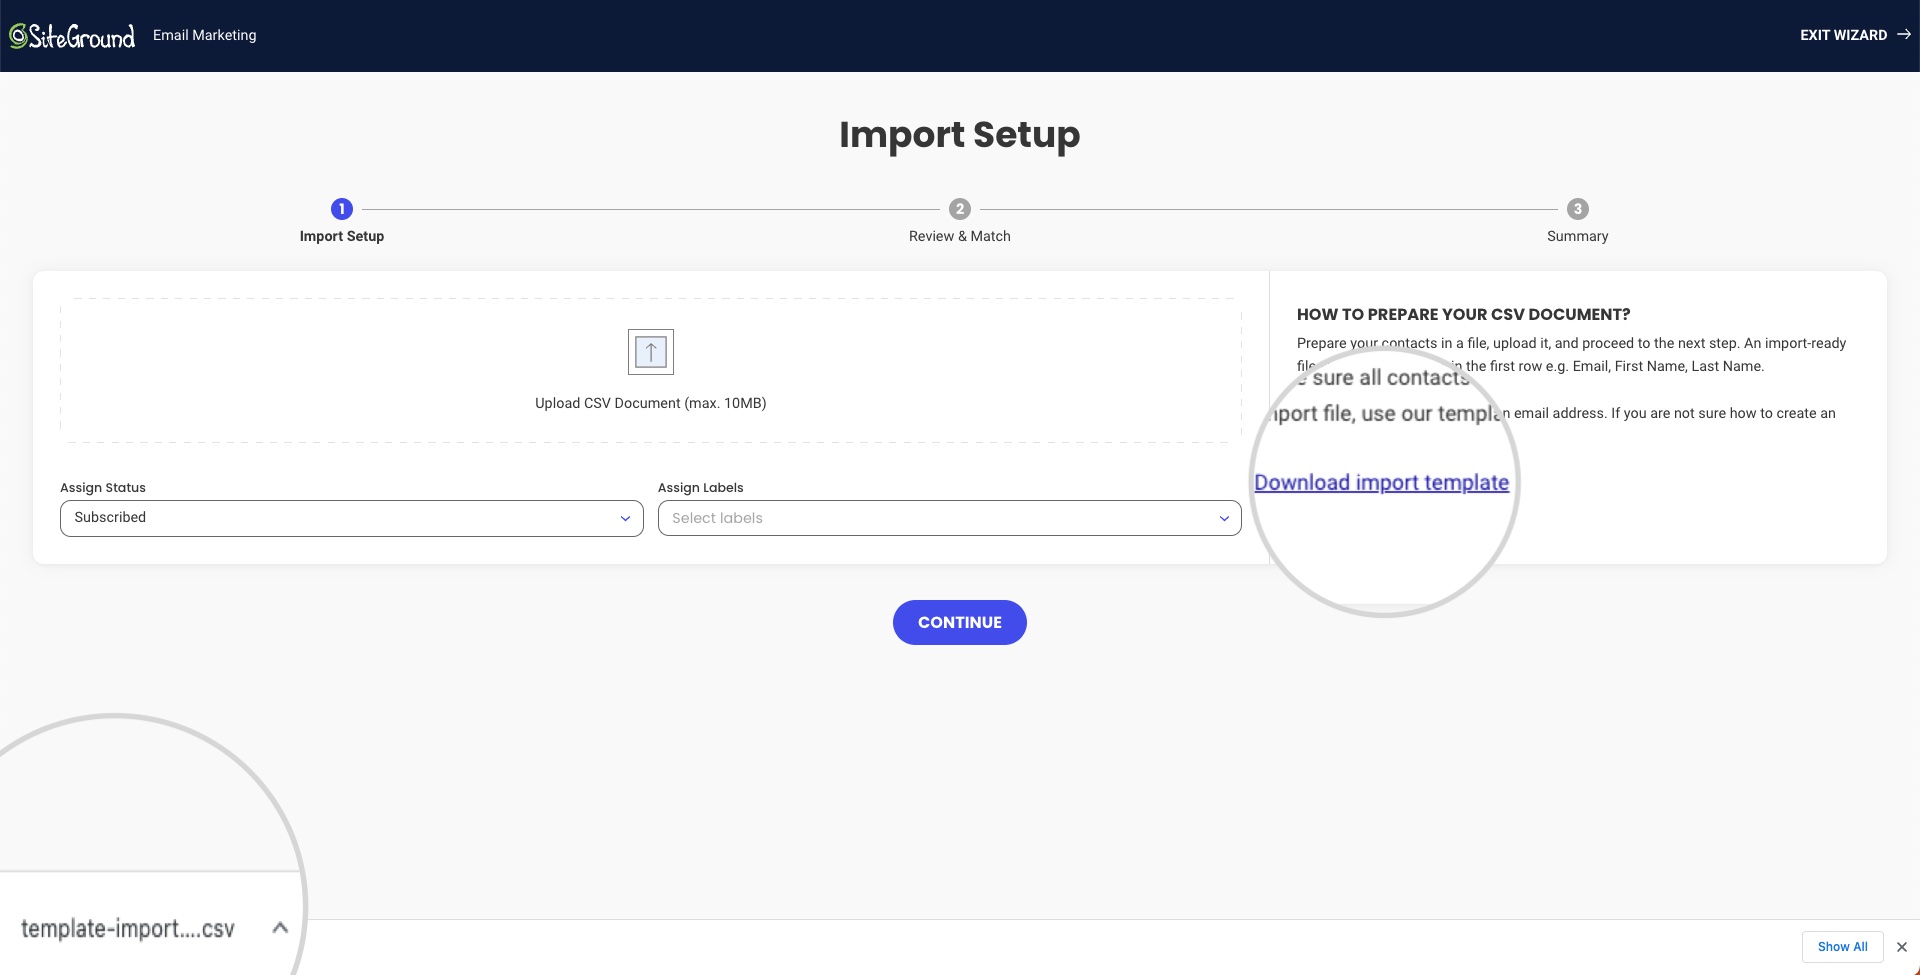
To ensure your CSV entries are in a compatible format with SiteGround Email Marketing, you can download a template CSV file on the first step of the import. This file contains preset fields, so you can just populate it with your contacts.
To download the file, click Import in the Contacts section of your Email Marketing service. On the following page, select Download import template. Your browser will download the CSV file on your device.
Open the file with any application that can read CSV files, like Excel (for Windows) or Google Sheets. Enter your contacts’ details according to the spreadsheet’s format, and save the CSV file on your computer.
How to Import Contacts from CSV
After you’ve prepared the CSV file, you can upload it to Email Marketing. Follow the steps below to learn how to do that.
Upload Your CSV File
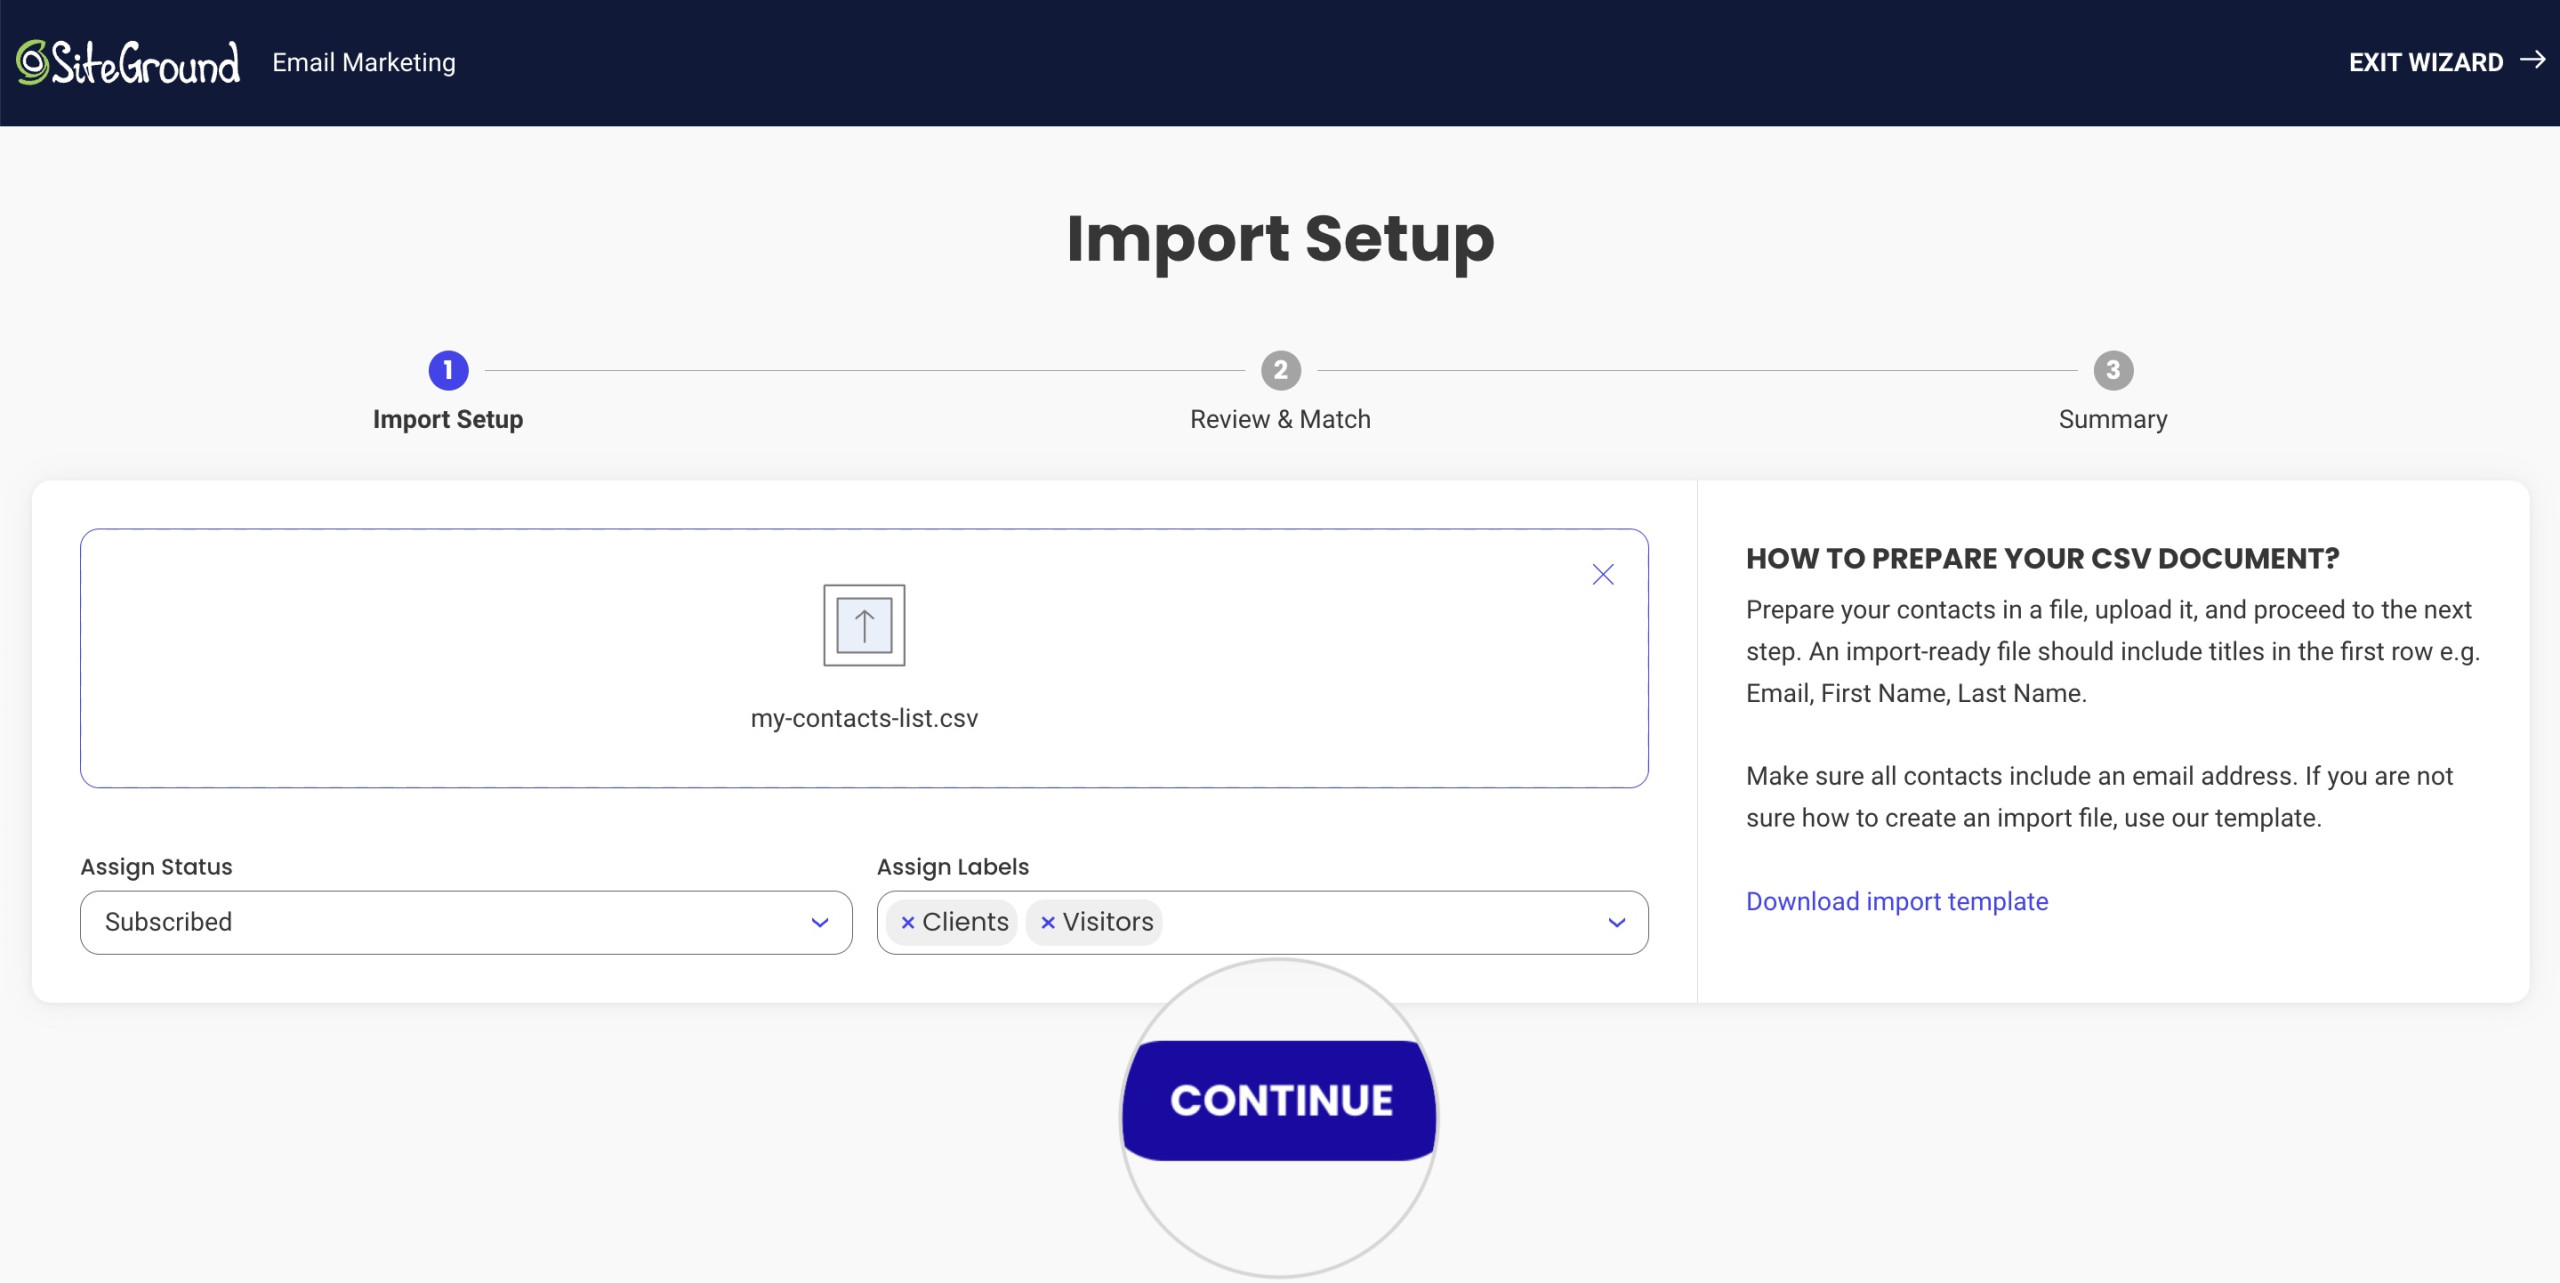
Go back to Email Marketing > Contacts > Import. Click anywhere on the section Upload CSV Document. A pop-up window will appear where you can select the CSV file from your computer.
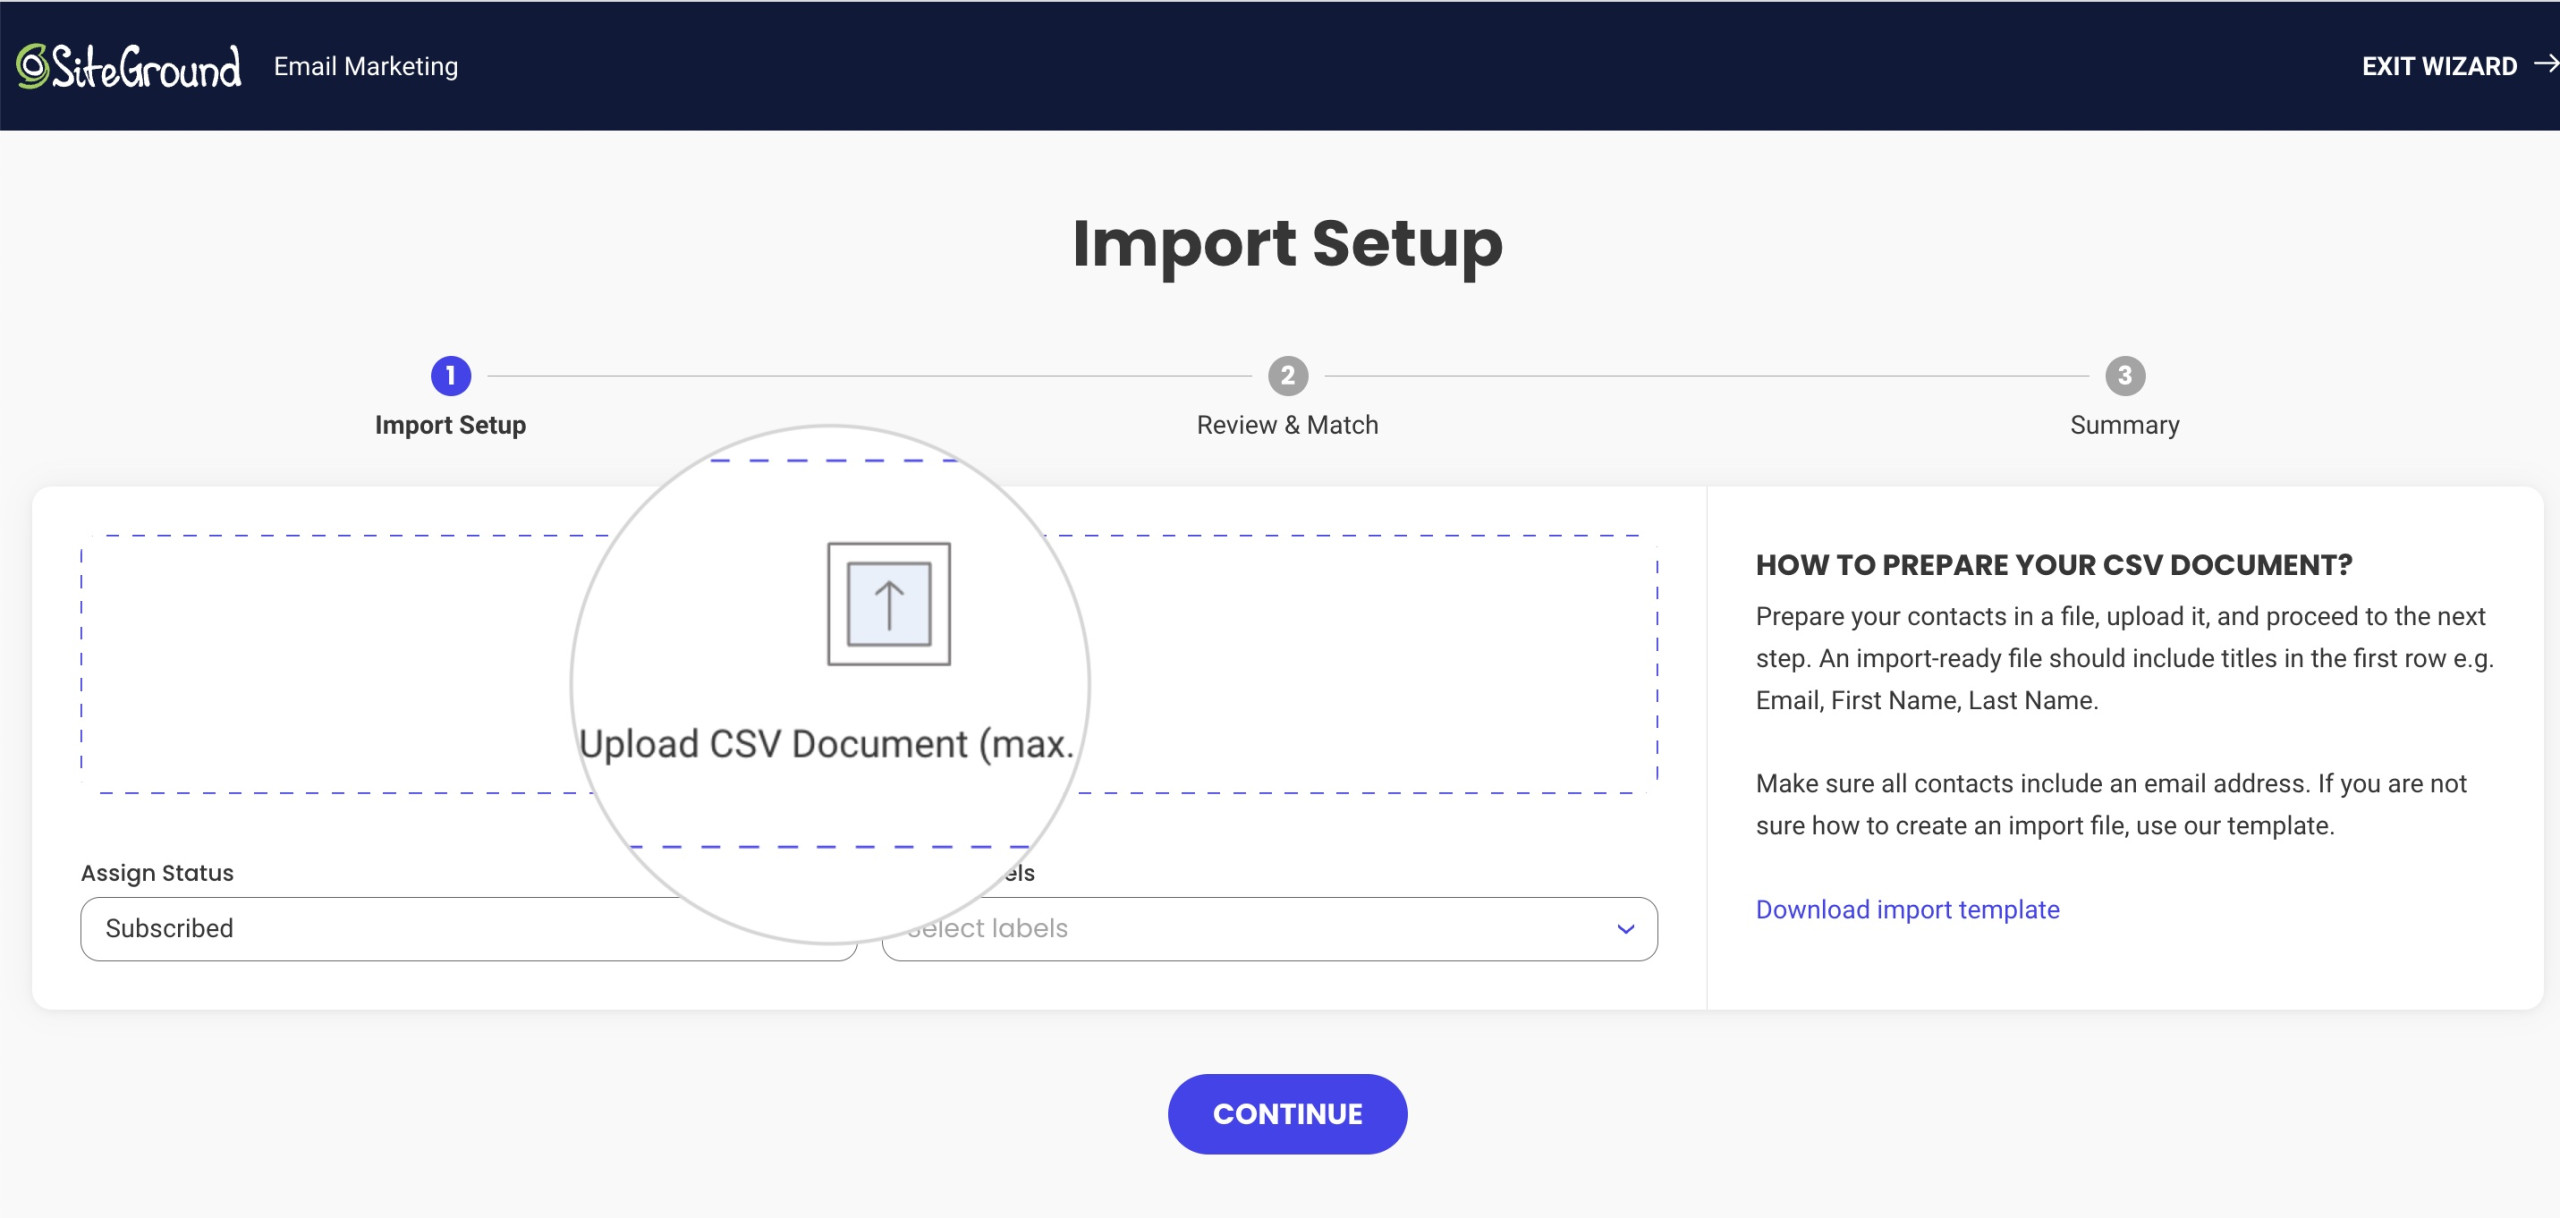
Assign Status and Groups
Choose the status of the contacts from the drop-down menu Assign Status. The options are Subscribed or Unsubscribed.
Optionally, you can assign multiple groups to the contacts from the drop-down menu Assign Groups. You can choose from the groups you’ve created in SiteGround Email Marketing.
To proceed to the next step of the import, press Continue.
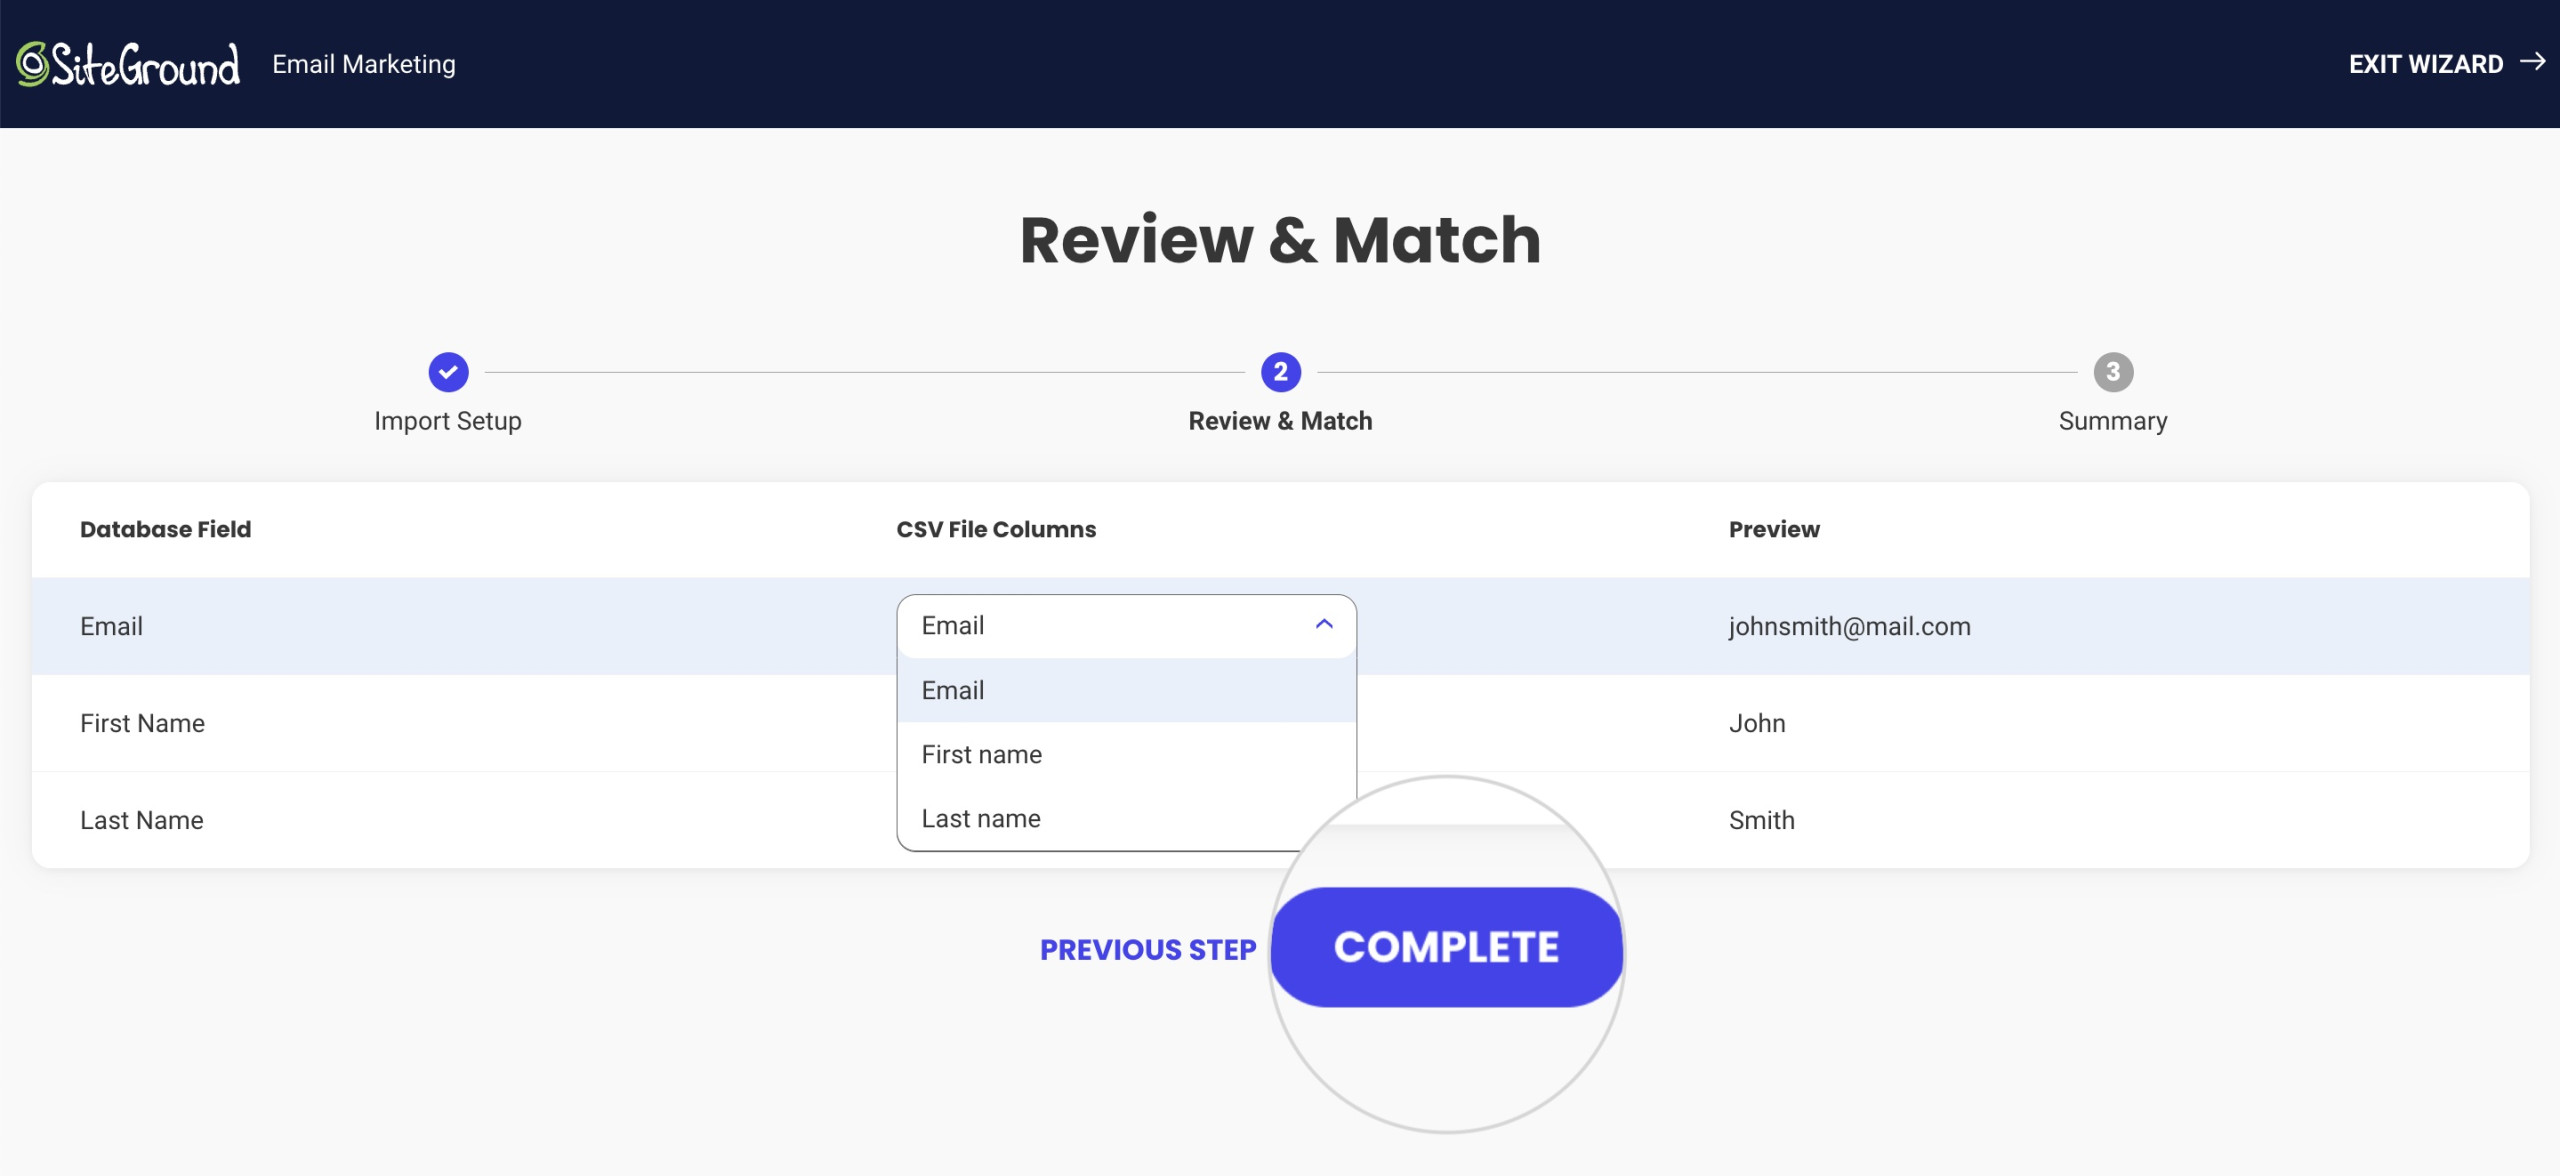
Match the CSV Columns with the Email Marketing Fields
In the last step, match the columns from your CSV file with the database fields used in Email Marketing. The fields are Email, First Name, and Last Name.
Next to each Database Field is a drop-down menu CSV File Columns. Choose the column that will correspond to the respective Database Field.
For example, if the email addresses of your contacts are recorded in the CSV file under a column named Email, select it from CSV File Columns for the Database Field Email.
To finish the import, press COMPLETE.
All done! The contacts from your CSV file will appear in Contacts.