Transfer email from previous host via a local mail application
Table of Contents
You may also transfer your email messages from other servers to SiteGround using your local email client, following these steps:
-
Step 1: Use a local mail client with IMAP for your existing email
First, make sure that you have a local email application linked and configured with your old email account (Thunderbird, Mac Mail, etc.). Make sure that your accounts are set to work with IMAP.
-
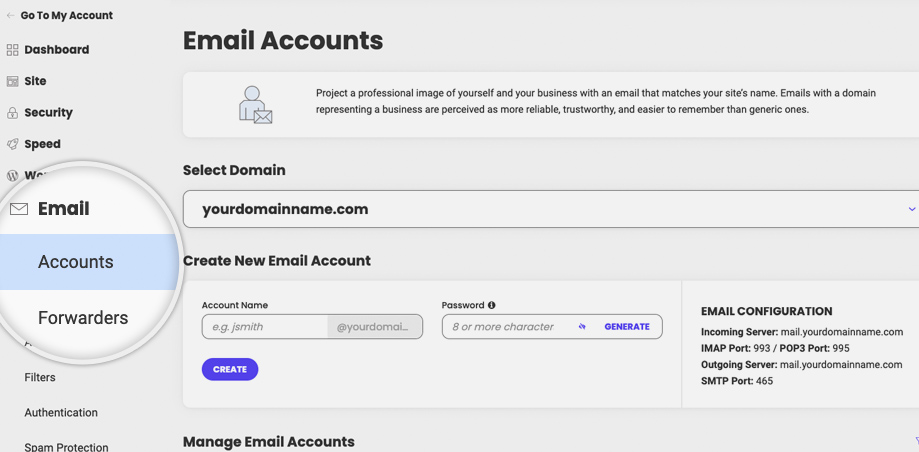
Step 2: Create the email accounts from Site Tools
Next, you need to create from Site Tools > Email > Accounts your email acounts on the SiteGround servers. If you want to migrate an email account with address yourname@domain.com, create this account yourname@domain.com from Site Tools. It’s like creating a duplicate account of your already existing one, but you are doing it on your new host server while the old one is active on your previous server.
-
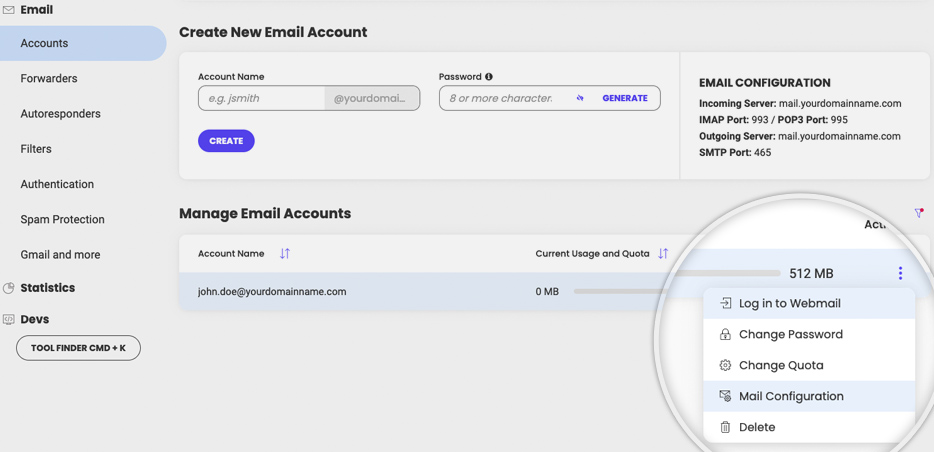
Step 3: Configure the new email account and move existing messages
Using the same email application, add your newly created email account using the settings provided by Site Tools. You can get the email configuration from Site Tools > Email > Accounts > kebab menu (the action button next to the email account in the Manage Email Accounts section) and click Mail Configuration.
Then, using drag-and-drop, move all the folders from your old account to the new SiteGround account (Inbox, Sent, etc.). Your email application will start copying the messages from the old server to the new one. Note, that this may take a while so make sure the operation is completed before you proceed.
See detailed Mac Mail transfer instructions and Mozilla Thunderbird transfer instructions.
-
Step 4: Update your domain’s MX records
Now that you have your messages on our servers, update the domain’s MX records so that your email service is handled by your new hosting account at SiteGround. You can see which the correct default MX record are in Site Tools > Domain > DNS Zone Editor. There you have to select the MX tab and choose the “Switch to system default MX records“. Thee correct records will be displayed in the tool.
If your domain is pointed to our name servers, simply click use the Create button in that tool to create and start using the right MX records.
If your domain is pointed to external name severs, you have to copy the three MX records listed as the expected defaults for your domain and add them in the DNS zone of your domain, wherever you manage it.
-
Step 5: Remove your old email accounts
Once you start receiving your emails to your new SiteGround account on your application, check if there are some messages received on the old account and move them to the new one. Once that final sync is over, you can safely delete your old account.