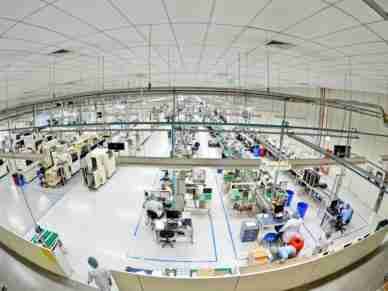
U.S. manifests a manufacturing boom

More things really are being made in America these days. By the end of 2022, U.S. manufacturing was growing faster than the rest of the world for the first time in a long time. U.S. manufacturing jobs hit their highest levels since 2008 this year. There are some roadblocks up ahead that could slow or even stop the growth, but with key pieces of legislation driving a post-pandemic surge in investment, the U.S. manufacturing boom is real. What remains to be seen is how big it will get and how long it will last.
Jobs, Jobs, Jobs

The numbers bear out the boom. Bureau of Labor Statistics data showed an addition of 800,000 manufacturing jobs in the U.S. from January 2021 up to May of this year, an uptick of 6.4%. The biggest gains were in the most populous states, with Texas adding 86,000 jobs, California 79,000, and Florida 37,000. Ohio and Georgia, also in the top 10 states in terms of population, added 31,000 and 29,000 manufacturing jobs, respectively. The biggest percentage gains came in Nevada (15%), Montana (11%), Wyoming, and Arizona (10% each).
With high demand for manufacturing workers, average pay is over $32 per hour and as inflation cools and fears of a recession sink away, those earners are getting more bang for their buck. The Reshoring Initiative reports that companies have announced more than 400,000 new domestic manufacturing jobs this year.
Energy production, both renewable and fossil fuel, drove a significant portion of those job gains, with Covid-related medical production of PPE and pharmaceuticals surging as well. What has the manufacturing boom poised to last, however, is the investment in new facilities that are being built over the next several years. By May, U.S. companies had committed $200 billion to new manufacturing projects.
Boosted by funding from the Infrastructure Investment and Jobs Act, CHIPS and Science Act Inflation Reduction Act as well as reshoring efforts and revamped supply chains in the wake of Covid disruptions, factories are popping up all over the U.S.
“As the U.S. government attempts to shore up the economy and protect it from potential geopolitical shockwaves in the future … it is undoubtedly stimulating manufacturing growth and investment in new facilities, particularly those dedicated to the production of semiconductors and electric vehicles (EVs),” Interact Analysis CEO Adrian Lloyd wrote in Smart Industry.
More in the Works

“The boom in U.S. manufacturing construction is a real one,” the Treasury Department concluded, one unmatched throughout the world. “While it can be difficult to compare such granular data across countries, the surge appears to be uniquely American—not mirrored in other advanced economies.”
By the end of the year, 18 semiconductor factories will be built or under construction in the U.S., and the Semiconductor Industry Association says more than 50 projects have been announced since the passage of the CHIPS and Science Act.
Real spending for construction of computer, electronics, and electrical manufacturing facilities has nearly quadrupled since the beginning of 2022, the Treasury reports. TSMC, Samsung, and Intel have all announced new chip plants in the U.S., and Samsung and Panasonic are building EV battery factories in the Midwest.
Those sectors are leading the U.S. manufacturing boom, but construction for chemical, transportation, and food & beverage manufacturing is also up. Manufacturing facilities account for around 10% of all new construction, the highest level in at least 30 years and nearly twice the average for the years between 2010-22.
“The U.S. has clearly set its sights on becoming an international hub for the production of electric vehicles and semiconductors, in particular,” Lloyd wrote.
The End is Near?

Part of being an advanced economy is the shift from manufacturing-based to service-based. It’s not an uncommon phenomenon throughout the world. But not all the manufacturing jobs the U.S. lost were being replaced by service jobs. Many of them were simply lost. So while there’s room to replace those, it’s not likely the U.S. is going to be the manufacturing powerhouse it was in the middle of the 20th century or that China is now.
“(T)he impact is unlikely to be seismic, or on a New Deal scale, for a variety of reasons,” Lloyd wrote. “We are predicting year-on-year growth will remain below 10% in the medium-term with a shallow recession in 2024 and the growth rate failing to recover to 2022 levels out to 2027. Our Manufacturing Industry Output (MIO) tracker, which quantifies the total value of manufacturing production — with deep granularity — across 35 industries and 44 countries, forecasts a good but not outstanding increase in the overall value of US manufacturing, from just over $5.8 trillion to just under $6.8 trillion during 2022-2027.”
There remains a shortage of skilled labor in manufacturing, and stiffer competition will make it harder to find workers. Automation will be able to pick up some of the slack, but it will mostly handle simple tasks, not the more complex contributions the industry lacks.
The Institute for Supply Management’s PMI has indicated contraction for the manufacturing sector for nearly a year straight after 28 consecutive months of growth. Those numbers, of course, don’t account for factories being built that will begin churning out products through the rest of the decade. Goldman Sachs predicts an additional 200,000 to 250,000 U.S. manufacturing jobs in the next two years. The manufacturing boom might not make the U.S. the world’s top manufacturer again, but it certainly isn’t a mirage.


Leave a Reply