How to Upgrade Joomla!
Table of Contents
Keeping your Joomla! up-to-date is extremely important for your website security. It is also very easy when it comes to upgrading within the same major version you are using. However, the process of migrating from one major version to another is not such a simple task but we strongly encourage you to nevertheless make the effort.
Joomla! 4
Upgrading within the same Joomla! 4.x version
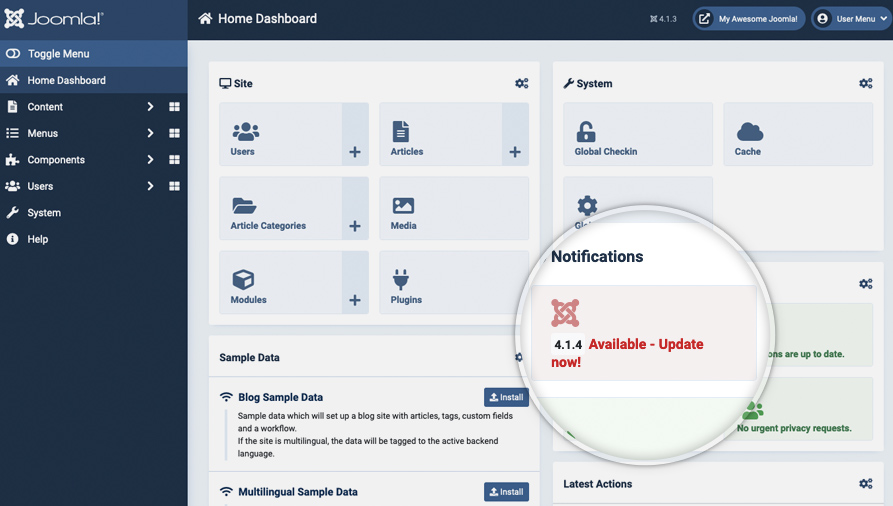
To upgrade your Joomla! 4.x manually, you need to access your administrative area at http://yourdomainname.com/administrator. Once you do that, Joomla! 4 will automatically check for new versions at its official repository. If there is a new version available, you will see a notification in the dashboard. Click on it to start the update process.
Important: We strongly recommend that you create a backup of your website before you initiate the upgrade process.
On the page that opens mark the checkbox “I’m prepared for the update and have made a backup of the files and database.” and then click on Start Update.
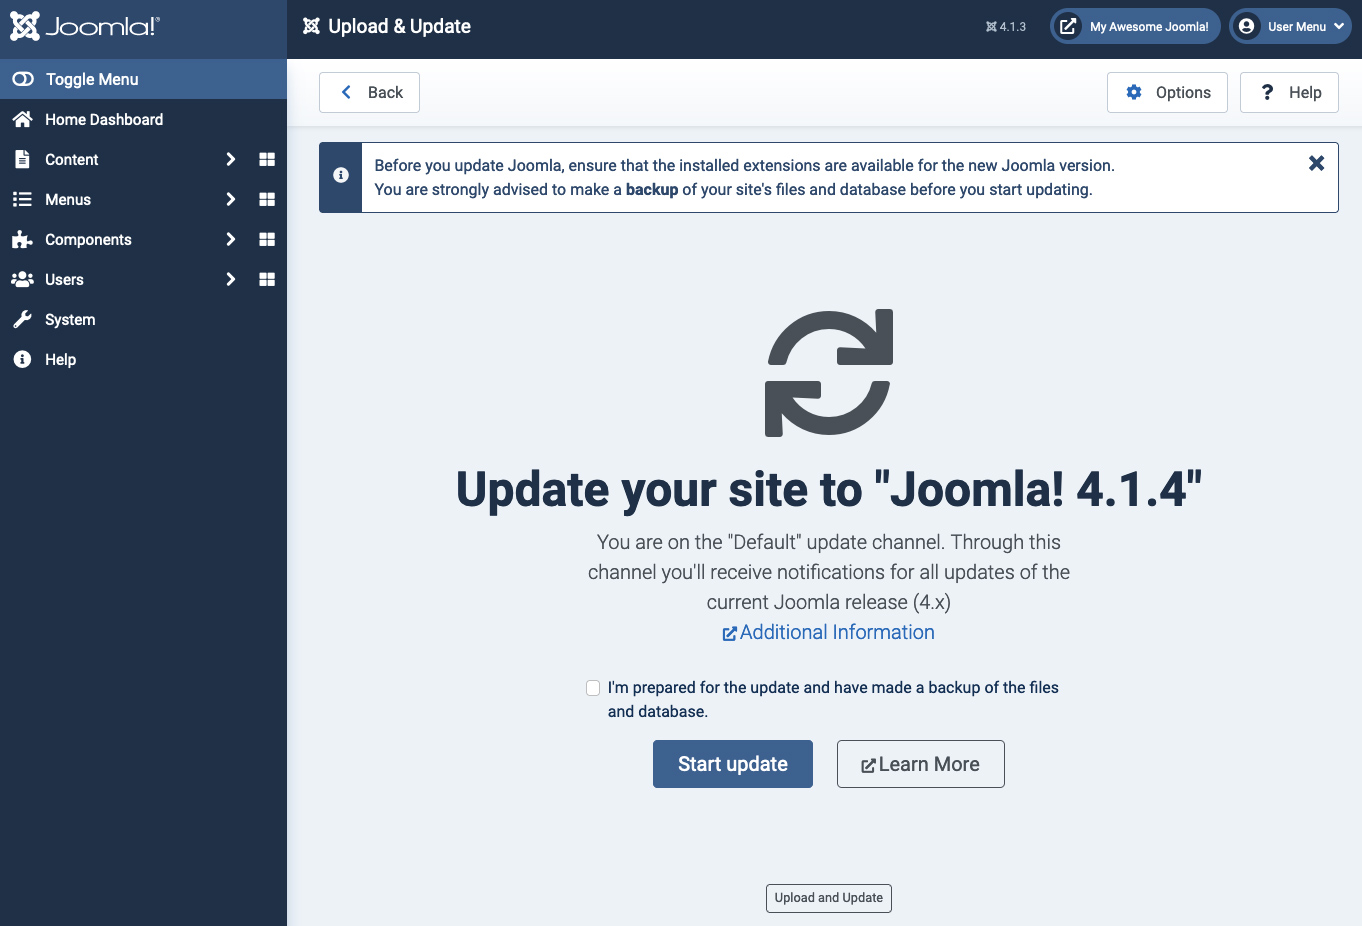
In a few moments, your Joomla! 4.x website will be upgraded to the latest version and you will be redirected to a page with confirmation for the successful update!
Migrating from Joomla! 3.x version to Joomla! 4.x
Migrating to a new major version can be difficult mostly because usually the template and extensions currently used by you may not be compatible with the new Joomla! version. This means that once you complete the migration process you will have all your content transferred to the new version, but may need to change or update all templates and extensions before your website actually starts working.
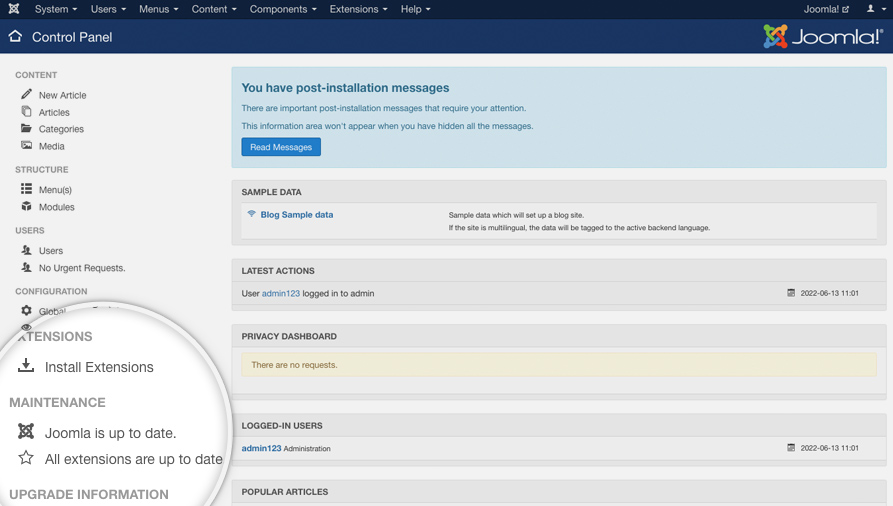
In this tutorial, we will describe how to move from Joomla! 3.x to Joomla! 4.x. To begin with the migration login to your administrative area. Then, click on”Joomla is up to date” under Maintenance.
By default Joomla! only checks for updates in the current branch, so you will not see an update available to 4.x. You can change this default behavior by clicking Options in the top right corner of the page -> select Joomla Next from the Update channel drop down menu. Click on Save & Close to apply the changes and return to the update page.
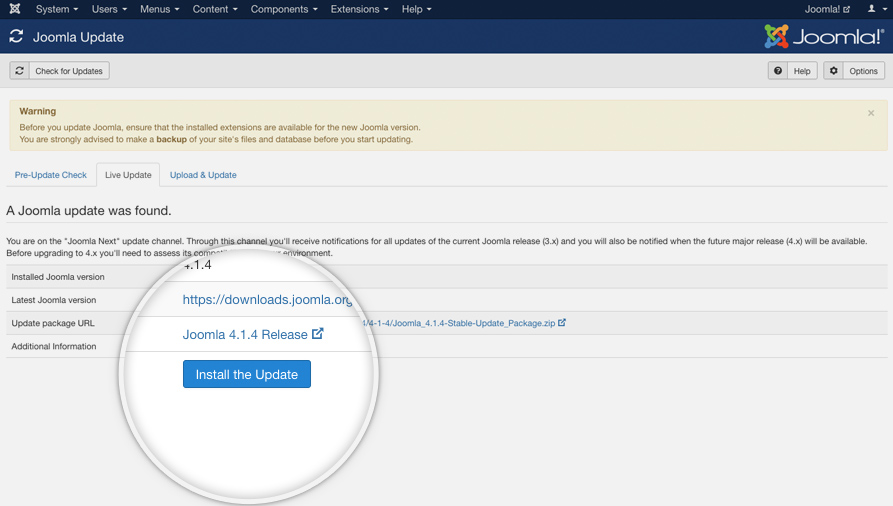
Now Joomla! should immediately detect that there is an update available to the latest 4.x branch version. Click the Live Update tab and then click on Install the Update to initiate the operation.
It will take a few minutes to migrate your content. Do not close your browser window during that process. Finally, you’ll see a confirmation for the successful migration from your newly upgraded Joomla! 4.x admin area.
Joomla! 3
Upgrading within the same Joomla! 3.x version
To upgrade your Joomla! 3.x manually, you need to access your administrative area at http://yourdomain.com/administrator. Once you do that, Joomla! 3 will automatically check for new versions at its official repository. If there is a new version available, you will see a notification in the dashboard. Click on Update now to proceed.
Important: We strongly recommend that you create a backup of your website before you initiate the upgrade process.

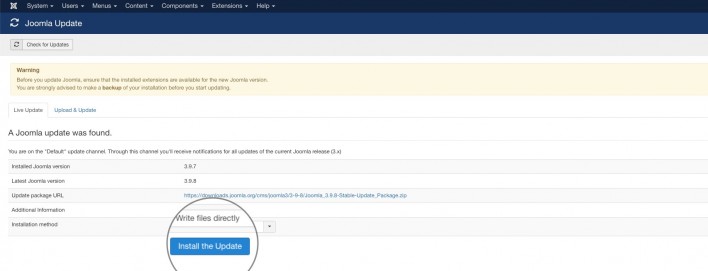
Once you click on the link, you will be redirected to the Joomla! 3.x update page. Here, you will see the information about your current Joomla! 3.x version and the latest one you will be upgrading to, the update package URL, and the installation method. You shouldn’t make any changes at this point – the default settings should work just fine. All you have to do is click on Install the update.
In a few moments, your Joomla! 3.x website will be upgraded to the latest version and you will be redirected to a page with confirmation for the successful update!
Migrating from Joomla! 2.x version to Joomla! 3.x
Migrating to a new major version can be difficult mostly because usually the template and extensions currently used by you may not be compatible with the new Joomla! 3.x version. This means that once you complete the migration process you will have all your content transferred to the new version, but may need to change or update all templates and extensions before your website actually starts working.
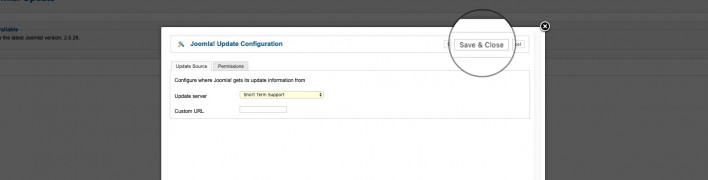
In this tutorial, we will describe how to move from Joomla! 2.5 to Joomla! 3. To begin with the migration, first, you need to login to your administrative area. Then, navigate to http://yoursite.com/administrator/index.php?option=com_joomlaupdate. This will take you directly to the Joomla! 3.x Update page. Since there is still no long-term release of the Joomla! 3.x branch, you will have to switch to short-term release settings for the update server. To do this, click on Options.

A pop-up will appear with all the available settings for the Joomla! 3.x Update component. All you have to do is click on the drop-down menu next to the Update Server label and select Short Term Support. Finally, click Save & Close.
Once you switch to the short-term version update server, Joomla! 3.x will immediately detect an available update. Press Install the Update to proceed with the migration.

Joomla! 3.x will take a few seconds to migrate your content. Do not close your browser window during that process. Finally, you’ll see a confirmation for the successful migration from your newly upgraded Joomla! 3.x admin area.