How to Manage Groups in SiteGround Email Marketing
Table of Contents
Groups are a powerful feature that helps you better organize and segment contacts in your email marketing campaigns.
In this guide, you’ll learn how to create, delete and edit groups in SiteGround Email Marketing.
How to Create Groups
You can create new groups in the Email Marketing > Groups >Create group section. Type the preferred group name in the “New Group” field and click Create.
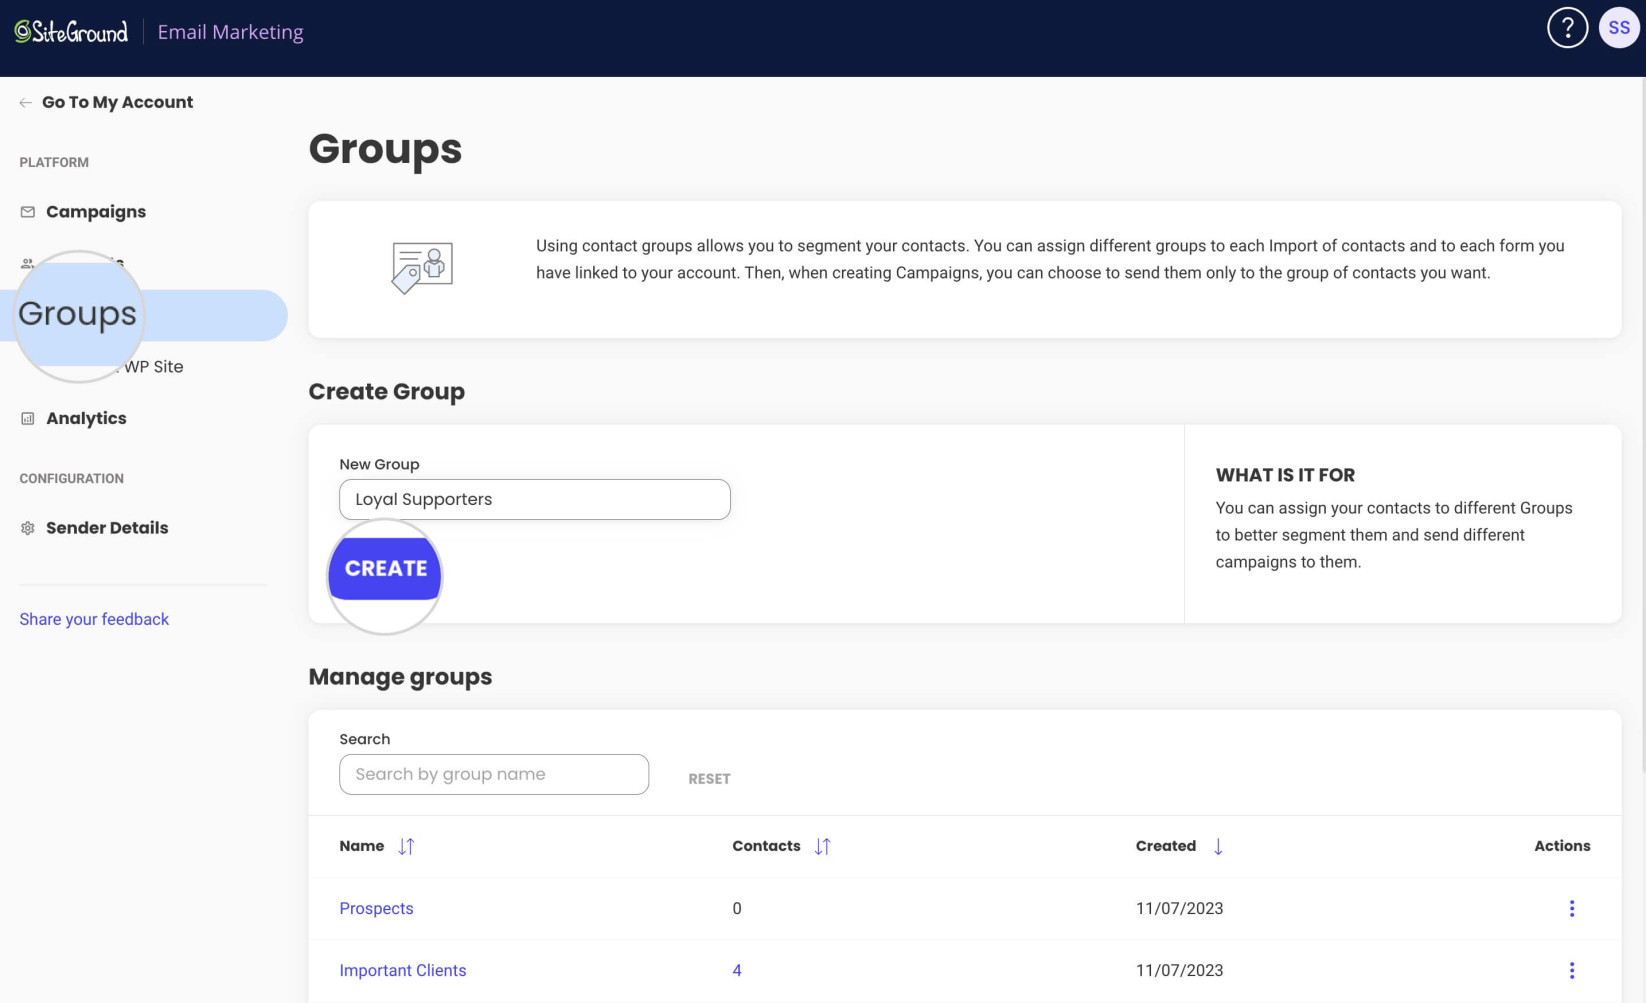
The group will be listed in the Groups > Manage groups section of your Email Marketing dashboard.
How to Rename Groups
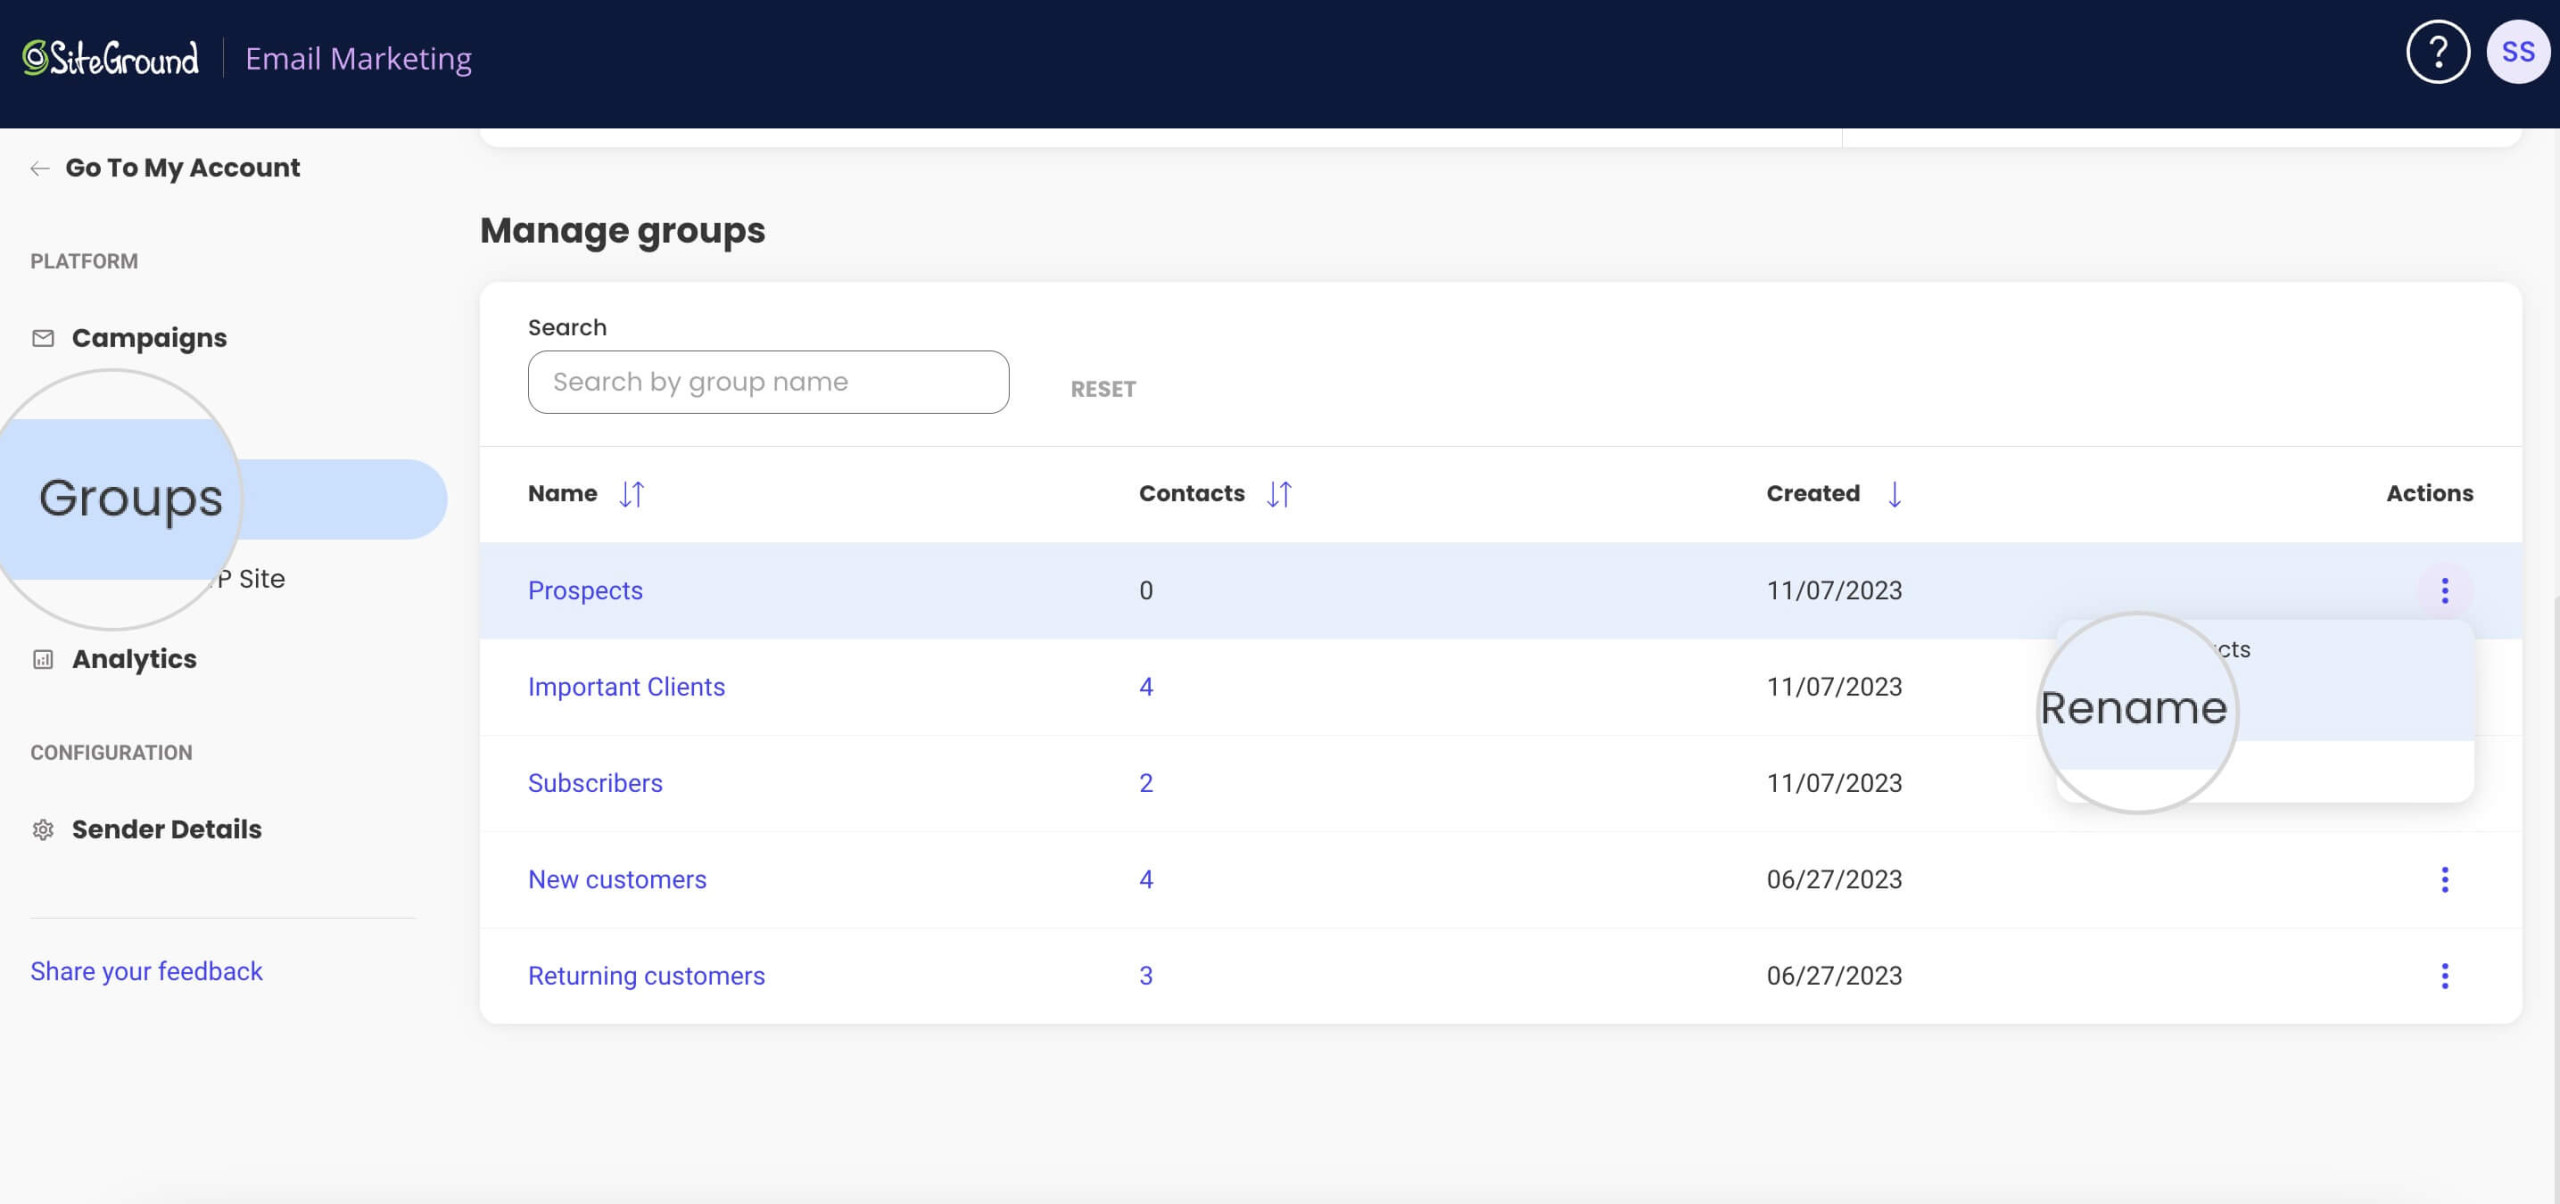
If you’ve made a typo or wish to change the group name altogether – you can easily rename it. Go to the Groups section, press the Actions menu for the chosen group, and select Rename.
In the following pop-up window, write down the new group name and press Confirm.
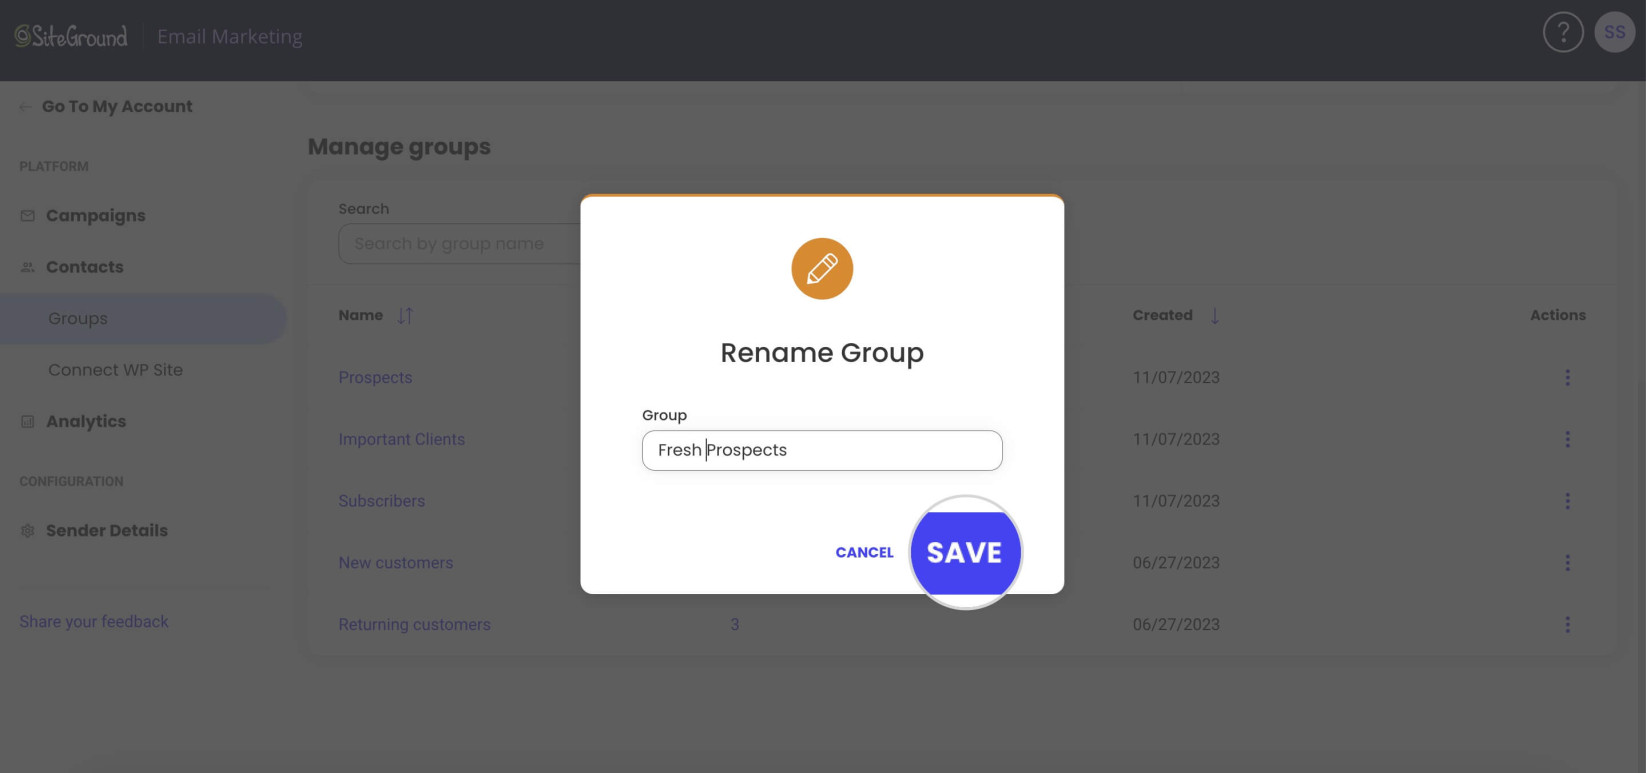
Even after being renamed, the group will preserve the contacts it was assigned to.
How to Delete Groups
Eventually, you may end up with groups that you no longer use. In this case, you can just delete them. The contacts assigned to the deleted group will remain, so you don’t have to worry about losing them.
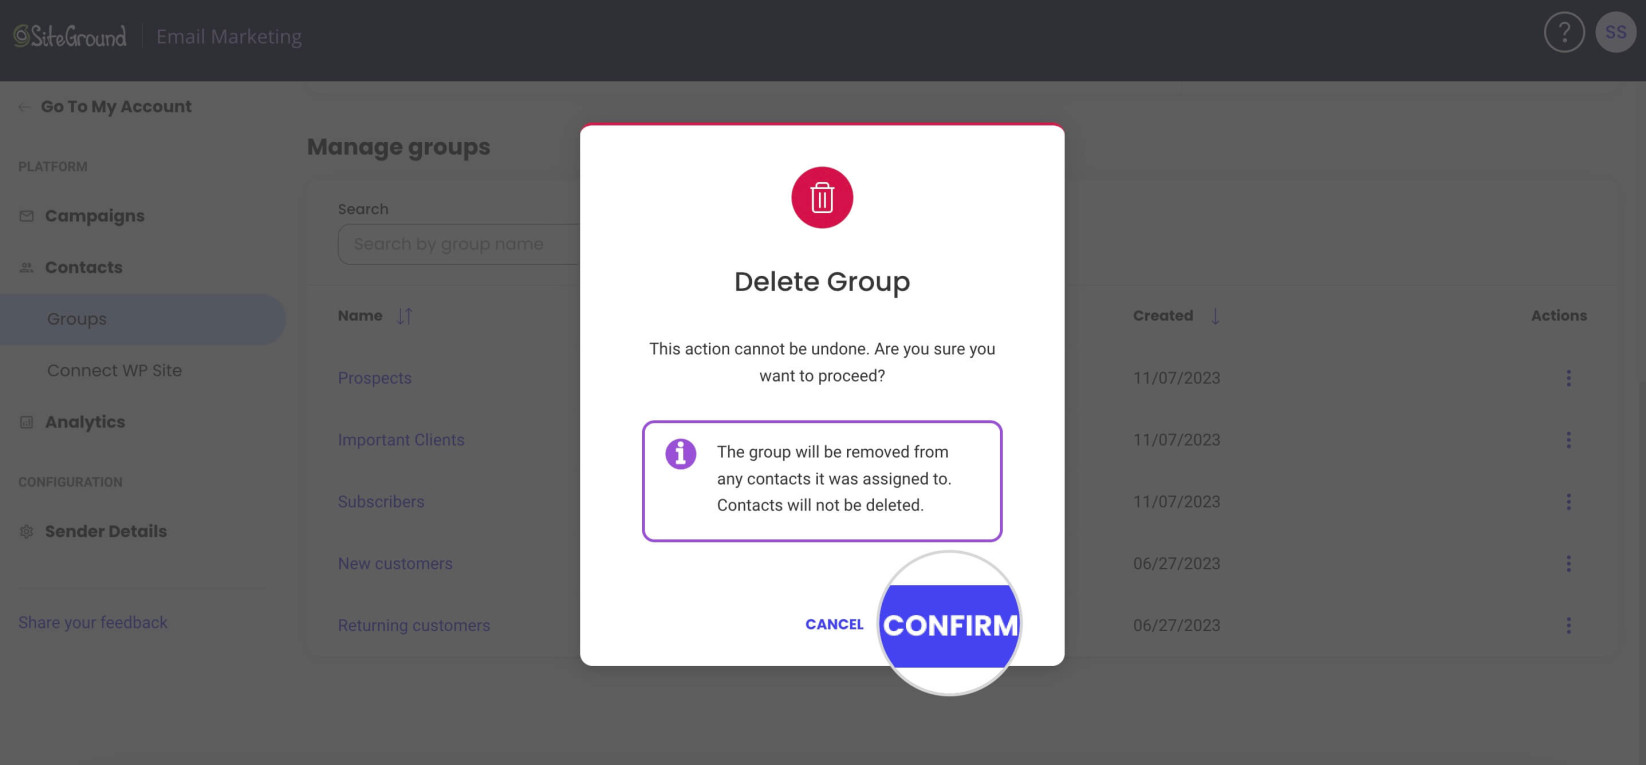
To delete a group, go to Email Marketing > Groups. Press the Actions menu for the group you want to delete, and select Delete.

A new pop-up window will appear with the notification that the contacts assigned to the group won’t be deleted. Press Confirm to delete the group.